


For years, the motor industry has told us how complicated modern vehicles are, and you must always visit a main dealer for servicing work. If your ’van is under manufacturer warranty, we’d definitely concur. But what if you have an older vehicle, or want to do a simple bit of motorhome maintenance that doesn’t need to involve pre-booking and a tediously long wait in a reception area?
Actually, some tasks on modern vehicles are easy to do and best of all, you can save a small fortune by doing them yourself. If your dealer is miles away from where you live, you need to factor in your time, too. For many jobs, it’s quicker to fix it yourself than travel.
The motorhome maintenance tasks we’ve outlined here won’t steal a whole weekend of your life away – just a few hours, tops – and they don’t require specialist tools. It’s like cleaning a motorhome – you just need the right bits, like the best motorhome cleaner and motorhome polish.
Practical Motorhome is supported by its audience. When you purchase through links on our site, we may earn an affiliate commission. Learn more
How much can you save?
As an example, Halfords charges £20 for swapping a vehicle battery. This is five minutes’ work with a basic socket set on most ’vans, so it’s an easy win if you’re motorhoming on a budget. They also charge £9 for fitting each light bulb. Again, these can be an easy fit.
However, the big wins come if you do your own oil changes and replace the brake pads. A simple oil and filter change can cost £180 or more at a main dealer; doing it yourself can cost as little as £50 and an hour of your time.
Save even more on brake pads and discs: a BMW dealer once quoted over £500 to replace the front pads and discs on our car, while identical top-end OE parts cost under £200. An hour later they were fitted, saving over £300.
Motorhome maintenance: the basics
Before you start, a few safety basics. First, know your limitations. If you’re the sort of person who has never put up a shelf, you might want to think twice before graduating to motorhomes. But for most people, if you’re methodical and careful, you’ll be fine.
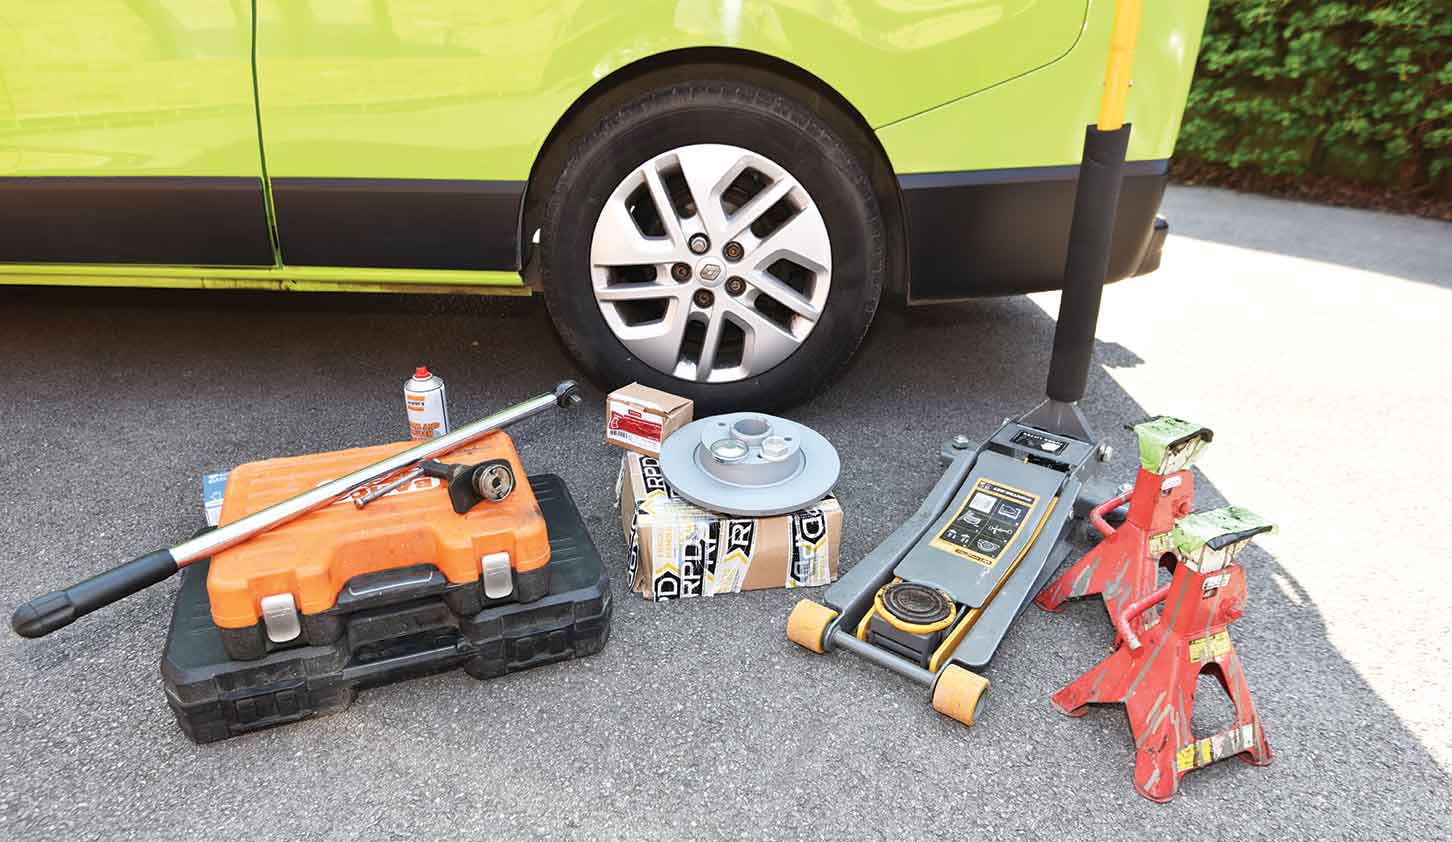
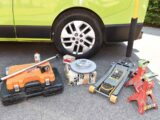
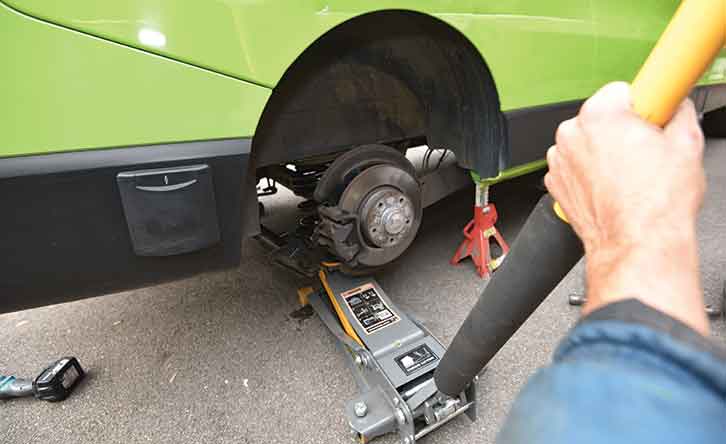
Many jobs on a vehicle involve lifting it up and it’s vital to do this safely – start by parking on solid flat ground, such as Tarmac or concrete. Grass and gravel are not suitable. If you want to raise it to remove a wheel, it’s wisest to invest in a trolley jack and a set of axle stands and chocks. Never work underneath a vehicle that isn’t on axle stands and with its wheels chocked. It must also be in gear (‘Park’ if an auto), with the handbrake on.
A trolley jack of around 1.5 tonnes will lift one wheel of a 3.5-tonne vehicle (remember that the weight is distributed over four wheels), so you don’t have to buy a bulky four-tonne trolley jack. A two- to three-tonne jack will easily cope with most lifting tasks for a circa 3.5-tonne motorhome.
Machine Mart has a great selection of jacks – just check it will go high enough to lift your vehicle. Never work under a vehicle supported only by a jack (and definitely not the wobbly emergency jack supplied with the ’van)!
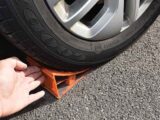
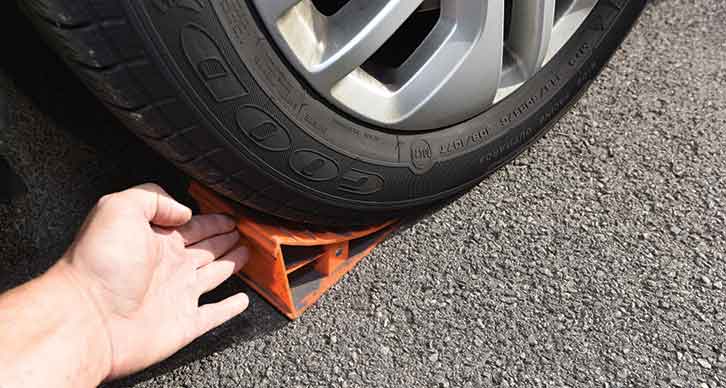
Motorhome levelling ramps – especially taller models – are also useful for safely raising a vehicle to work on the underside, but must always be used with chocks (and the handbrake safely on/vehicle in gear).
We wouldn’t recommend doing any tasks on large RVs that involve removing a wheel. But for Fiat Ducato, Ford Transit or Mercedes Sprinter-sized vehicles and lighter, you’ll be okay.
Before you start any motorhome DIY task, make sure that you have the correct personal protective gear. Goggles are essential for working under a vehicle. Disposable gloves are vital for anything involving old oil (a known carcinogen).
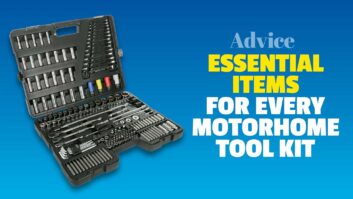
Essential tools for motorhome maintenance
It’s likely that you already have a good set of tools, but you might want to add a few Torx bits (internal and external). These are widely used on modern ’vans – they take more torque than hex heads and better resist rounding.
If you’ve never really worked on your vehicle, head to Halfords. They offer a wide selection of socket sets and you want to look for their Advanced range. Bahco also has great value socket sets.
Halfords sells torque wrenches, too, essential for tightening fixings to the correct torque – these are needed for work on the drivetrain.
We’d also suggest buying a multimeter – these start from as little as £10 online and are important for a range of tasks, from testing fuses to checking batteries and alternators.
For an oil and filter change, investing in an oil filter removal tool (under £20) can be helpful, while a brake caliper wind-back tool is another useful thing to have (around £20) if you want to swap a set of brake pads.
Online research
Before you get stuck into any motorhome maintenance task, do your homework. The internet is a great resource for information and you can bet that someone will have carried out the task before you. Ideally, you want to look for photos and videos detailing the work.
Generally, random non-expert DIY videos fall somewhere between two extremes: either a car crash of issues as some hapless would-be mechanic blunders from one problem to another, or a thorough account of how to do it.
Either way, you’ll get a sense of what is involved and whether you want to tackle it. Don’t just look at one video, watch a few and you should get an idea of who is giving competent advice.
Where to get parts for motorhome maintenance
While buying original parts from your local main dealer is the easiest way to ensure compatibility, you will pay through the nose for them.
Parts made by the original equipment manufacturers are available elsewhere. We’d highly recommend buying locally and using your nearest motor factor to source parts. That’s where your garage sources parts from and they’re geared up to supply the correct items, quickly and at the right price.
More importantly, they will allow you to return parts quickly and easily – it’s easy to order the wrong parts and it’s far more difficult to return them to an online supplier.
National chains, such as Euro Car Parts and GSF, can be a useful source, but they’re rarely cheaper than your local motor factor for identical parts.
With online suppliers you have to be very careful – eBay is awash with cheap parts and all manner of substandard, non-approved stuff. Many are cheap because they’re poor quality and some of them are simply fake.
One online supplier worth looking at is Autodoc, or its lower-priced sibling, Buycarparts.
Identifying parts is best done by removing the part and looking for a part number, so you replace like with like. This isn’t always practical, and it makes sense to buy locally, so you can easily return unwanted items.
Snapped and seized fixings
On newer ’vans just out of warranty, you probably won’t encounter too many stuck fixings, but on older vehicles, it’s an ever-present threat.
Any fixing exposed to the exterior can corrode and this is exaggerated in dissimilar metals, where galvanic corrosion is a factor. Equally, parts subject to heat can seize in place.
Stuck, snapped and seized fixings are just one of those things that will bite the home mechanic from time to time. Happily, you can buy all manner of tools to remove them – from applying heat with a blowtorch, to penetrating fluids and extraction tools. If you get really stuck, remove the item and take it to your local garage.
Six simple DIY motorhome maintenance jobs
Checking and replacing fuses
Fuses have a very simple role – they stop wiring or faulty appliances from catching fire. If you overload a circuit, often by running too many things at once, they will blow. This means the thin metal strip inside will overload and melt, cutting the power to that circuit. It’s common to hear a ‘pop’ when a fuse blows. If several electrical items have stopped working all at the same time, suspect a fuse first.
You can find your vehicle fuses listed in the base vehicle handbook, while habitation fuses should be detailed in your ’van conversion handbook and are often listed on the fuse box/consumer unit.
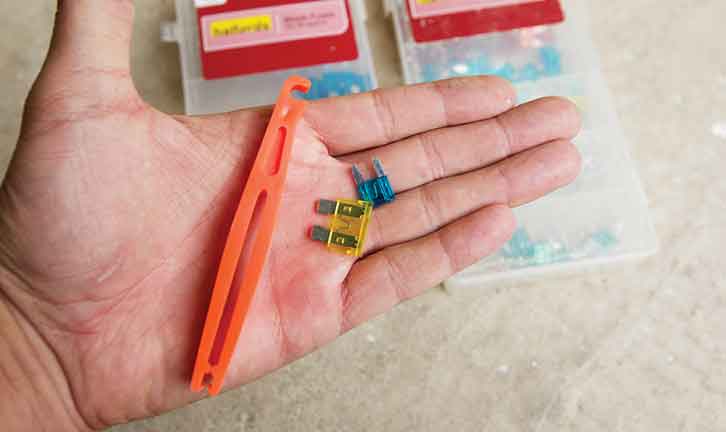
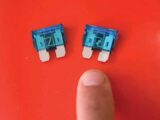
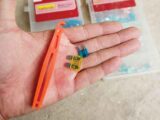
Once you’ve identified the fuse that controls the failed circuit, remove it with a fuse removal tool – often a small yellow/red/orange plastic tool clipped on or near the fuse box lid. You can also use a small pair of pliers, or even your fingernails if there’s sufficient access. Always replace the fuse with one of identical rating (for example, a 10A fuse must be replaced by a 10A one).
Never fit a higher-rated fuse – you might overload the wiring. It’s worth noting that fuses are colour coded: 10A is usually red, 15A blue and so on.
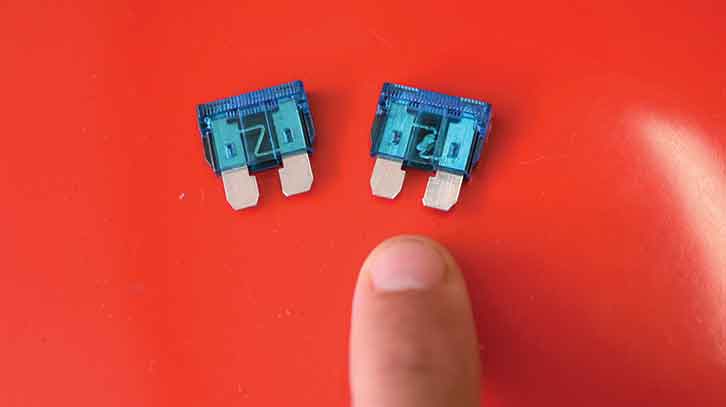
You could check a blown fuse with a multimeter, but it’s usually pretty obvious when the filament has melted out, and you will be able to see it.
Be picky about where you buy your fuses from – get them from Halfords, your motorhome dealer or motor factor, or a reputable electrical supplier, such as RS Components. Do not use cheap unbranded items, which have been known to cause high resistance – and problems.
If you replace a fuse and it keeps blowing, check what you have plugged into that circuit and remove it. If the fuse still keeps blowing with nothing plugged into the circuit, you need to visit a main dealer or a competent auto electrician, who will check for a wiring fault. Fuses always blow for a reason, so you should always investigate.
Replacing a headlight bulb
A blown headlight bulb isn’t just dangerous, it can also cost you points on your driving licence, so it’s a real priority to swap it.
If one headlamp blows, it’s also not uncommon for the other one to follow suit, plunging you into complete darkness at night, which isn’t ideal.
If your vehicle has factory xenon or LED headlamps, you’ll need to visit your dealer and might require an entire new lamp. If you have a halogen bulb, it’s relatively easy to do it yourself.
The actual bulb swap is simple, but not all manufacturers provide good access to the back of the bulb.
For a Renault Trafic/Vauxhall Vivaro, they can be swapped in situ, but on some models of Fiat Ducato, it will be easier to remove the whole headlamp. Happily, this isn’t too big a task.
You must replace the bulbs with ones of identical wattage to the originals (check the spec in your base vehicle owner’s manual, which will also detail the type – for example, H4, H1 and so on), but changes to the law mean you can’t use LED or xenon replacement bulbs. You’ll fail the MoT if you do (see: how to help your motorhome pass its MoT).
You can buy uprated halogen bulbs, but they must be replaced in pairs. These slightly brighter bulbs tend to have a reduced lifespan, too.
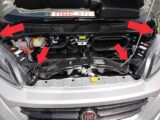
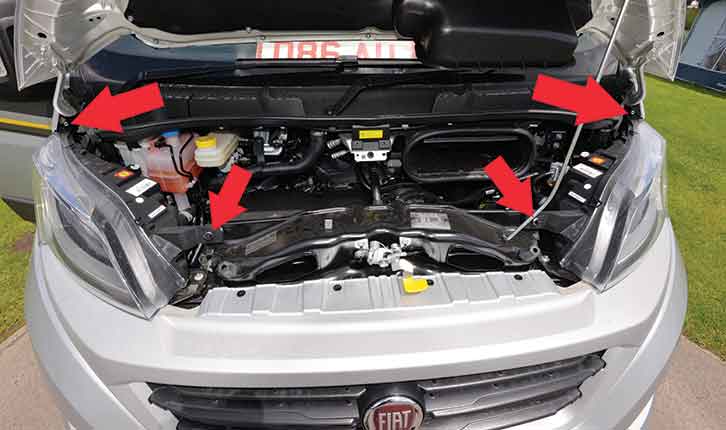
On a Ducato, open the bonnet and you should see two screws holding on each headlight – one on the wing and one on the grille. Remove these (they’re usually a T30 Torx bit) and pull the headlamp unit towards the front of the vehicle, away and to the centre to release the clips. This should give you access to the rear of the headlamp.
You can either unclip the wiring loom to work on the headlamp on a workbench, or swap the bulbs in situ.
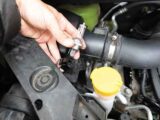
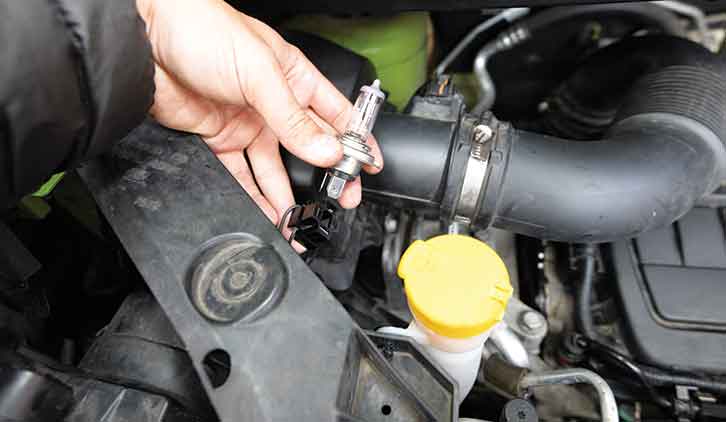
Remove the round plastic dust covers to the rear and you will see the bulb holder inside. Remove the plastic connector from the rear of the bulb, squeeze together the metal securing wires and you should then be able to wiggle the bulb free.
Fit the new bulb, taking care not to touch the glass section. If you do touch it, clean it with solvent before refitting. The bulbs often have an orientation tang, so check this is in the correct slot before refitting the securing wire.
Refit the dust covers and reattach the headlamp in the lower clips, then refit the securing screws. Well done, you’ve just saved enough for a pub lunch!
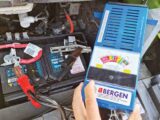
Checking the battery and alternator
After motorhome tyres, batteries are one of the most common motorhome faults in a ‘van. If the habitation battery goes flat, it can be annoying, but if the vehicle battery fails, you can have a long wait for the rescue service. Avoid this by checking the basics yourself with a multimeter.
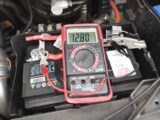
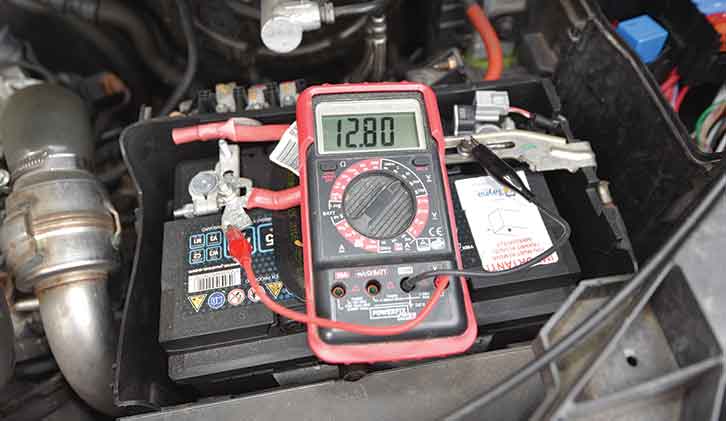
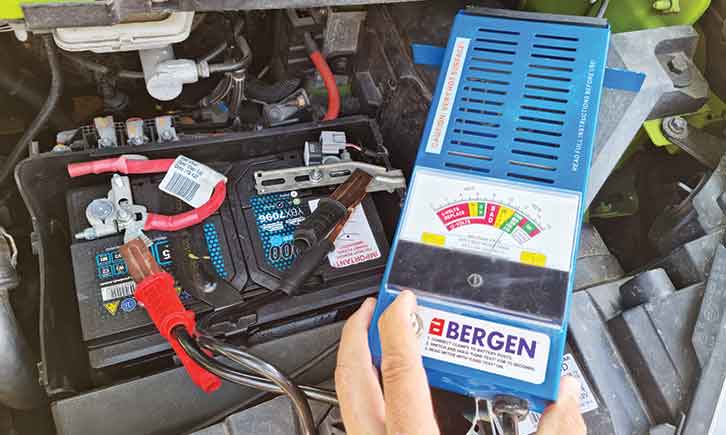
Voltage is easy to check, but you need to know what the voltage means. A 12V battery is flat when the voltage reads 12V. Yes, this sounds a little mad, but it is the case: 12.5V is considered half flat, 12.9V ‘full’. With the engine off, read the voltage using a multimeter. Anything above 12.7V is fine.
Now switch on the engine and the headlights (this triggers the alternator to start charging) and measure the voltage again. It should jump up significantly to about 13.5-14.5V.
Any higher than this and there is an alternator issue – you run the risk of boiling the battery – while if the voltage doesn’t change, the alternator is faulty and needs checking.
If the voltage keeps jumping up and down randomly, it could be because the ’van has an ECU-controlled ‘smart’ alternator. Load up the electrical system some more – headlights, radio, heated rear screen – and remeasure.
If the battery seems fine, but is sluggish to start the vehicle and won’t hold charge, you’ll need a drop test. Any local garage can do this.
Finally, if you do need a battery, don’t opt for the ‘free disposal of your old battery’ schemes that many places offer. Always keep it and recycle it at your local scrapyard yourself – lead has a high scrap value and a large motorhome battery will be worth around a tenner.
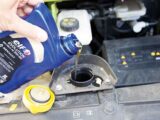
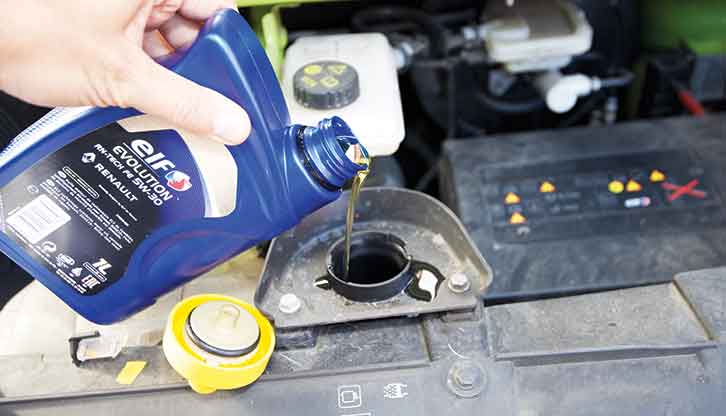
Oil and filter service
Many modern motorhomes are far easier to service than older ones and have an easy-to-replace oil filter cartridge that is a doddle to swap.
The hardest part of the job is usually accessing the sump – you often need to lift the vehicle up on your levelling ramps to remove the plastic undertray. If you have an older vehicle with no undertray, it’s an easy task.
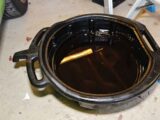
Make sure you have an old washing-up bowl to catch the old oil and always dispose of it safely – recycling centres have special dump points.
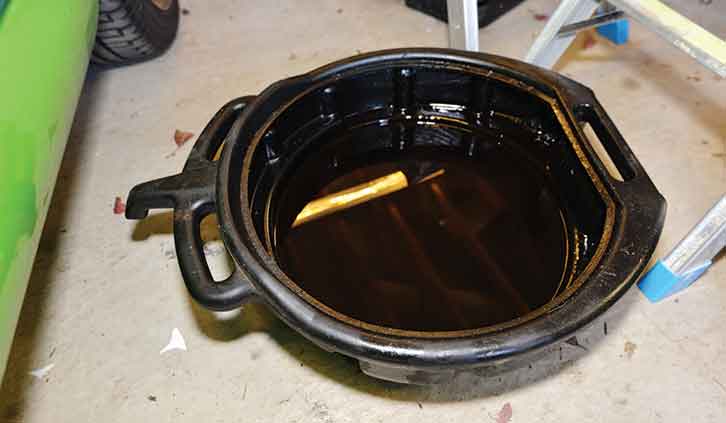
The procedure for all vehicles is similar: put the vehicle on ramps and secure it with chocks (in gear, with the handbrake on). Remove the undertray, cover the ground with an oil-proof sheet and place your bowl on it.
Unscrew the sump plug and collect the old oil in the bowl. It often helps to raise the bowl up, to avoid the wind blowing the oil away from it.
While the oil is draining, locate the oil filter and remove it (YouTube videos are helpful for this). It makes very good sense to buy a removal tool if you have a metal cartridge type, because they often stick in place.
On a reusable plastic housing that contains a separate filter element, all you need is a socket set or spanner to remove it. But you must use a torque wrench to tighten it up, to avoid leaks – they usually come with a replacement rubber O-ring seal, too, and this must be replaced each time.
Metal cartridge oil filters then simply spin back on (after putting a smear of fresh oil on the rubber seal) and are tightened by hand as much as possible.
With all of the oil drained out, refit the sump plug – ideally with a new copper washer or dowty seal – and torque it up to the correct tightness detailed in your workshop manual
(or listed online).
Check the correct volume of oil your engine needs and refill the sump via the upper fill point, until you can see the oil covering the minimum mark on the dipstick.
Start the engine and drive the vehicle off the ramps. Then on level ground, recheck the engine level and top it up to the maximum mark on the dipstick.
With practice, you can easily do an oil change in under an hour, saving you lots of labour and parts costs at your local dealership. Plus, it’s often quicker to do it yourself than to drive to your dealer. Definitely a win-win!
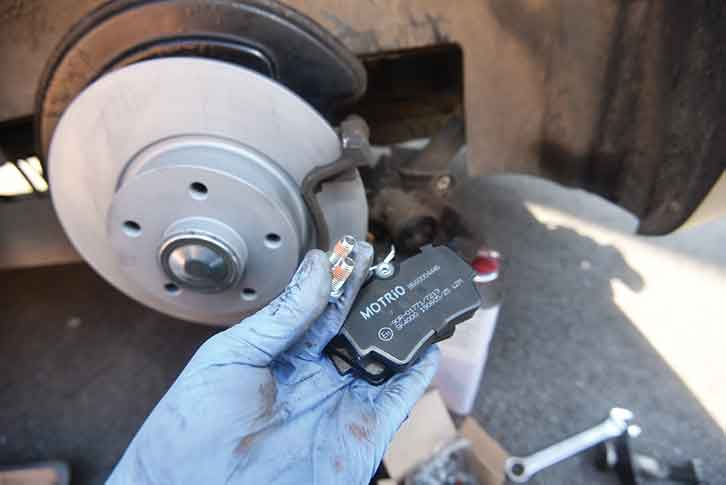
Fitting new front brake pads/discs
Of all the base vehicle tasks, fitting a new set of front brake pads is one of the easiest to do. Bone up on the procedure before you start, by taking a look at some online videos.
Front brake pads are far easier than rears, because you don’t have the handbrake mechanism to deal with. Front brakes do around 80% of the braking, too, so they tend to wear out first. It’s a very simple DIY task, taking under two hours (less with practice) and can save you hundreds of pounds.
Armed with the registration number, source the pads and discs from your local motor factors. Brands such as Febi Bilstein (also branded as Blue Print), Bosch, Textar, Jurid, ATE, Ferodo and Mintex are all high-quality OE-spec brands that provide great quality at a fraction of the price of parts sourced from main dealers.
Before starting, photograph all the brake parts as you go along – this will help you remember how it all goes back together again if you get stuck (and it’s a really good idea to do this for all DIY tasks).
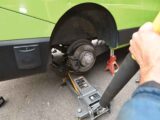
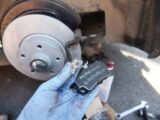
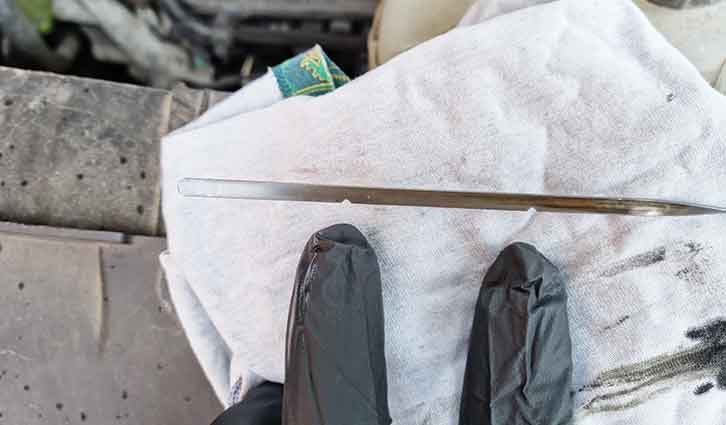
Pads often wear out at the same rate as the brake discs and if you can feel a pronounced lip at the outer edge of your brake disc, it needs replacing. Remove one wheel at a time to do this job, making sure to chock the wheels and use an axle stand. You don’t need to disturb the hydraulic system, so no fluid will be lost.
Remove the roadwheel and place it behind you – it will make a handy stool for this task! Check the lip on the disc – if it is pronounced, it makes sense to replace it. If it can barely be felt, you may get away with just doing the pads.
Brake caliper designs vary, but the procedures are all similar – remove the caliper (it usually has slide pins to the rear that unbolt) and lift it out of the way. Caliper pin bolts are rarely that stiff to remove.
order some from your main dealer
Remove the old pads from either the caliper carrier or the caliper by prying them out with a flat-blade screwdriver. Now push the caliper piston(s) back into the caliper housing.
A brake caliper wind-back tool (about £20) is the best way to do this, but a beefy G-clamp will suffice. If the piston doesn’t push back smoothly, or is seized solid, the brake caliper will need to be removed and reconditioned – replacements are widely available.
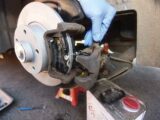
With the pistons pushed fully back, support the brake caliper on the suspension strut using a bungee cord or cable ties – this prevents the brake hose from being strained.
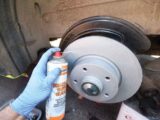
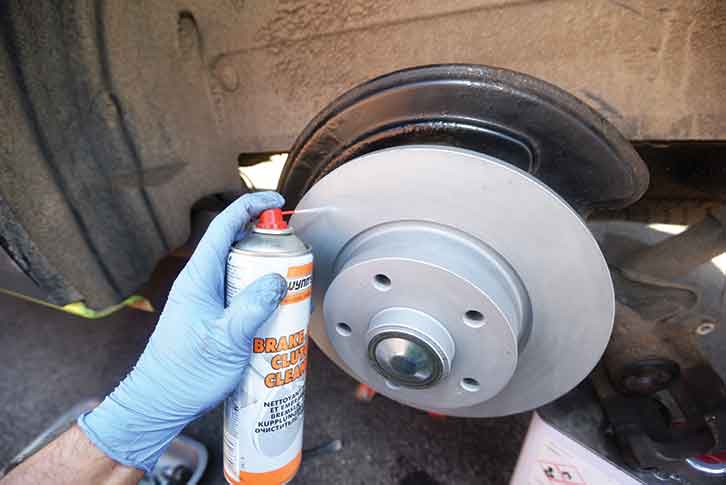
If you’re replacing the discs, unbolt the caliper carrier (these bolts are large and will be very tight), remove the securing screws holding on the old disc and remove. Clean the hub with a wire brush and ensure loose rust and debris are removed, so the new disc sits flush.
Discs are shipped with a protective coating to prevent rust – remove this with a solvent, then refit the new disc.
Clean any loose rust and debris from the caliper carriers, then bolt them back in place. Torque up the fixing bolts using threadlock.
Refit any spring clips around the pads and refit the caliper over them, making sure any springs or alignment clips are in place. Refit the caliper slide pin bolts (it’s best to use new ones – often supplied with the brake pads). Torque the caliper pin bolts to the right spec and refit the wheels. In the cab, press the brake pedal and check that it feels firm. Repeat on the other side of the vehicle and again, check that the brake pedal feels firm. If it doesn’t, seek professional help.

New brake pads/discs can often feel a little feeble until they are bedded in, and you do need to follow the brake manufacturer’s bedding-in instructions to the letter. This will usually involve a series of repeated brake stops, followed by a period of cooling off.
Replacing brake pads and discs is a surprisingly satisfying job and with practice, you can easily do them in under 90 minutes. If your dealer is an hour’s drive away, you’ll not only save lots of money, but your time, too!
Broken latches and catches
It’s worth bearing in mind that most motorhome interiors are not built by robots, but hand-built by humans. So they can be fixed by humans.
By far the most common issues are with latches and catches breaking or failing in some way. Often, these can be replaced with nothing more than a screwdriver and a little patience.
Start by unscrewing the old catch or latch – some have hidden fixings under coverplates that need to be picked out with a small flat-blade screwdriver.
Remove the old part and look for any part numbers and maker’s brands on it. If you’re lucky, they will be clearly marked. If not, it’s just a question of comparing items online from photos.
Motorhome manufacturers often use catches from firms such as Häfele and Zadi, and you may even find similar items in your local B&Q.
If you can’t find the exact part, look for a similar replacement – supplies of catches often vary over time, so it can be more difficult to source older items on classic motorhomes.
Always refit the new catch or latch with new screws of the correct length – Screwfix sells large multipacks, invaluable for DIY.
Ensure the cabinet you fit the catch to is secure – if the holes have enlarged or cracked, try moving the latch, or repair the damage with wood filler.
DIY motorhome maintenance tasks to avoid
Exhaust and emission control
You can buy pattern exhaust parts very cheaply, but it’s not worth fitting them yourself. Spending their life funnelling super-hot gases out of the engine, they invariably get welded together.
The bolts often seize, too, as they’re subject to so many heating and cooling cycles. Exhaust system parts are often very long and can be almost impossible to extract/refit when the ’van is on axle stands – you can’t angle them enough – garages use lifts for a reason!
For anything involving the exhaust or emission control systems, always visit a garage or exhaust centre. Let them tackle those seized bolts.
Verdict on motorhome maintenance
Carrying out a few basic tasks on your motorhome every so often can help to save you a fortune.
It can also save you time, once you are familiar with how to do things and don’t mind getting the odd bit of oil on your (gloved) hands.
Only tackle jobs you’re comfortable doing, and remember that you always have the safety net of a local garage.
Take a look at our guide to motorhome tyre pressure too if you want to find out more about how to set them.
Useful links
After some cleaning advice? Then take a look at our 16 tips to help you achieve a sparkling motorhome.
Future Publishing Limited, the publisher of Practical Motorhome, provides the information in this article in good faith and makes no representation as to its completeness or accuracy. Individuals carrying out the instructions do so at their own risk and must exercise their independent judgement in determining the appropriateness of the advice to their circumstances. Individuals should take appropriate safety precautions and be aware of the risk of electrocution when dealing with electrical products. To the fullest extent permitted by law, neither Future nor its employees or agents shall have any liability in connection with the use of this information. Double check any warranty is not affected before proceeding.
If you’ve enjoyed reading this article, why not get the latest news, reviews and features delivered direct to your door or inbox every month. Take advantage of our brilliant Practical Motorhome magazine SUBSCRIBERS’ OFFER and SIGN UP TO OUR NEWSLETTER for regular weekly updates on all things motorhome related.