


Working out the correct motorhome tyre pressure is not as simple as looking up a number in the owner’s manual for your car. On a car, it’s easy for manufacturers to work out the weight of the vehicle – you simply allow a set amount for the passenger weight and a maximum payload for the boot. The amount of variation isn’t that great and you have to make a real effort to overload a car.
With your motorhome, it’s different. Not only do you have a much larger volume to fill, but you also have to factor in the weight of a range of kit, and allow for a garage, a motorhome bike rack and the almost endless number of add-ons that owners can bolt onto their ’van.
While many manufacturers weigh each individual vehicle off the line and supply a label or documentation to this effect, not all do so and many brochure weights are based on calculated values.
No matter how the weight is decided, the one thing that no manufacturer can predict is what the owner will then add to their vehicle.
It’s this unknown extra weight that can cause problems with overloading. One owner might pack lightly, while another will add a motorhome awning, habitation air conditioning and a scooter rack, and then fill the garage with their anvil collection!
If you’re one of those owners whose ’van simply bristles with every possible accessory, you need to be very aware of your payload, and know how to load a motorhome.
It’s the driver’s responsibility to know the weight of their motorhome and simply stating “I don’t know the weight” is no defence in court. Legally, you have to know the weight of your vehicle and can be prosecuted if your ’van is significantly overladen.
A recent round of roadside checks by the Driver and Vehicle Standards Agency revealed that over 80% of the motorhomes stopped were overweight. So it’s not rare. Roadside checks are common outside motorhome shows.
The DVSA is putting greater focus on the question of motorhome weight, and there is already technology in place to automatically measure the weight of your vehicle while it is driving along certain motorways.
These Weigh In Motion Sensor (WIMS) systems have been primarily designed to catch overladen trucks, and can measure each axle individually and automatically compare it with the data logged against the registration number via the ANPR system.
And of course, they work just as well on motorhomes. There are 11 of these systems currently in use across the UK, mainly around the M25.
The payload question
If you’ve owned a few motorhomes over the years, you’ll be aware that they have been steadily increasing in bulk and levels of equipment.
Just like humans, leisure vehicles have been getting heavier with time! The main reason for this is the extra equipment fitted as standard on many motorhomes, crash legislation and the constant marketing demand for new vehicles to be better equipped than their predecessors.

Twenty years ago, electric windows, power steering, turbocharged engines and air conditioning were a rarity, while today, they’re commonplace.
In the habitation area, electric flush toilets, spacious washrooms, ovens, multiburner hobs and 100-litre water tanks have become the norm.
Base vehicles have become chubbier, too – owing partly to improvements in safety and beefier crash structures, partly to ever-tighter emissions laws that involve extra engine components and AdBlue tanks, and partly to simply becoming physically larger.
The first-generation Ducato was 4.76m long and weighed about 1620kg as an unconverted van, while the smallest modern Ducato is 4.96m long and weighs 1845kg. We’re not picking on Fiat here – it’s a similar situation with all van brands.
To account for this extra bulk, most modern vehicles have a higher MTPLM.
The 3500kg question
An added constraint for motorhomes is the 3500kg MTPLM limit for drivers. Drive a heavier vehicle and you’ll need the C1 category on your licence (which allows you to drive vehicles weighing a maximum 3500-7500kg). For drivers over the age of 70 – which means many motorcaravanners – maintaining your C1 licence involves having a medical and renewing it every three years.
Many people don’t want the hassle of the additional paperwork, or might not be medically able to do this.
Equally, people who passed their test after 1 January 1997 will not have the C1 category on their licence.
So to make your vehicle appeal to the maximum number of buyers, ensuring its MTPLM is no more than 3500kg is hugely advantageous.
But customers always want more kit on their new motorhome, and the base vehicles are getting heavier. So this is a balancing act between engineering considerations and marketing needs for brands. For this reason, payloads are always fairly tight and not all ’vans have as much payload as is ideal.
Visit a weighbridge
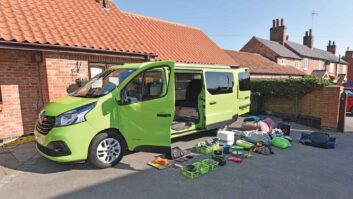
While you could weigh each and every item of your touring kit and work out the weight of every accessory on your vehicle, it’s a long-winded process and assumes you have an accurate figure for each item. But this calculation is never going to be that accurate – you will invariably miss an item, and updated parts can skew things, too.
The only way to get a really accurate weight figure is to put your motorhome on a set of scales. Trucks are commonly weighed on a weighbridge at scrap metal merchants, agricultural firms and at public weighbridges. Search online for your local public weighbridge and make sure you visit one. They will typically charge a small fee for this.
Drive to your local weighbridge with empty water tanks, a full tank of fuel and all of your normal touring kit on board. Bear in mind the weight of all of your passengers, too – that also has to come off your payload.
You need to weigh your front axle first, by just driving your front wheels onto the weighbridge plate. Then weigh either just your rear wheels (both sets if you have a tag-axle) or drive the whole vehicle onto the weighing plate. If the whole vehicle is on the weighbridge, your rear axle weight is the total weight minus the front axle weight.
The weighbridge operator will give you a printout of these weights – keep hold of this, because it’s important.
Overweight?
Armed with your accurate weighbridge figures, you now need to compare them with the maximum weights detailed on your vehicle’s chassis VIN plate for the front and rear axles.
There are several possibilities here. Either both your vehicle’s front and rear axles are under the maximum limit, or one or more axles is overweight.
If one axle is slightly over the MTPLM stamped on the VIN plate – usually the rear one – you can either slim down your kit over the rear axle, or move it further forward in the vehicle. Instead of carrying water bottles in the garage, move them into a low kitchen locker, for example. The other possibility is to decant some of the equipment you normally carry inside the vehicle to a small trailer (assuming that you have a towbar or the payload to add one).
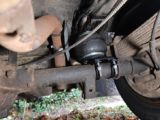
One factor that can play a big part in creating an overloaded rear axle is if your motorhome has a large rear overhang and you add a bike rack. A big overhang creates a cantilever effect on the rear axle and can magnify the weight you add to the rear.
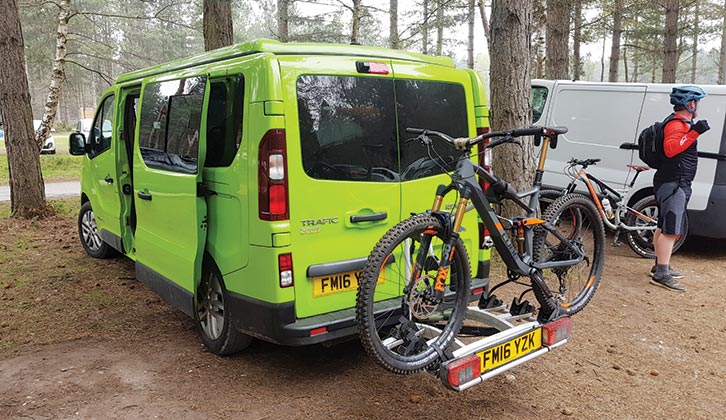
For example, it’s not uncommon for a 150kg scooter to exert over 200kg on the rear axle, owing to the cantilever effect caused by its distance from the rear axle. This results in a corresponding 50kg reduction in weight on the front axle, which can lead to stability issues.
There are several online calculators for the overhang and cantilever effect, but there really is no substitute for visiting a weighbridge and obtaining an accurate, provable figure.
So what can you do if one or more axles is significantly overweight and can’t be solved by moving your kit around or draining a water tank? Well, if a major cull of your touring kit still isn’t sufficient to solve the problem, you will have to consider uprating the weight limit of your vehicle.
If you’re only a couple of hundred kilos over your motorhome’s MTPLM, you might be able to have the vehicle replated to a higher weight limit – for example, increasing the chassis plate from 3500kg to 3850kg.
Firms such as SvTech can carry out this work, and sometimes it is as simple as a paper exercise for a few hundred pounds, which includes being supplied with an updated chassis plate.
If your motorhome is significantly overweight, then some additional work might be needed on the vehicle before it can be rated at a higher weight limit.
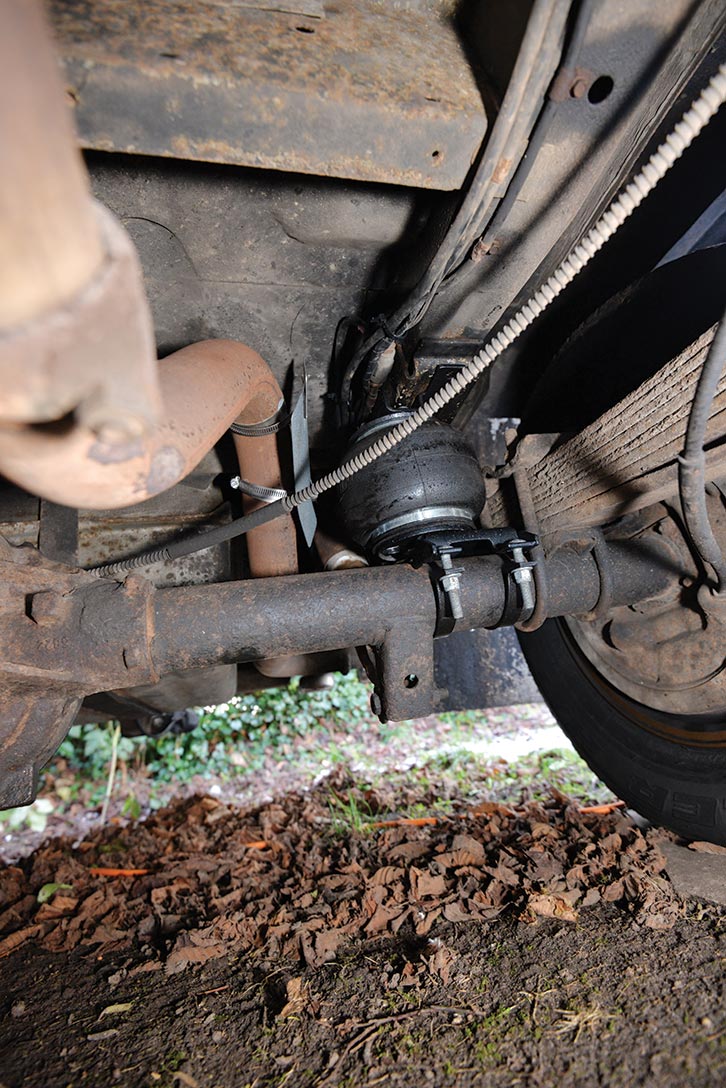
This might involve, for example, fitting air suspension to the rear or upgrading the chassis structure. Again, you’ll need to speak to a specialist such as SvTech for advice about this.
While we’re on the subject, bear in mind that any replating in excess of 3500kg will necessitate you having the C1 category on your driving licence.
But don’t just ignore it if your ’van is overladen. Not only can it be highly dangerous to drive a vehicle in this condition, it’s your legal responsibility to sort the problem out.
The penalties for being caught while driving an overladen vehicle can range from £100 (less than 10% overladen) to £300 (if you’re over 15% overweight). If your motorhome is found to be more than 30% overladen, you will be issued with a court summons.
So do remember that as the vehicle’s driver, you are responsible for knowing this weight. It’s not optional.
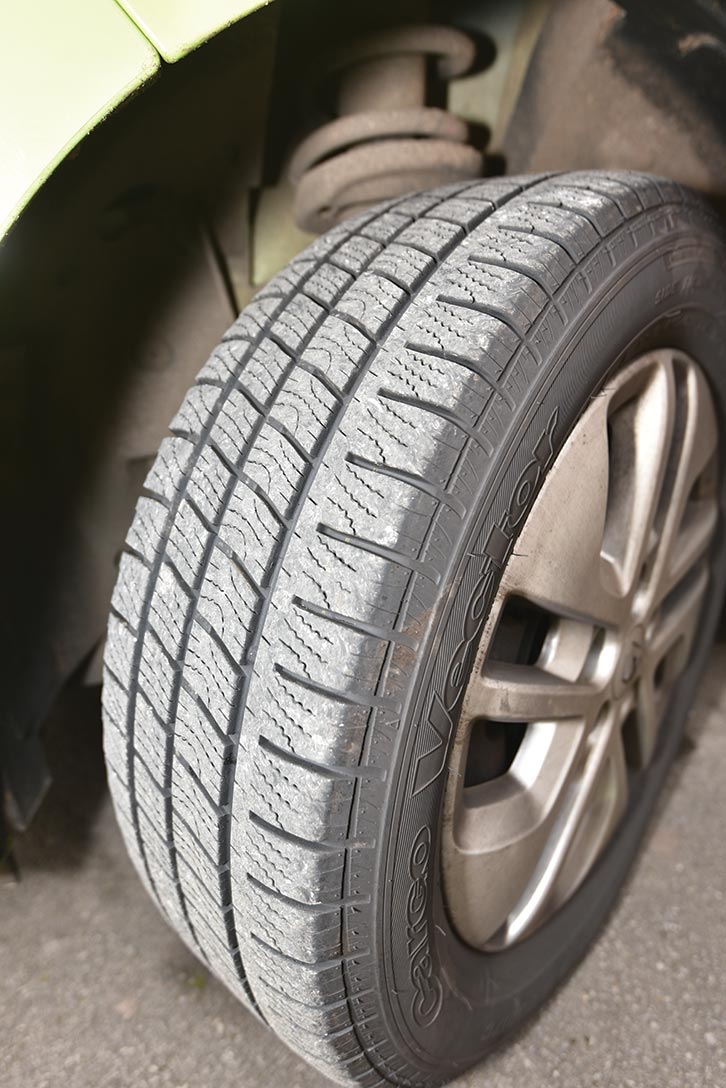
Tyre sizing and ratings
If you look at the owner’s manual or on the door jamb of your motorhome, you will find the tyre size it has been designed to use. Alternatively, you could take a look at the tyres that are fitted on it – if it is still running on its original wheels, of course.
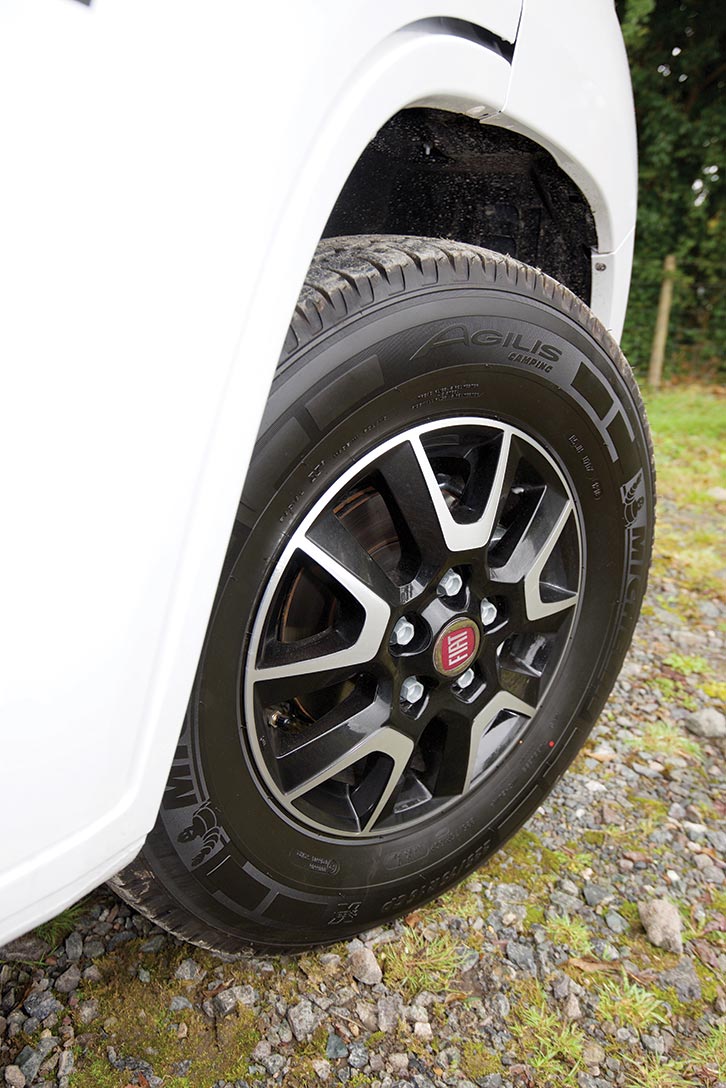
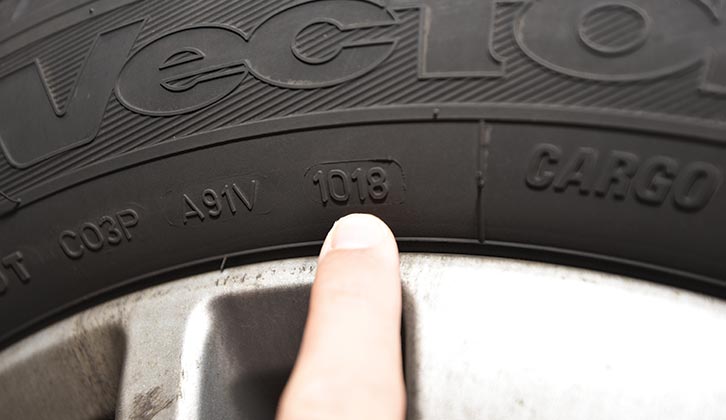
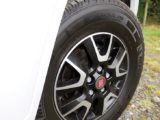
A common size for a Fiat Ducato tyre is a 225/75 R16, which will be stamped on the sidewall and is a mix of imperial and metric numerals.
The 225 refers to the tread width of 225mm, while the R stands for radial tyre construction.
The 75 is the aspect ratio and this is the measure of tread width relative to the sidewall height. The smaller the number, the thinner the sidewall.
Low aspect ratios of under 45 are generally referred to as low profile and are only really seen on medium panel van conversions with larger alloy wheels (for example, 19-inch or above).
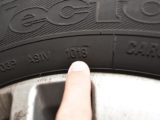
The other important tyre sidewall markings are the load and speed index. Typically on a 16-inch Ducato tyre, this will be something like 116Q. The ‘116’ is the load index and in this case, indicates a maximum load (for each tyre) of 1250kg (that is, a potential maximum motorhome weight of 5000kg for a four-wheeled vehicle, subject to individual axle loads).
The ‘Q’ is the maximum speed rating for the tyre when fully loaded, 99mph in this case. The load index and speed rating must exceed the vehicle’s actual weight and speed.
Never fit replacement tyres with a lower load index or speed rating.
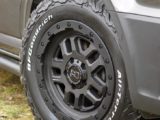
Motorhome-specific camping tyres are marked with ‘CP’ on the sidewall and have a beefier construction than you’ll find in regular van tyres.
These are a good choice for your motorhome, because they have been specifically designed to suit the heavy loads and usage of leisure vehicles.
Working out correct motorhome tyre pressures
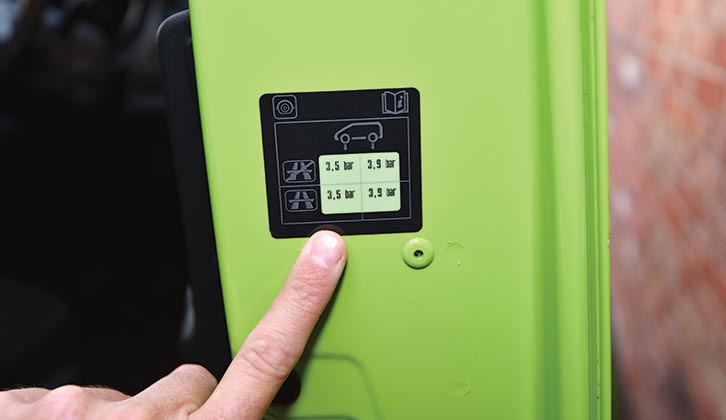
After checking that you have suitable tyres fitted for the weight of your motorhome, and armed with those accurate axle weights, you can now contact your tyre manufacturer to find out what actual tyre pressure they recommend for each axle.
Many manufacturers provide tables of information, where you can look up your particular brand and size of tyre and find pressure recommendations for a range of axle weights. Search online for the Michelin Technical Guide or the Continental Technical Databook and you should find the relevant PDFs, which you can download.
However, the European Tyre and Rim Technical Organisation (ETRTO) has also issued its own advice on this.
As well as recommending the use of camping-specific tyres (those marked ‘CP’ on the sidewall), ETRTO advises using pressures of 80 psi on the rear axle and following the manufacturer’s advice on the front axle.
This advice can conflict with the maximum pressure stamped on the tyre sidewall (for example, 75 psi maximum pressure is common). Although these sidewall pressure markings are designed primarily for the US market, where temperatures in the more arid states can exceed 50°C (56°C in California’s Death Valley is the record), they should also be observed in Europe.
After our hot summer, European heatwaves are not unknown and when combined with motorway driving – which increases tyre pressure as the air heats up – this can cause excess pressure.
ETRTO’s advice is aimed to simplify the whole motorhome tyre pressure question and to be a one-stop solution for all, but it can result in a very harsh ride in the vehicle.
By using accurate weights combined with tyre manufacturer advice, you can tailor the ride to suit your ’van.
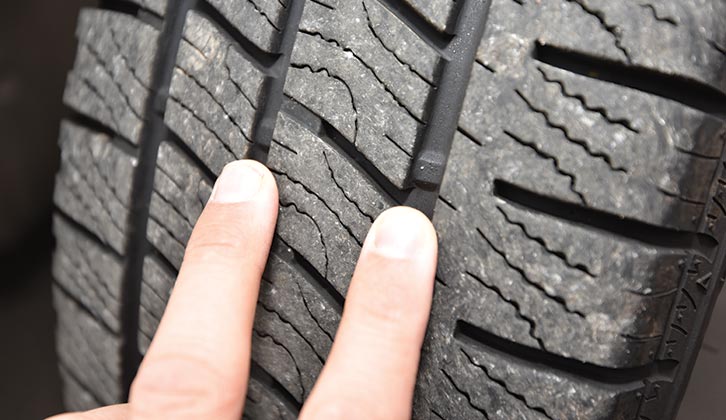
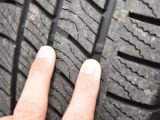
If you have set your tyre pressure correctly, the tyre wear will be even across the tread pattern. If the tread wears out in the centre, the tyre is overinflated. If it wears out on both outer edges, it is underinflated.
Uneven tread wear on one edge indicates that the vehicle has another problem – this could be due to the tracking needing to be checked (adjusted by lengthening or shortening the tie rods on the steering arms), or it could be due to worn suspension components (for example, worn wishbone bushes). Uneven wear needs to be investigated by a garage.
Setting the pressure
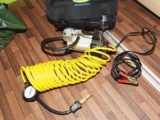
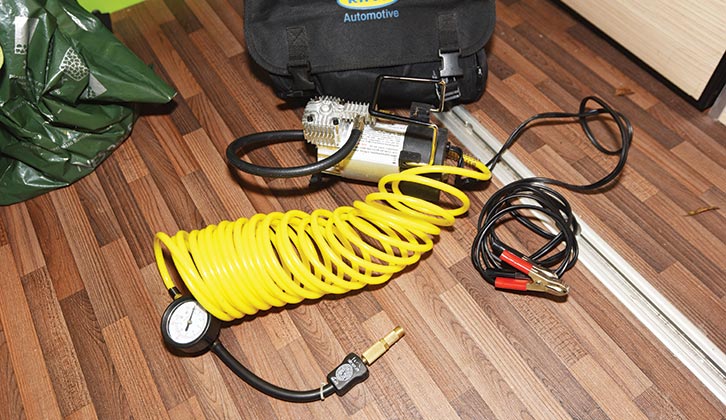
It’s advisable to carry a tyre inflator onboard that is suitable for motorhome tyre pressures (for example, the Ring RAC900, which is widely available online for around £80).
Some car tyre inflators cannot reach the higher pressures that are required by a motorhome tyre – car pressures tend to be around 35 psi, while the pressures needed for your motorhome can be double this.
Generally speaking, compressors that plug into your 12V dash socket are low-powered car items that are not best suited to motorhomes.
Motorhome compressors also have longer leads and separate airline hoses, which are preferable for longer vehicles and tag-axles. A compressor will also make you self-sufficient in the event of a flat tyre, for added peace of mind.
The other important point to bear in mind here is that not all petrol stations have airlines set to go up to the higher tyre pressures that are required for motorhomes, so you can’t always rely on them. All auto workshops will have high-pressure airlines, but that’s of no use if you can’t drive to them. Or it’s a Sunday afternoon in France.
You can also use manual pumps, such as foot pumps, or even bicycle pumps, to inflate a motorhome tyre in case of emergency. However, having once done this for a magazine feature and turned purple in the process, it’s really not worth all of that hard work.
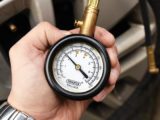
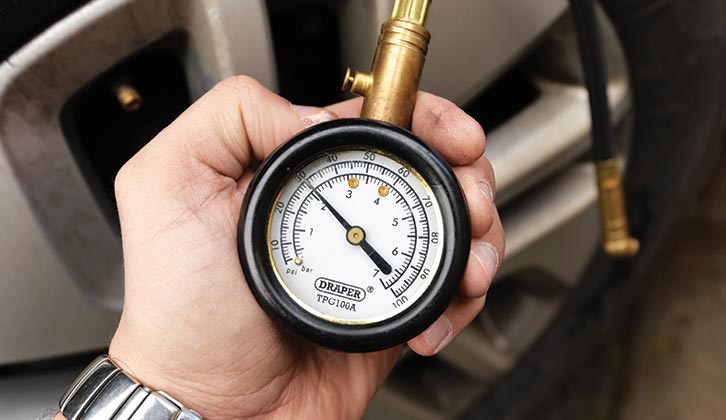
As well as a suitable compressor, you will also need an accurate tyre pressure gauge – again, check that its range goes high enough. Analogue ones need to use a 0-80 psi (0-5.5 bar) range as a minimum. Look for gauges that have a bleed-off valve, because these make setting the pressure far easier.
Set your tyre pressures first thing in the morning, before the motorhome has been driven. These are referred to as ‘cold pressures’, whereas if you set the pressure after the vehicle has been driven on a motorway, you’ll be setting the ‘hot pressures’.
When driven, tyres get warm and this increases their pressure. So if you set the tyre pressure when they’re hot, you’ll find it about 5 psi too low when the tyres cool. Most manufacturers quote cold pressures in the owner’s manual and take into account the rise in pressure when the tyre is warm.
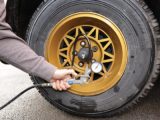
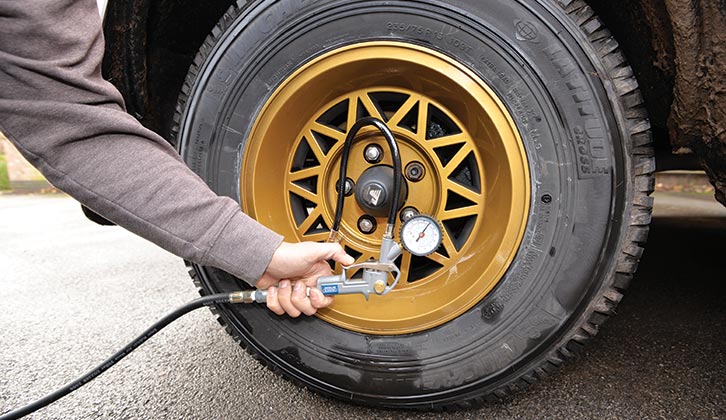
If you’re setting the pressure to, say, 65 psi, inflate the tyre to about 70 psi on the compressor gauge and then remove it from the valve.
The next step is to check the motorhome tyre pressure with your pressure gauge, and bleed off any excess pressure until the value given is correct.
The reason for using a separate gauge is that some compressor gauges are not always particularly accurate.
Premium or budget?
One thing we haven’t mentioned so far is the tyre brand to opt for. Brands such as Bridgestone, Continental, Dunlop, Goodyear, Michelin and Pirelli are all considered to be ‘premium’, while mid-range brands include Avon, BF Goodrich, Maxxis and Toyo.
Budget brands include those that your local tyre centre sells at lower cost, such as Federal, Evergreen, Landsail and Marshall.
Many premium brands also own sub-brands. For example, Michelin owns BF Goodrich and Kleber, while Continental owns Uniroyal (in Europe), General Tyre and Semperit.
The key point to make here is that the premium brands tend to save their latest technology and improvements for their premium ‘hero’ brands.
Mid-range and budget tyres will always be a generation or two behind premium tyres. In reviews, premium brands will invariably outperform the mid-range and budget brands.
So what does all of this mean in the real world? Well, the difference in wet braking distance between a premium tyre and a budget one can be huge.
In a 2021 test by German publication ProMobil using a VW Transporter camper, the best-performing premium tyre stopped 3.8m shorter than the worst budget tyre. That’s one car length shorter and in an emergency, could be the difference between stopping safely or crashing and being injured.
The tyres that your vehicle sits on are the only thing linking your motorhome to the road, so it pays to always fit the best tyres that you can afford.
Motorhomes only tend to do low annual mileages, so averaged out over several years, the difference in cost is not that significant. And it’s a small price to pay to give you peace of mind and keep you and your family safe.
If you enjoyed finding out about motorhome tyre pressure, why not take a look at these:
- We take a look at the tips that can help you maximise your motorhome fuel consumption.
- Motorhome engine remapping can be a good way of increasing the power of a diesel-powered ‘van; here’s what you need to know.
- Take a look at our guide to motorhome security to see what you can do to keep your ‘van safe and secure.
Useful links
Tyre pressure calculator
Replating advice
Find your nearest weighbridge
Premium tyre manufacturers
Future Publishing Limited, the publisher of Practical Motorhome, provides the information in this article in good faith and makes no representation as to its completeness or accuracy. Individuals carrying out the instructions do so at their own risk and must exercise their independent judgement in determining the appropriateness of the advice to their circumstances. Individuals should take appropriate safety precautions and be aware of the risk of electrocution when dealing with electrical products. To the fullest extent permitted by law, neither Future nor its employees or agents shall have any liability in connection with the use of this information. Double check any warranty is not affected before proceeding.
If you’ve enjoyed reading this article, why not get the latest news, reviews and features delivered direct to your door or inbox every month. Take advantage of our brilliant Practical Motorhome magazine SUBSCRIBERS’ OFFER and SIGN UP TO OUR NEWSLETTER for regular weekly updates on all things motorhome related.