We’re at that time of the year when many of us will be well underway with planning our first tours of the year – if you haven’t already embarked on one, that is. A clean at the start of the season to get rid of any grime that can build up over the winter months, and one at the end, prior to the ‘van going into hibernation, will help you avoid having to deal with a lacklustre grey box on wheels, instead giving you a sparkling clean motorhome for your tours.
Cleaning a motorhome doesn’t just give you the benefit of a shiny ‘van to tour in, however. This is something that will also pay dividends if and when you come to sell it too.
While having one of the best motorhome cleaners will always be an important step in a stress-free cleaning process, following our handy hints and tips will help to make it an even more straightforward process.
So let’s make sure you’ve ‘van is looking its best for 2024 with our top tips!
Practical Motorhome is supported by its audience. When you purchase through links on our site, we may earn an affiliate commission. Learn more.
1. Test the products first
Before you start using any new cleaning products and solutions, always test them on a small area.
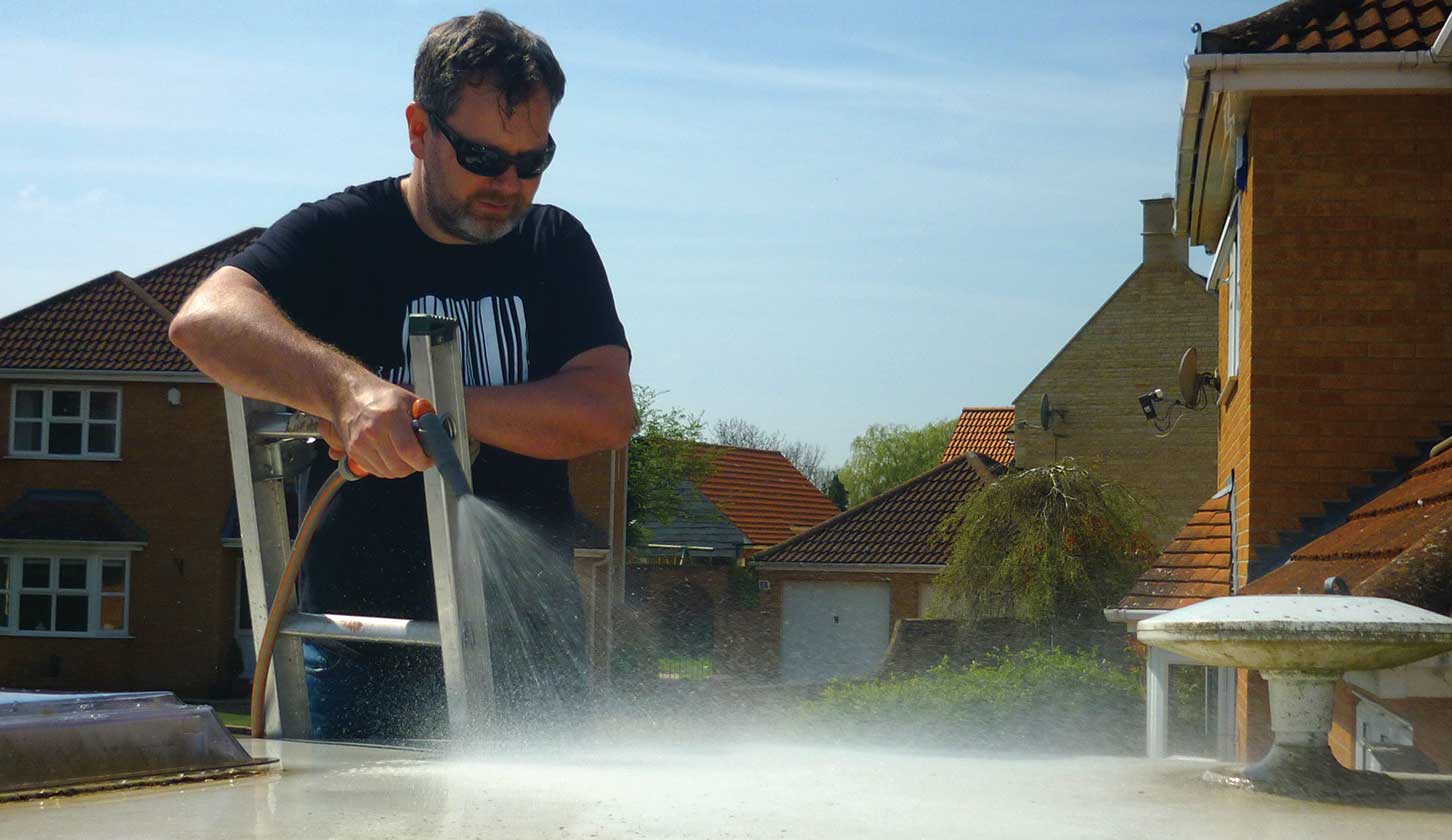
2. Don’t use a high-pressure jet washer at close range
Never use high-pressure jet washers directly on the surfaces of a motorhome – particularly a coachbuilt – at close range. Many are powerful enough to remove decals, damage sealant or force water through window seals or locker hatches.
3. Change the water
Change the water regularly, so you’re not rubbing dirty water, containing damaging grit, into your paintwork. Over time, this grit creates swirls on the surfaces.
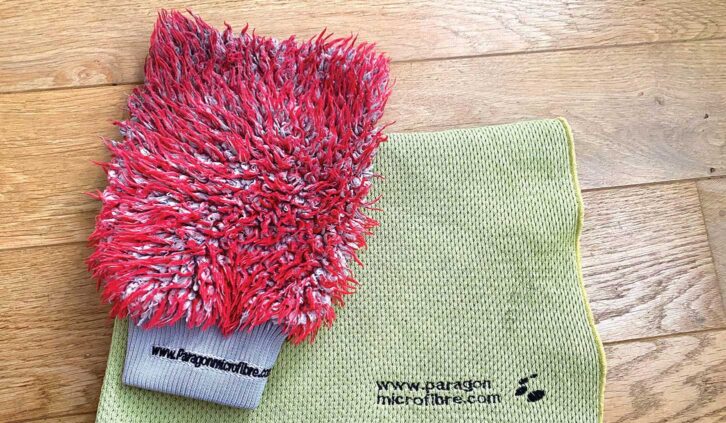
4. Regularly rinse your cleaning cloth or sponge
Rinse your cloth or sponge frequently, to avoid any grit build-up. My old faithfuls are these microfibre wash mitts and drying cloths from Paragon.
5. Choose a cleaning bucket with care
Invest in a cleaning bucket with a raised grid in the base, which lets grit drop to the bottom of the bucket, while the water remains free from grit, minimising the risk of scratching.
6. Use a polish
Older and neglected ’vans with GRP panels can suffer from degrading of the outer resin layer of the GRP. Once exposed, the inner layer can become chalky and fragile.
Although this damage can’t be repaired, these degraded areas can still be protected, and their shine restored, by applying a coat of the best motorhome polish to them. Ideally you should do this two or three times a year for best effect.
7. Spray water carefully
Always try to be especially careful when spraying water around any of the door and window seals, especially on older vehicles.
8. Removing scuffs and marks
Scuffs and marks on surfaces can often be removed by using a lightly abrasive pad, or a rubbing compound such as T-Cut. These solutions contain fine abrasive particles and remove light scratches and restore paint colour by rubbing away the top layer of the damaged surface.
This is done on an almost molecular level, meaning that you are very unlikely to damage your vehicle by using them.
9. Cleaning external fridge vents
Use a toothbrush or a nail brush to clean the external fridge vents.
10. Choose your cleaning solution with care
Be wary of using powerful petroleum-based cleaning solutions and degreasants on your vehicle’s exterior – they could degrade silicone sealants and mastic compounds.
11. The benefits of a good sponge
The Erase Away sponge is ideal for use on decals because it’s non-chemical. This will quickly restore badges and stickers to their former glory.
12. Make sure your cleaner is suitable for the surface you’re using it on
Check that your choice of cleaning agent is suitable for all of the surfaces and materials with which it will come into contact. Some instructions, for example, state that the product
should not be sprayed onto any decals or sealants.
13. Follow the instructions of your cleaner
Always make sure you follow the instructions for using each of your cleaning agents, such as leaving spray on surfaces for a minute or two so it can start to act, before rubbing it in and then rinsing the area down.
14. Look after the seals
Keep all of your door, window and locker seals in fine fettle by rubbing them over with a silicone grease or spray at least twice a year. This will help to protect and preserve them, preventing them from degrading because of sunlight (UV) exposure. It will also minimise any hardening.
Apply the grease or spray to a clean cloth and then wipe the lubricant liberally around the seals. While you have the product to hand, you might also want to apply some silicone lube to the toilet cassette seal.
Take a look at what we have to say about the care and repair of rubber seals for more guidance on maintaining them too.
15. Look after the locks
Once the motorhome is clean and the seals have been lubed, go around it and spray a small amount of lubricant into locks, working it in fully with the key.
16. The benefits of a sealant/coating system
If you have a real aversion to cleaning your ‘van, you could consider investing in one of the many protective sealant/coating systems on the market. These are designed to repel water and dirt, making vehicle cleaning more of a rinse down than a full-on scrub.
Most of these products are sprayed on, or hand-applied by professionals, and marketing information explains that Teflon or Nano-ceramic compounds work at a molecular level to get into the ‘pores’ of the plastic or paint finish, protecting the surfaces of the motorhome and resisting attack from damaging contaminants.
One application will be enough, and protection will also be guaranteed by some of the firms involved in this business.
Many motorhome owners swear by coatings available from the likes of Paintseal Direct or Diamondbrite.
Interested in the other tasks you can do to look after your ‘van? Our guide to motorhome maintenance talks you through the tasks you can tackle yourself.
Future Publishing Limited, the publisher of Practical Motorhome, provides the information in this article in good faith and makes no representation as to its completeness or accuracy. Individuals carrying out the instructions do so at their own risk and must exercise their independent judgement in determining the appropriateness of the advice to their circumstances. Individuals should take appropriate safety precautions and be aware of the risk of electrocution when dealing with electrical products. To the fullest extent permitted by law, neither Future nor its employees or agents shall have any liability in connection with the use of this information. Double check any warranty is not affected before proceeding.
If you’ve enjoyed reading this article, why not get the latest news, reviews and features delivered direct to your door or inbox every month. Take advantage of our brilliant Practical Motorhome magazine SUBSCRIBERS’ OFFER and SIGN UP TO OUR NEWSLETTER for regular weekly updates on all things motorhome related.