
I make absolutely no apologies for being a fan of the Alde heating system. That isn’t to say there’s something wrong with any of the other systems, because there isn’t, but in many respects, the Alde system is far more controllable and provides more features than a domestic set-up.
There are so many useful accessories that can be added, too.
One of the best features of the Alde heating system is its option to select Night Mode. This allows you to choose settings for overnight, in addition to your default daytime settings.
For example, you might like the ’van to be a cosy 20°C during the day, but that could be too warm for comfort overnight. And there’s really no point in heating the water at night, either, especially if you’re running on gas, so would hear the burner operating – to say nothing of the wasted energy.
Night Mode is simple to arrange and can take care of all of that, and more. So if you want to set it up, here’s how.
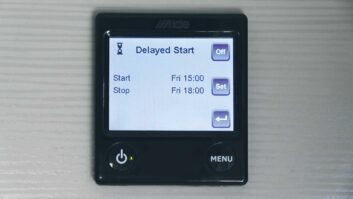
- Take a look at our guide to setting the Delayed Start function on your Alde heating
Setting up Night Mode
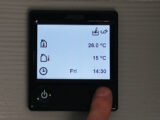
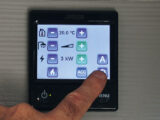
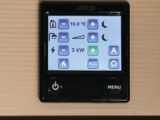
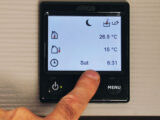
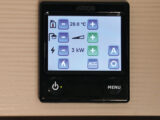
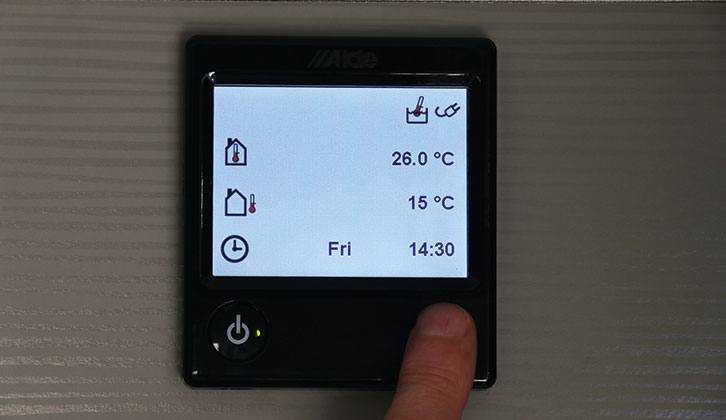
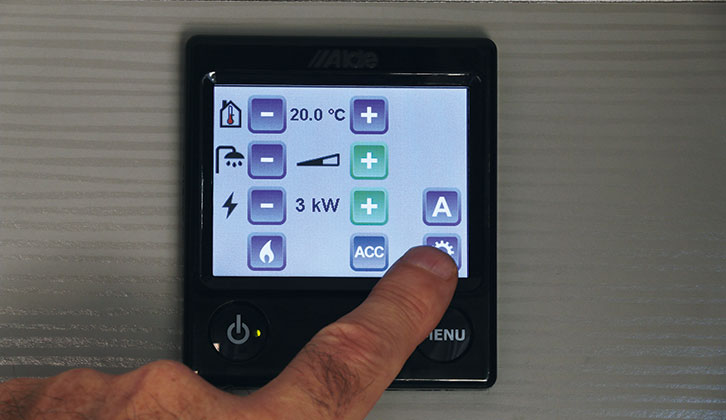
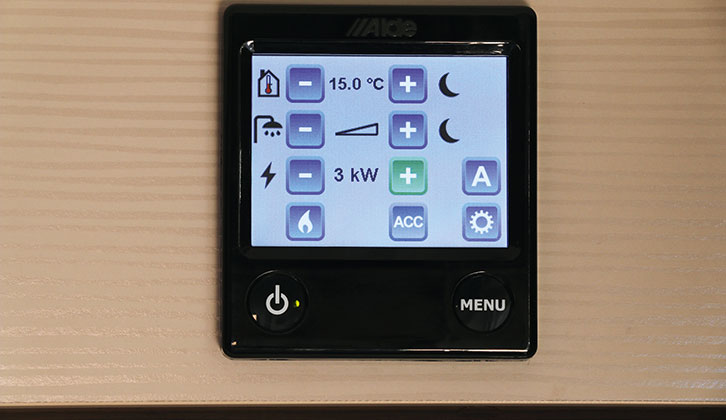
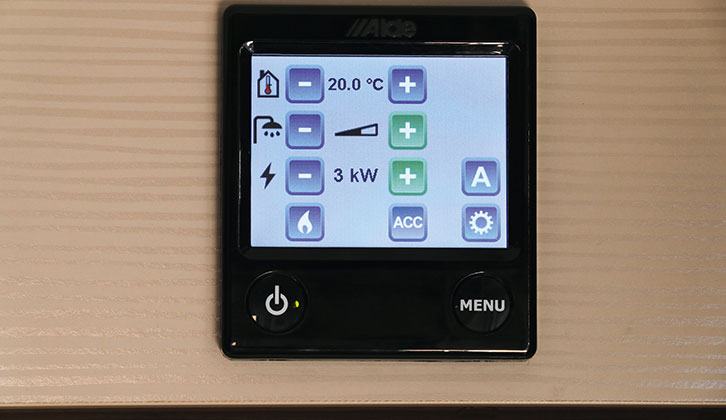
Starting from the Home screen, press the Menu button (bottom right on the Control Panel) to display the default settings – in this case, temperature set at 20°C, the water heater ‘on’ and using electricity on the 3kW setting.
You don’t need to alter any of your preferred settings when you set up Night Mode. Whenever you turn off the heating system, you’ll find that when you turn it on again, it always returns to those settings.
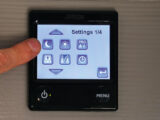
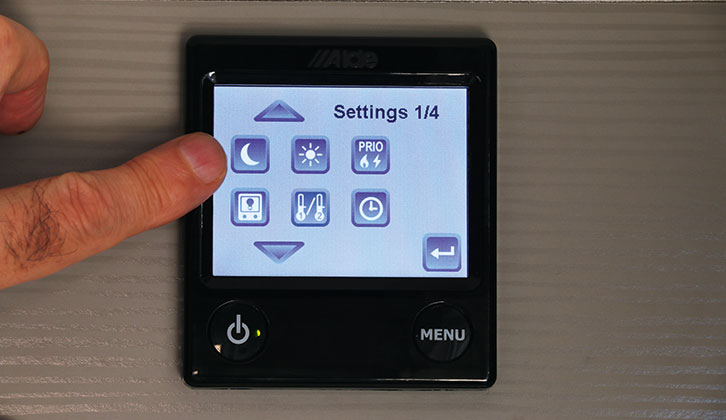
Next, touch the Settings icon at the bottom right of the screen, which will take you to Page 1 of the Settings.
On Page 1, you will see a Moon (night-time) icon at the top left, and next to it a Sun (day) icon. Just ignore the Sun icon and settings. You don’t need to do anything with them, they are there for a different purpose.
I have lost count of the number of times I’ve been asked if the daytime settings need to be set for Night Mode to work. The answer is an emphatic no. Do not touch them!
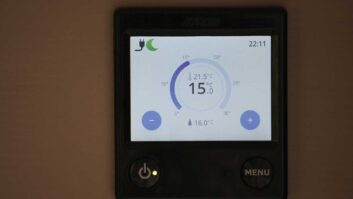
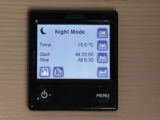
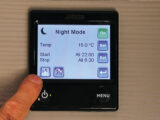
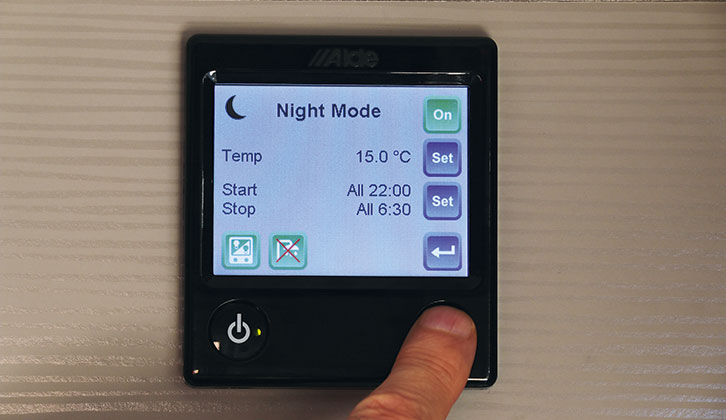
Tap the Moon icon and you’ll see the Night Mode menu page displayed.
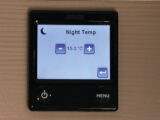
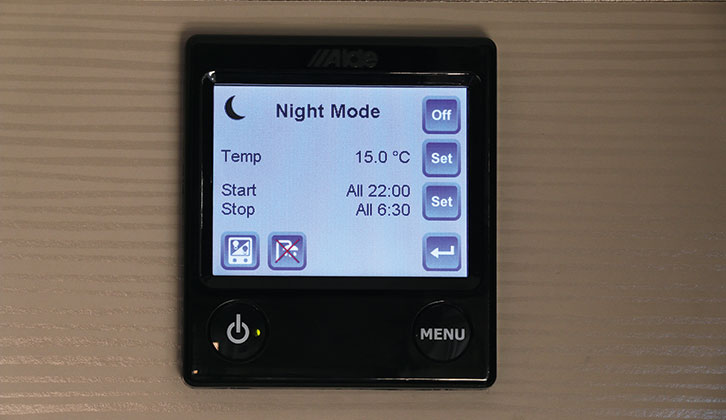
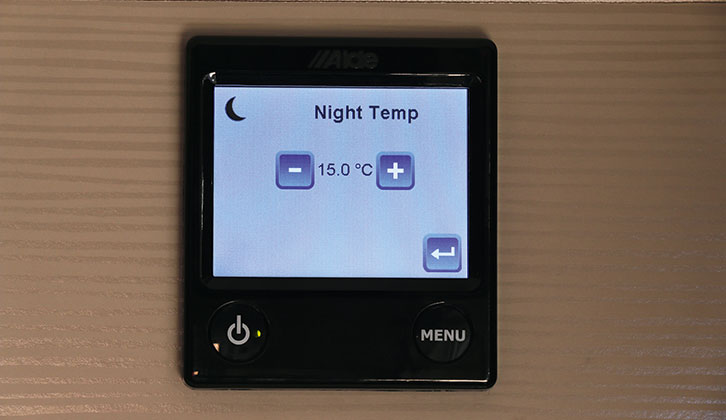
First, set your desired overnight temperature. We have ours at 15°C, but you can set it anywhere between 5°C and 30°C; it’s your choice.
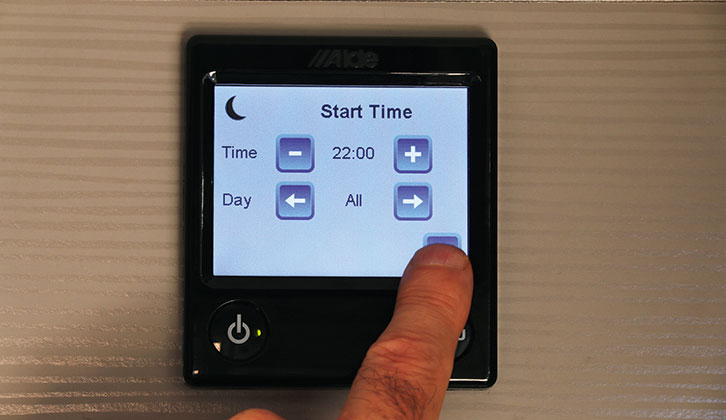
To return, touch the Back Arrow icon (bottom right of the screen) and set the time you’d like the Night Mode setting to begin operating.
This is when the system will change from your default settings (20°C, water heater on, and so on) to the new Night Mode settings (15°C in our case).
Bearing in mind that the motorhome will still be at the higher temperature when Night Mode takes over, you might want to set the Start Time for about 30 minutes before you go to
bed, so there’s time for the interior to cool down a bit.
Now set the days on which you want Night Mode to operate. You can choose individual days, but we select ‘All’, so that it works every day. Next, touch the Back Arrow to go to the Stop Time.
- Is the bright white light of your control panel keeping you awake? Our guide to inverting an Alde control panel is sure to help!
Set temperature and time
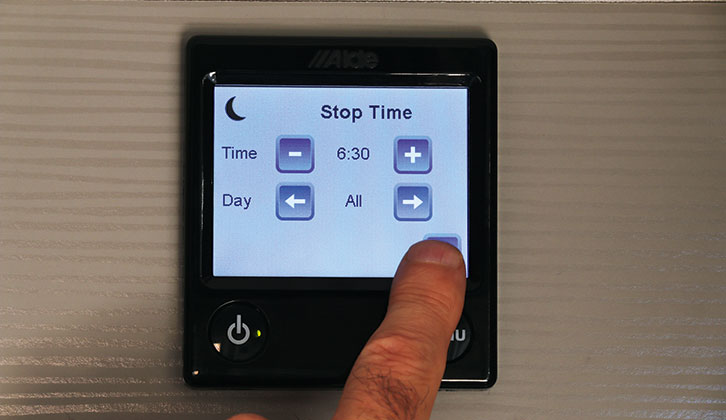
Again, bear in mind the vehicle won’t instantly be up to temperature, so I would suggest setting the Stop Time to an hour or so before you get up.
Of course, the time taken to heat the interior will depend on how cold the outside temperature is and which power setting you might be using –Gas/Gas+Electric/Electric on 2kW or 3kW (1kW will struggle to heat both ’van and water). With your Stop Time selected, touch the Back Arrow icon, which will then return you to the Night Mode Menu page.
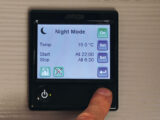
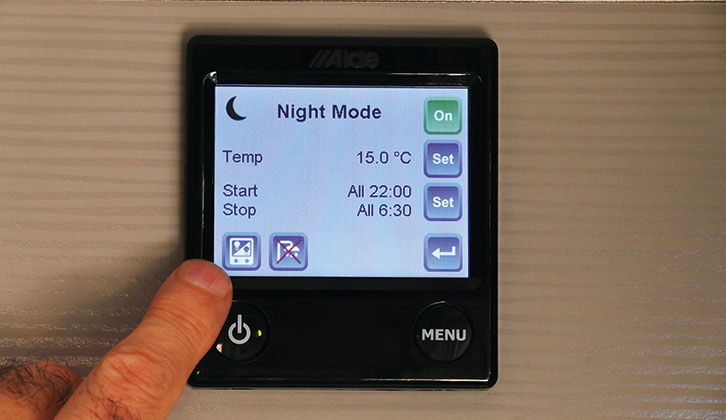
At the bottom left of the screen, you’ll see there are two icons. The one on the far left is to invert the screen. Rather than having the glaringly bright screen with black figures on overnight, the inverted screen will be black with white figures. If you prefer that, touch the blue icon so that it turns green.
Next to it is an icon of a showerhead with a red cross over it. This turns the water heater off, again a good idea for overnight, so touch that and it will also turn green. The water, of course, will remain plenty warm enough for use overnight should the need arise.
Automatic system
Finally, ensure the icon at the top right of the screen is green and shows On. If it is blue and says Off, touch it, so that it changes to green and On.
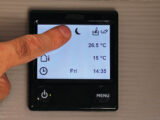
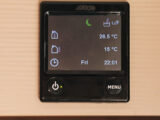
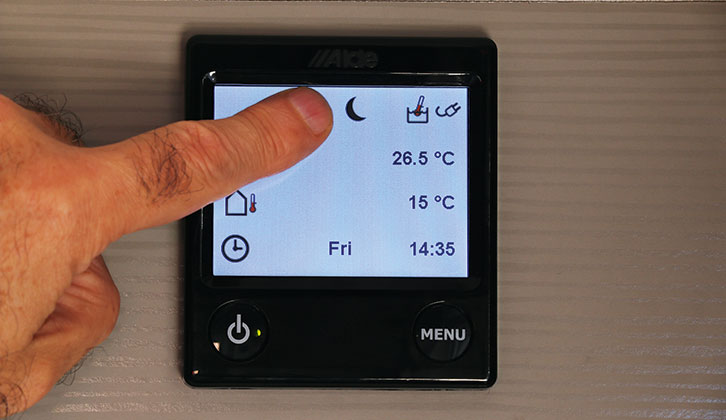
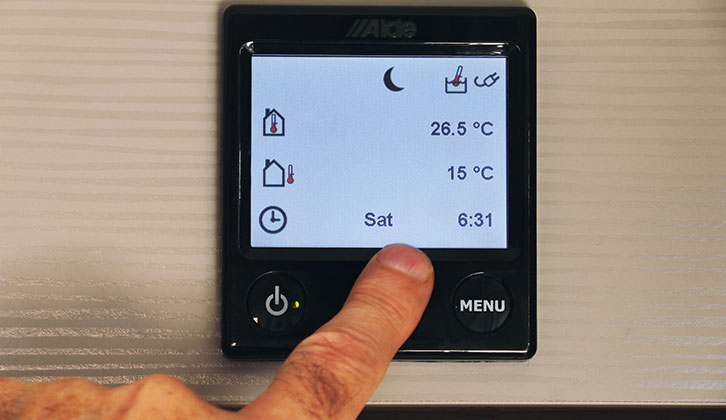
Now press the Menu button twice to return to the Home screen. You will see a black Moon icon at the top centre. This shows the Night Mode is set.
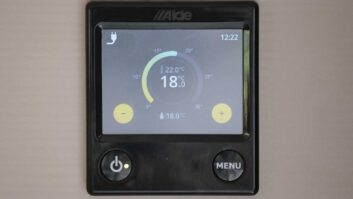
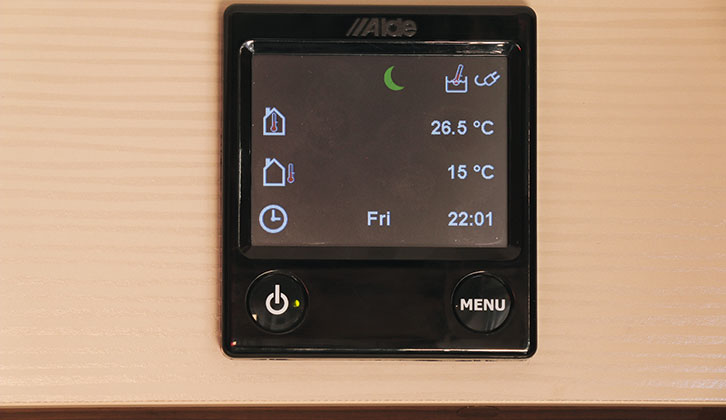
And that’s it. The system is fully automatic. When it’s time for Night Mode to operate, if you’ve set the screen to invert, it will switch to black with white figures and the Moon icon will go green, so that you know it’s all working correctly. You can check or adjust Night Mode settings by pressing the Menu button as you would for your default settings. Just remember, there’s no need to touch the Sun icon!
A step-by-step guide to setting Night Mode on your Alde Heating
1. Begin by pressing the Menu button
2. Touch the Settings icon
3. Tap the Moon (Night Mode) icon
4. The Night Mode Menu page
5. Set the Night Mode temperature, then tap the Back Arrow.
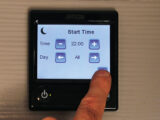
6. Set the Start Time for Night Mode and select a day, or All
7. Select Stop Time
8. To invert the screen, tap the icon so it turns green.
9 Similarly, to turn off the water heater overnight, tap the Showerhead icon to turn it green.
10. The black Moon icon at the top of the screen indicates that Night Mode is set.
11. When the chosen time is reached, the screen inverts and the Moon goes green
12. You can check the Night Mode settings by pressing Menu.
13. At the end of Night Mode, the screen returns to normal…
14. … and the settings will return to your chosen defaults
Future Publishing Limited, the publisher of Practical Motorhome, provides the information in this article in good faith and makes no representation as to its completeness or accuracy. Individuals carrying out the instructions do so at their own risk and must exercise their independent judgement in determining the appropriateness of the advice to their circumstances. Individuals should take appropriate safety precautions and be aware of the risk of electrocution when dealing with electrical products. To the fullest extent permitted by law, neither Future nor its employees or agents shall have any liability in connection with the use of this information. Double check any warranty is not affected before proceeding.
If you’ve enjoyed reading this article, why not get the latest news, reviews and features delivered direct to your door or inbox every month. Take advantage of our brilliant Practical Motorhome magazine SUBSCRIBERS’ OFFER and SIGN UP TO OUR NEWSLETTER for regular weekly updates on all things motorhome related.