


For the 2023 season, ’vans fitted with Alde heating had the new 3030 boiler and control panel installed.
This incorporates quite a few changes from when I explained how to invert the Alde 3020 control screen, so this is a good time to take a closer look at the system.
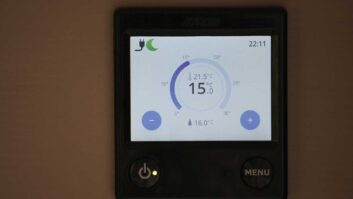
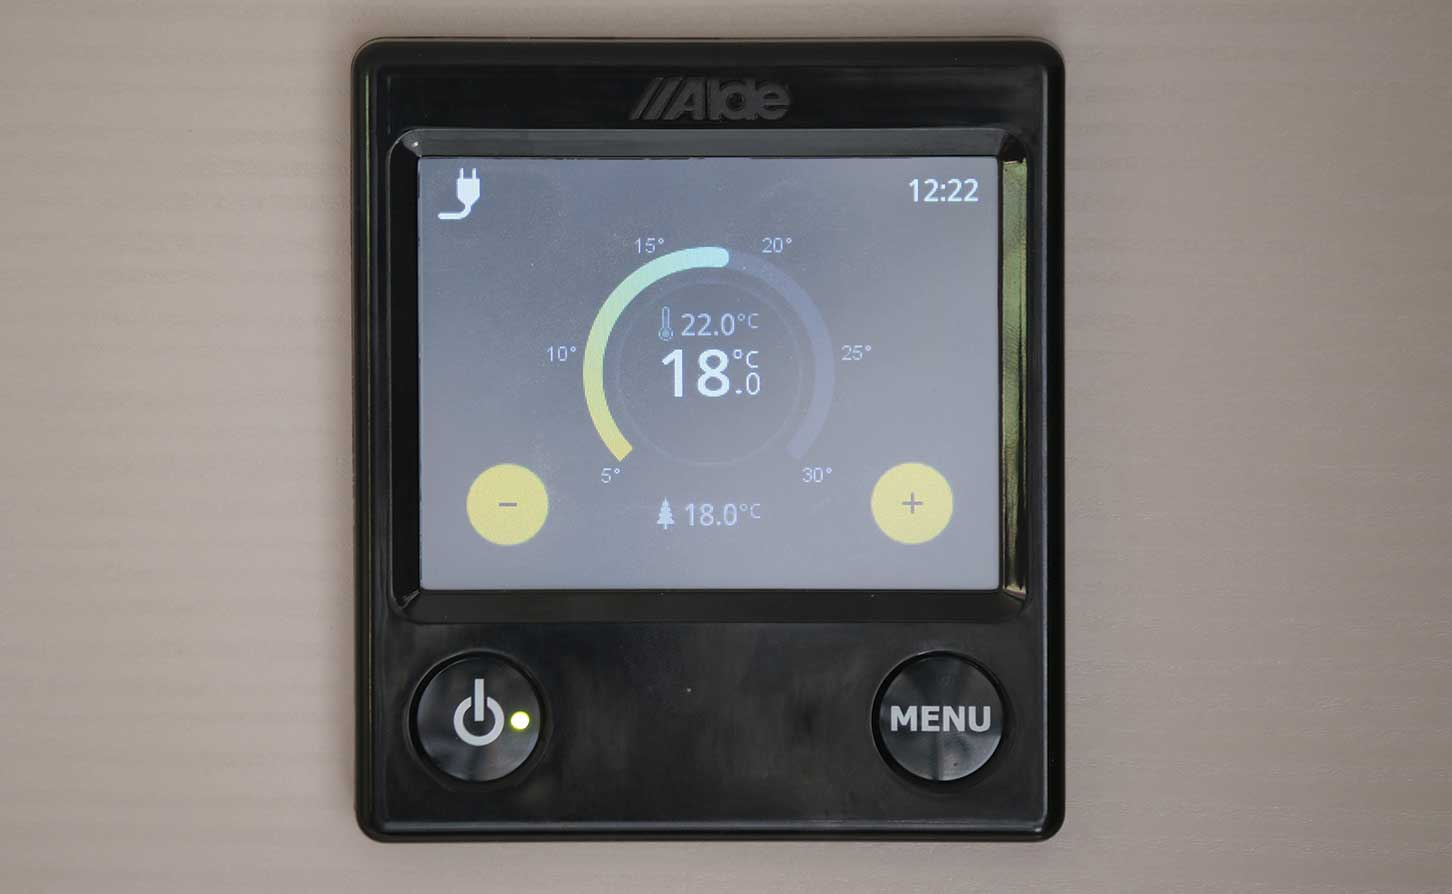
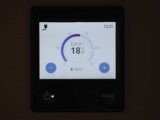
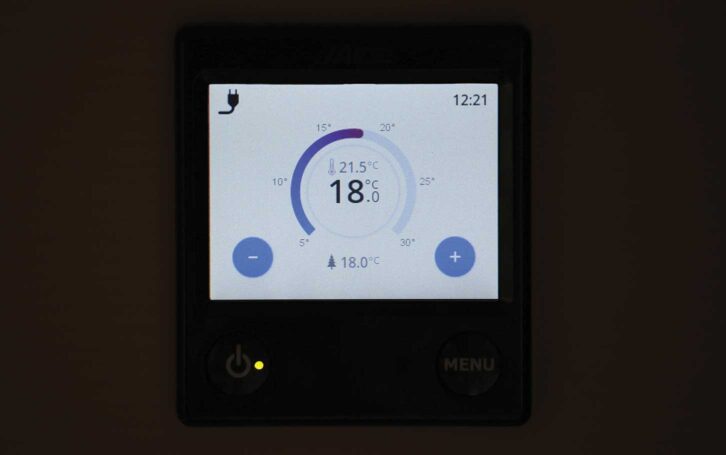
The first thing you’ll notice about the control panel is the more up-to-date display, with temperature adjustment settings on the Home screen. This has apparently been done in response to requests from customers.
The main display screen (where you can see the status of various things) is now on the next screen, displayed after pressing the Menu button once.
Screen display options
As with the previous-generation 3020 system, there are various brightness settings, which can be useful at night, because the Home screen itself is very bright, even if you select the lowest brightness setting for it.
Although inverting the screen (that is, swapping the colours of the text and the background) makes it look rather colourful, it does remain quite bright, because there’s so much information displayed – too bright, perhaps, for some to leave it on overnight when you’re pitched up (see: the best motorhome sites if you’re wondering where to go).
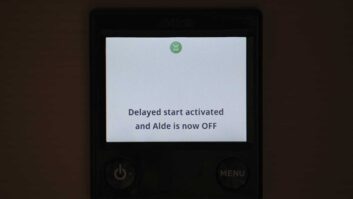
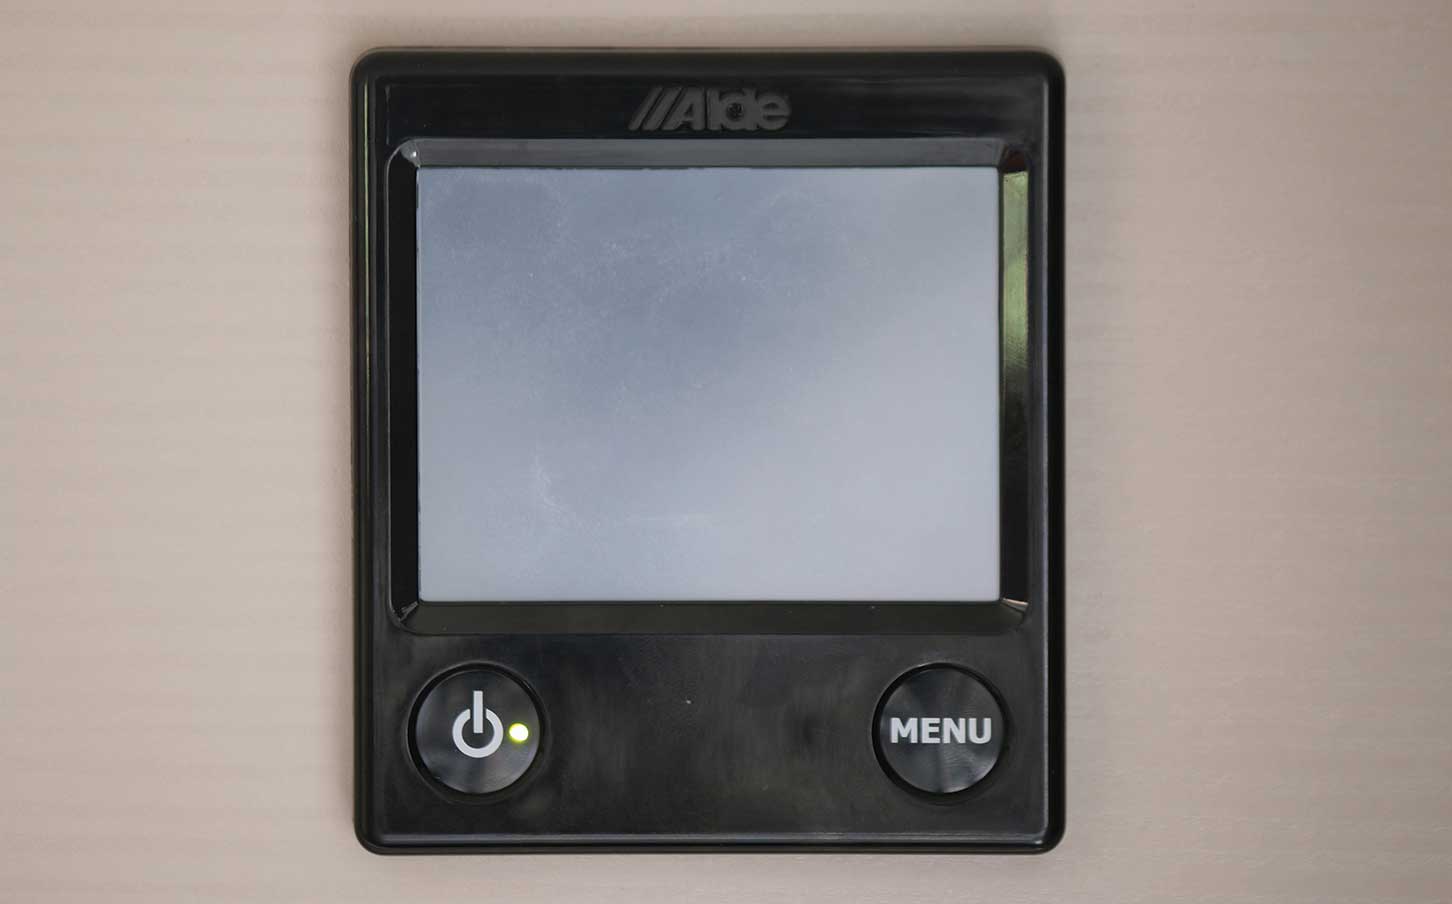
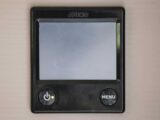
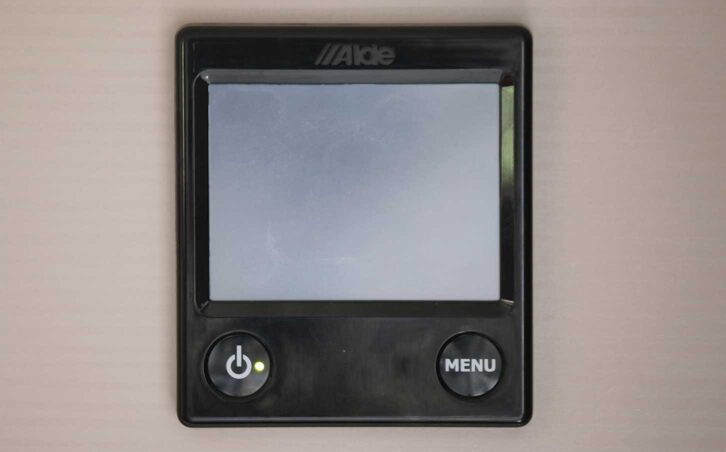
There is a third option, however, which is to use the Dark screen. This turns off the display after 30 seconds, although the small green LED on the main on/off button remains lit to show you the system is still operating.
In Dark mode, all you have to do to see the display is touch the screen and it will light up for 30 seconds. Should you want to alter the settings, the display will remain on for 30 seconds after adjustments have been made.
Although this is one of the simplest functions on the 3030 control panel, it’s also one of the most useful.
Now let’s look in more detail at how to invert the screen, how to darken it and how to adjust the brightness.
Inverting an Alde 3030 control panel
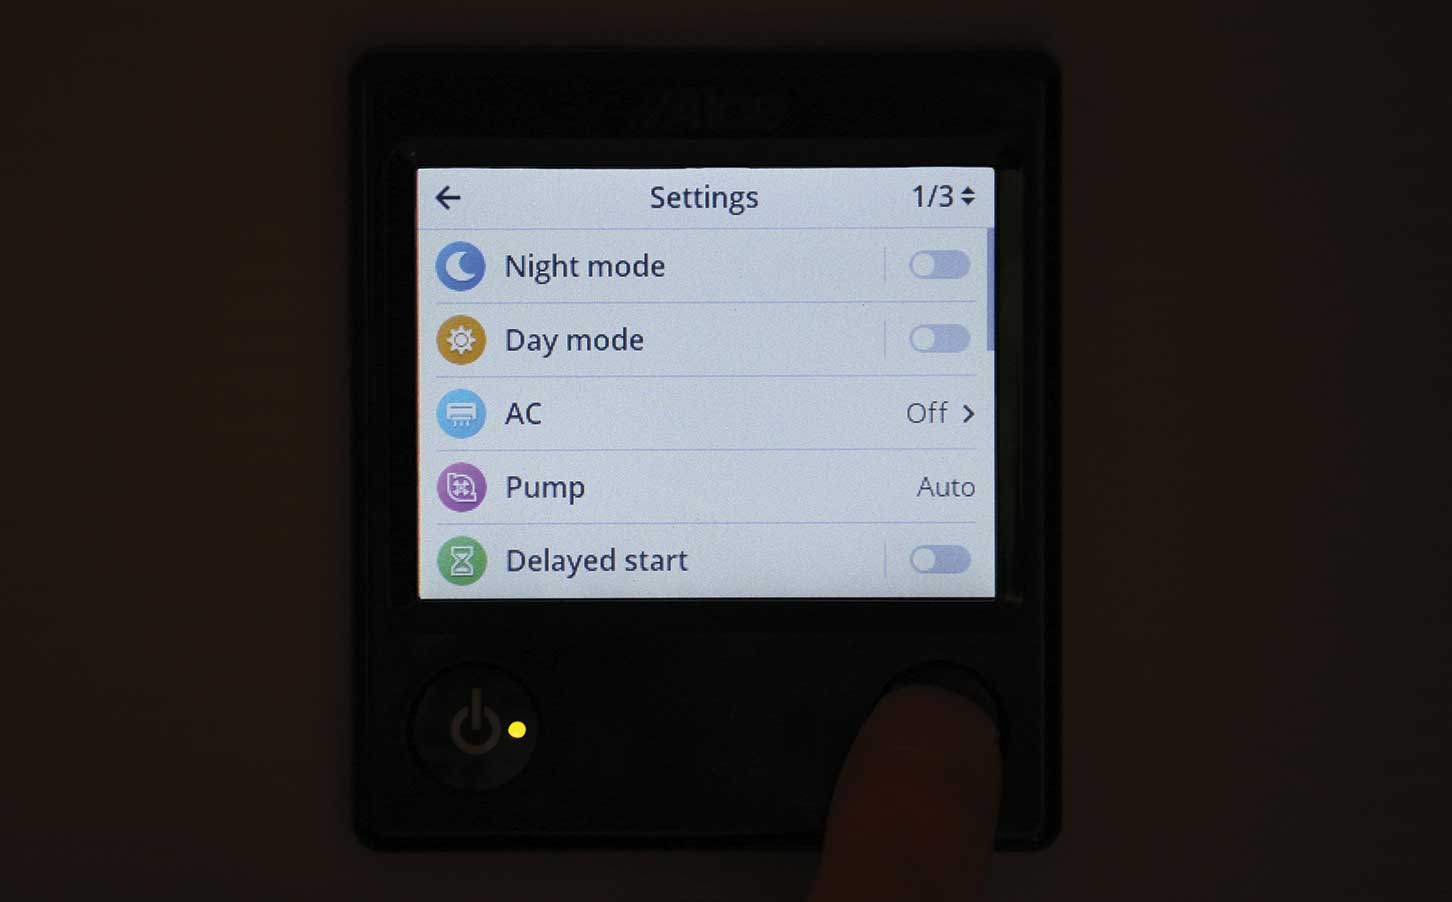
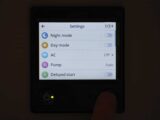
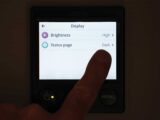
With the Alde system turned on, press the Menu button at the bottom right of the control panel twice. This will take you to Page 1 of 3 of the settings. Touch the ‘Page 1/3’ icon at the top right of the screen. This will take you to ‘Page 2/3’ – where you need to be.
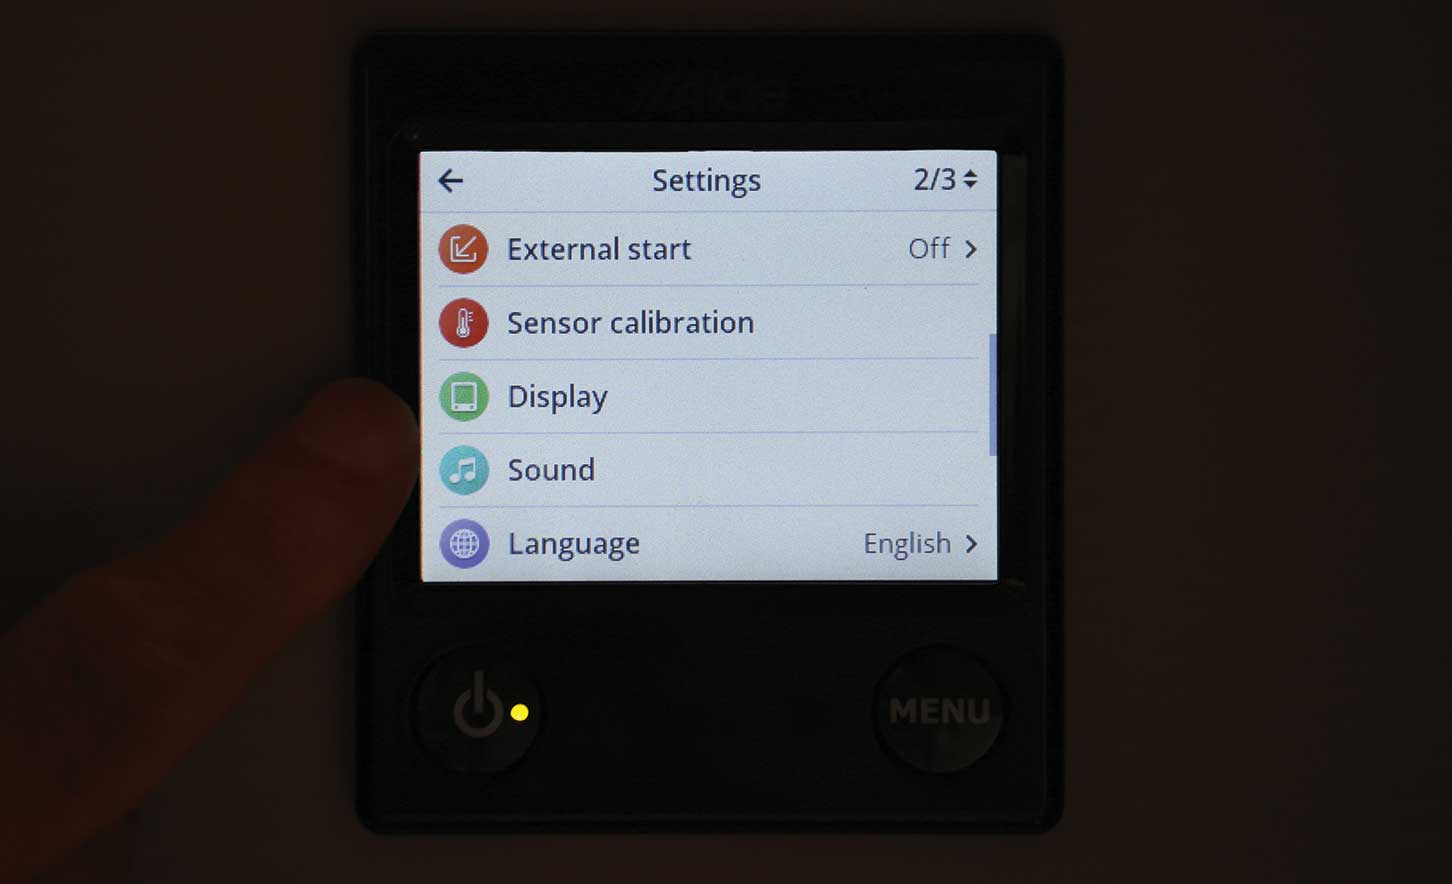
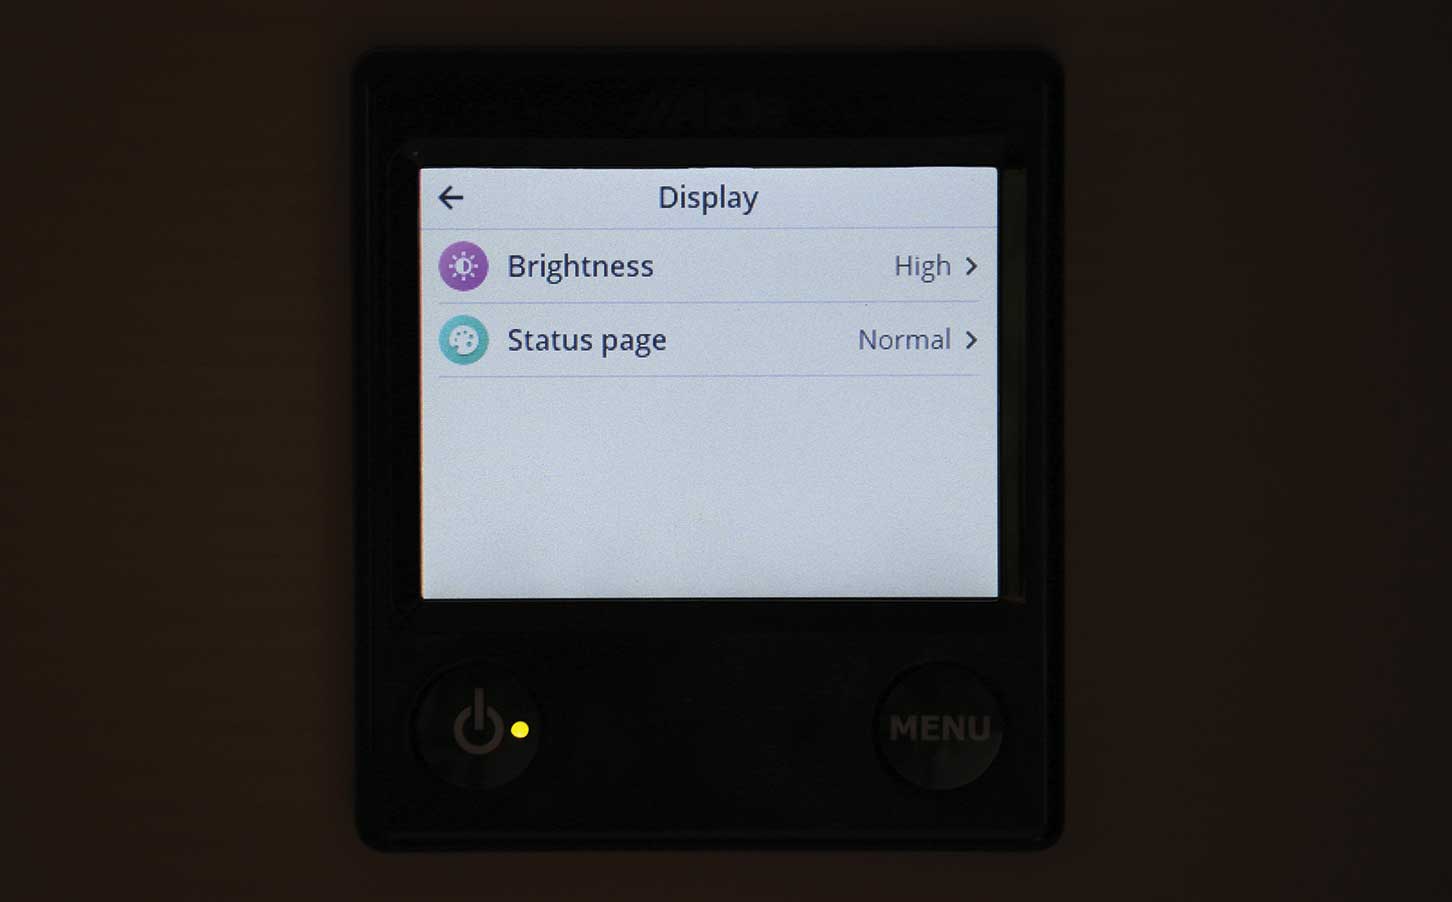
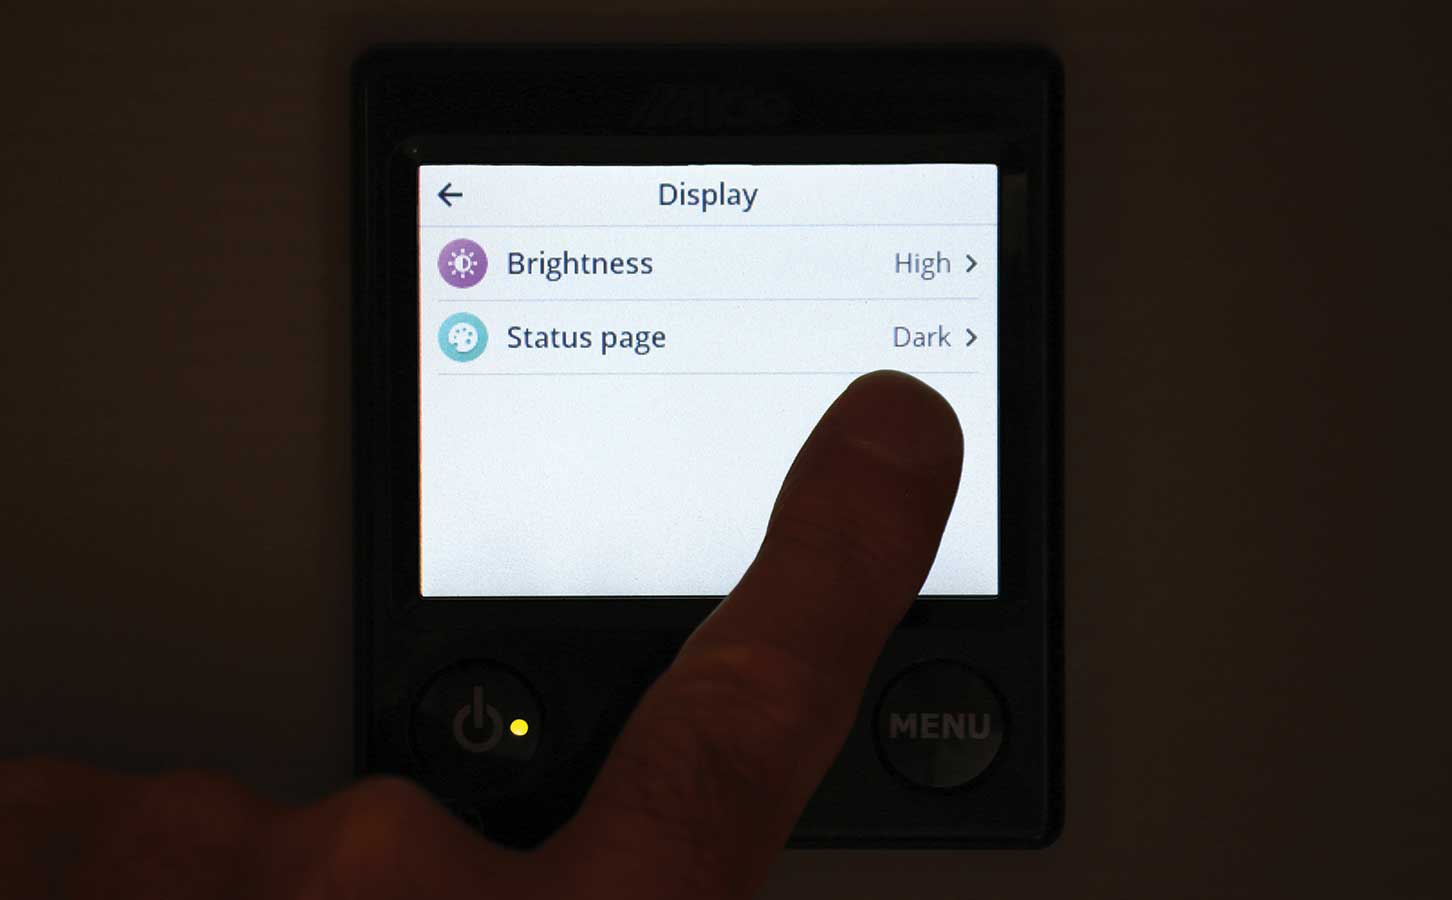
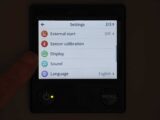
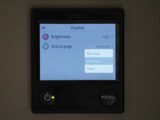
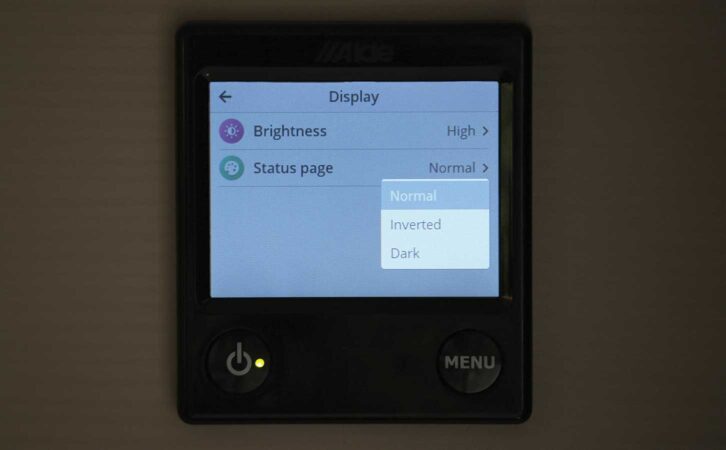
Halfway down the list of icons on Page 2/3, you’ll see the green Display icon. Touch this, and the next page will give you the choice of two display settings, Brightness and Status page.
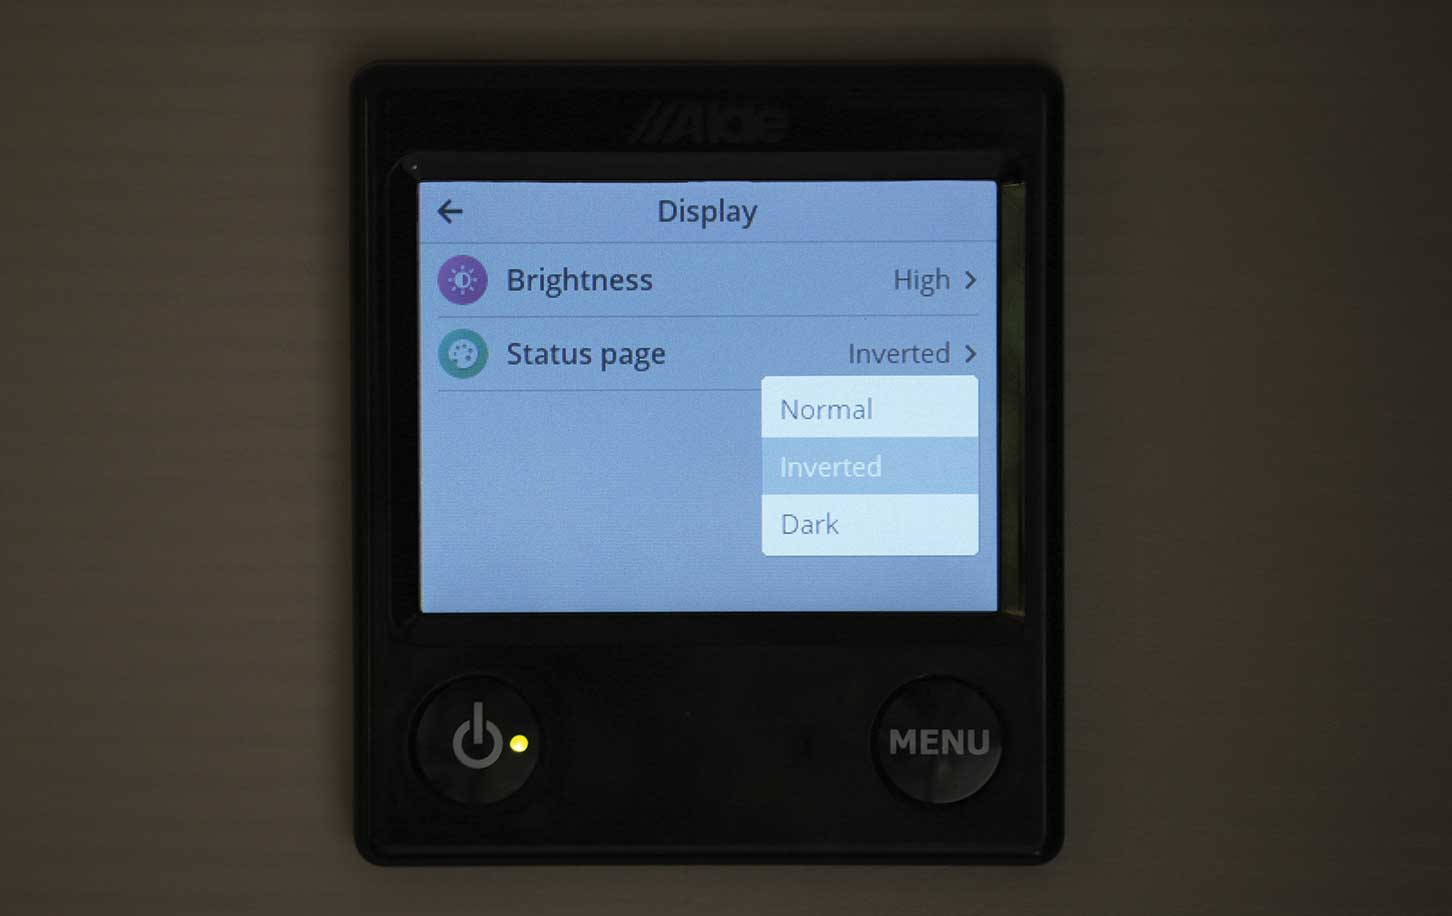
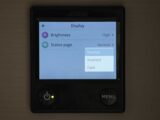
Touching the Status page icon will bring up a drop-down menu, giving you three choices: Normal, Inverted and Dark. Obviously, Normal is the default, bright-background setting. Inverted provides a coloured display on a black background, and Dark is the setting where the display goes off after 30 seconds.
After making your choice, you then simply need to press the Menu button twice to return to the Home screen.
If you’ve chosen the Inverted setting, that is the display you should see.
As far as I am aware, choosing the Dark setting results in the appearance of a dulled-down version of the Normal setting, even when the brightness has been turned up to high.
Putting an Alde 3030 into Dark mode
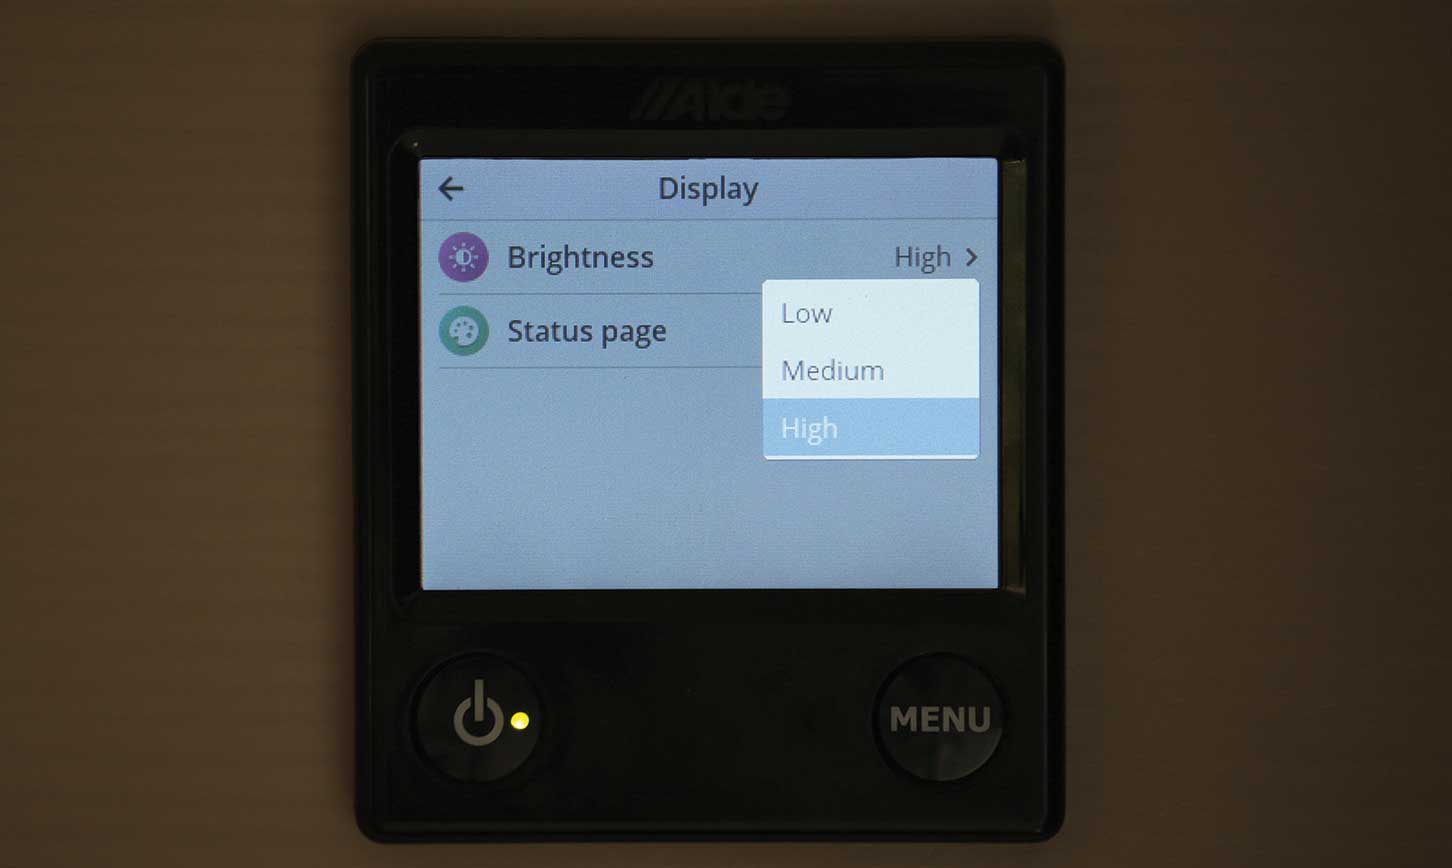
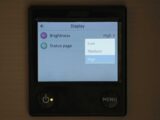
To change the display’s brightness, follow the initial steps outlined above and when you get to the Display menu, rather than changing the Status page settings, select the Brightness icon.
This will open another drop-down menu, this time offering the options Low, Medium and High.
For daytime use, my own preference is the brightest setting on the Normal display; anything dimmer makes the screen harder to see.
For evenings and nights, we use the Dark setting.
It’s definitely worth exploring your control panel options – as is often the case, an apparently baffling array of menus is actually fairly straightforward once you get used to using them.
How to invert an Alde 3030 control panel or put it in Dark mode – a step by step guide
1. The ‘Home’ screen is brightly lit in the default setting.
2. Press the ‘Menu’ button twice to get to the ‘Settings’ page.

3. Touch the ‘1/3’ icon to go to ‘Page 2/3’, then select the ‘Display’ icon.

4. This will give you options to adjust the style and brightness of the display.

5. Touch the ‘Status page’ icon and a drop-down menu will appear.
6. Select ‘Inverted’; you might find that this is your preferred setting.

7. Press the ‘Menu’ button twice to return to the ‘Home’ screen – now inverted.
8. An alternative to ‘Inverted’ on the ‘Status page’ menu is ‘Dark’.

9. As before, press the ‘Menu’ button twice to return to the ‘Home’ screen. The display will go off after 30-seconds but the green LED on the on/off switch will remain illuminated.
10. To change the brightness of the display, touch the ‘Brightness’ icon and the drop-down menu will give you a choice of ‘Low’, ‘Medium’ and ‘High’.

Nigel Hutson is a Brand Ambassador for Alde International
Future Publishing Limited, the publisher of Practical Motorhome, provides the information in this article in good faith and makes no representation as to its completeness or accuracy. Individuals carrying out the instructions do so at their own risk and must exercise their independent judgement in determining the appropriateness of the advice to their circumstances. Individuals should take appropriate safety precautions and be aware of the risk of electrocution when dealing with electrical products. To the fullest extent permitted by law, neither Future nor its employees or agents shall have any liability in connection with the use of this information. You should check that any van warranty will not be affected before proceeding with DIY projects.
If you’ve enjoyed reading this review, why not get the latest news, reviews and features delivered direct to your door or inbox every month. Take advantage of our brilliant Practical Motorhome magazine SUBSCRIBERS’ OFFER and SIGN UP TO OUR NEWSLETTER for regular weekly updates on all things motorhome related.