
Many of us will be looking forward to another fine summer of touring, and all of the great experiences and enjoyment that will bring. For many of us, what really enhances that sense of anticipation and excitement is the planning and preparation. Carrying out these pre-departure checks early enough (at your leisure) and you can avoid lots of last-minute stress, and even save yourself some money.
Depending on how you look after and store your motorhome, this 10-point check-up should take a day or two. Bringing your motorhome home from storage to do it is a great idea, because the journey will give you the opportunity to check it’s driving well, and you’ll have access to mains power if needed, and a tap for cleaning.
Just make sure to carry out all of this prep at least a week or two before your planned departure, to allow yourself ample time for the task.
1 Clean your motorhome’s exterior
To start with, it’s time to clean your motorhome. Your vehicle might be looking just a little down-at-heel after a winter in storage, so why not set aside a day to give it a really good spruce-up?
Starting outside, soak the motorhome with a low-pressure hose (don’t use a jet-washer on the accommodation area, because it can penetrate window seals and might damage the graphics). This will soften up any grime.
Next, choose one of the best motorhome cleaners and sponge it onto the surfaces, giving any black streaks some extra attention.
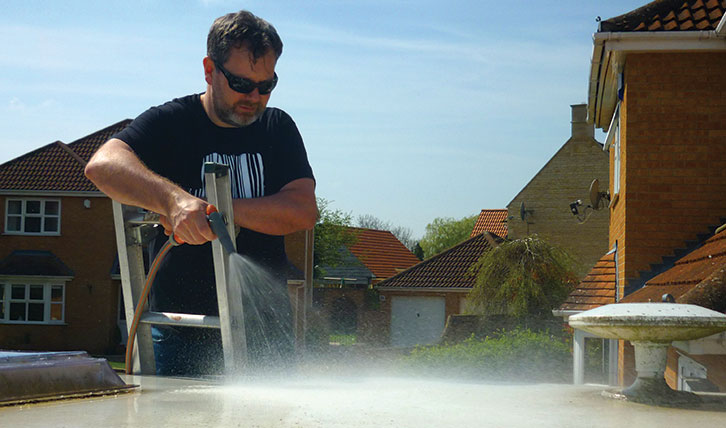
You’ll need a ladder to reach the roof, but do make sure you protect the edges of the roof from damage – and that the ladder is secured and stable. You’ll also need a long-handled brush.
Once it’s washed and rinsed, apply a motorhome polish to the panels, such as Autoglym’s SRP001 Super Resin Polish. If your ’van has a paint protection treatment, such as Diamondbrite or Paintseal, this won’t be required.
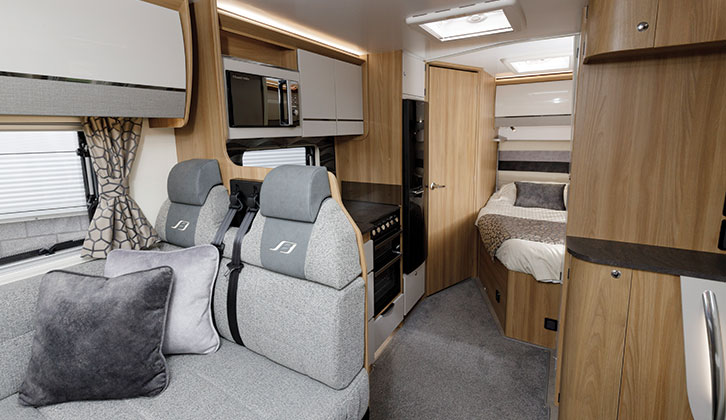
2 Clean the interior
After any amount of time in storage, check the vehicle lockers and corners for signs of mouse or insect ‘squatting’ (and check your motorhome for damp while you’re there – you can buy damp meters from as little as £12).
All being well, the interior will just require a thorough spring cleaning (having one of the best motorhome vacuum cleaners will help here), although you might consider protecting your carpets and furnishings from spills and dirt for the season by applying a specialist coating.
Your dealer might be able to treat the interior with products from Paintseal or Diamondbrite, or you could do it yourself with Scotchgard or Supagard. If so, just make sure you do it in a well-ventilated area, and allow your vehicle to air for at least a few hours.
3 Leisure battery and gas supplies
If you’ve bought the best leisure battery for a campervan and it has remained untouched throughout the winter months, it should be fully checked and charged before you embark on your first trip, particularly if you’re planning to take your motorhome off-grid.
We’d recommend keeping it charged over any break, to avoid damage, and a smart charger used over the winter will have kept it in tip-top condition. As an example, take a look at CTEK’s MXS 5.0, costing around £80.
If you have a solar panel charging your battery, unplug it first, then use a multimeter (costing from £12 online) to test the battery voltage.
Touch the probes on the negative (black) and positive (red) terminals, and you will get a reading. A fully charged leisure battery should be around 12.9V when full. Anything under 12V is cause for concern and needs urgently recharging.
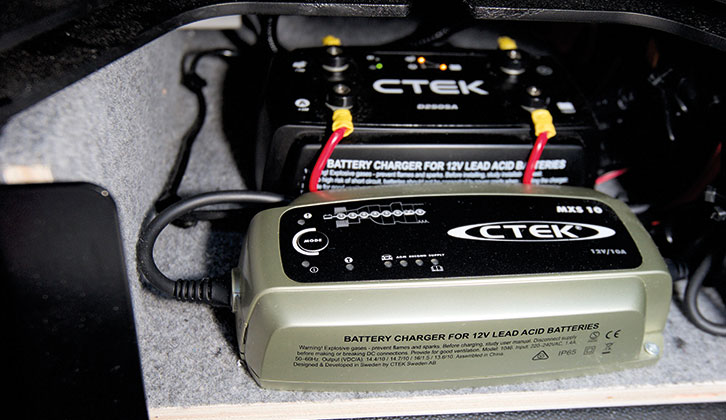
Charge the battery a few weeks before your first trip, and you’ll be able to see if it holds the charge.
Our guide to winter battery care fills you in on more about batteries.
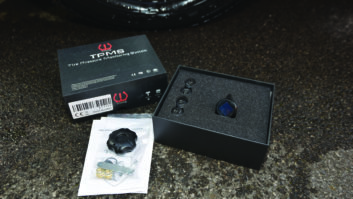
Next, you’ll need to check your gas levels, to ensure that you will have sufficient fuel for your next trip. Often, it’s easy to tell if the gas bottle is quite full just by shaking it.
Otherwise you could weigh the bottle, or use a device such as Truma’s LevelCheck (£65 from Prima Leisure).
This clever little gadget is easy to use, and suitable for 200-350mm diameter cylinders. It even has a handy integrated LED torch, for checking gas levels in the dark.
4 Flush out the water system
Drinking water that has been sitting stagnant in your motorhome’s tank or water pipes all through the winter could lead to upset stomachs, or worse.
This makes carrying out a pre-season water flush a really good idea, and it’s not difficult. Here’s how to do it…
To clean and descale the system, some people choose white vinegar diluted 1:50 with water, or bicarbonate of soda (1 tsp per litre). These will clean, not sterilise.
For sterilising the system, a product such as Puriclean is best, and relatively cheap, too. Milton Fluid is also popular, but vehicle manufacturers say this has the potential to affect internal pump components, so we would avoid it.
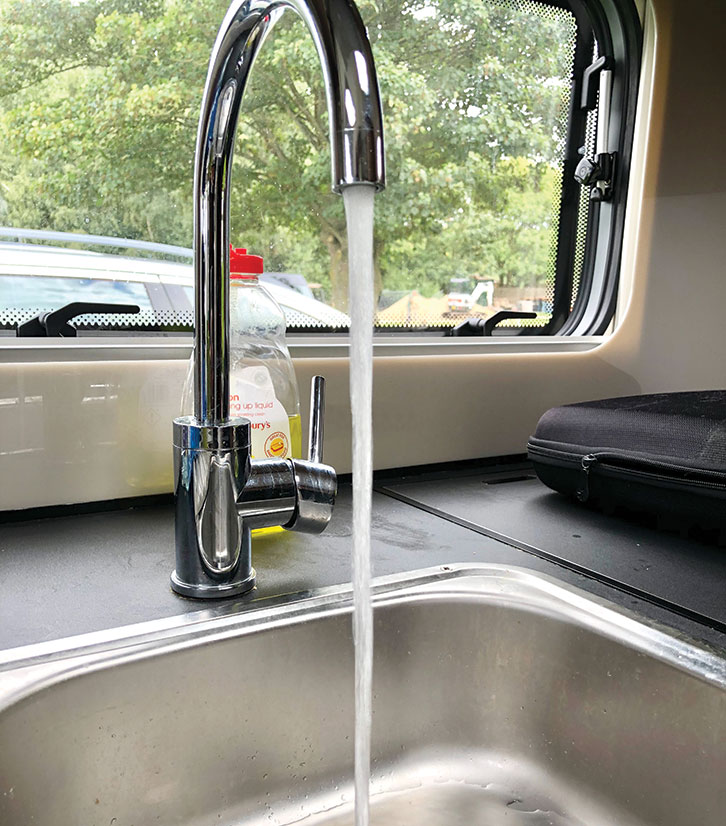
Whatever you use, mix the solution in your water tank, then close all of the taps and turn on the pump. Starting at the tap furthest from the tank, open each in turn until the solution starts pumping through (be careful of spluttering air in the pipes).
Close the tap and move on. When they are all done, leave the solution in the system overnight to take effect. Next day, fill the tank with fresh water and pump it through each tap in turn until there are no chemical smells. Repeat this until you’re happy the tap water is pure.
The grey-waste tank also benefits from this treatment. The water system is now fully sterilised and ready for another season.
5 Examine the fridge
Ideally, your fridge will have been emptied and turned off all winter, with the door left ajar for airflow and to prevent build-up of odours.
Cleaning a fridge is easy, using a non-abrasive cloth and a warm, weak solution of bicarbonate of soda. Bicarb is a gentle abrasive, so it cuts through any grime without damage.
After washing down the interior, give it a wipe around with a cloth and plain water, before drying it with another soft cloth.
If there’s mould in your fridge, consider using vinegar as a cleaning agent, as this kills both mould and mildew spores. Mix vinegar and water one-to-one in a spray bottle and spray the affected areas, before using a brush to scrub them.
For stubborn staining, a bicarb paste will gently scour the spots.
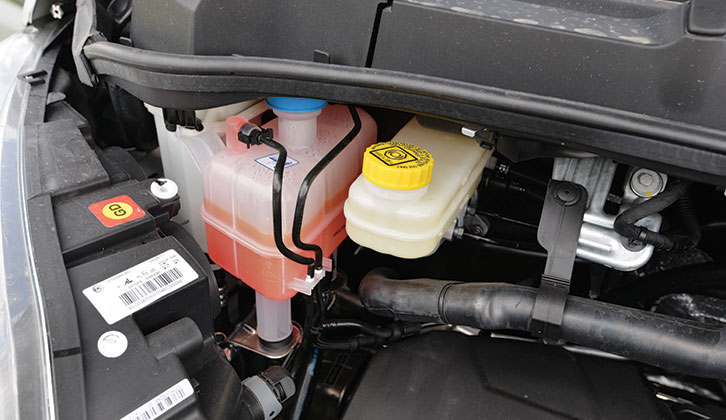
6 Tyres and beneath the bonnet
After the winter lay-up, it’s time for the motorhome tyres and oily parts on your vehicle to have a thorough check-up.
On the tyre tread pattern, look for even wear across the tread. If they have worn down evenly across the width of the tread pattern, that tells you the tracking and alignment of the vehicle are set correctly and the motorhome tyre pressure probably isn’t too far out.
Wear in just the central section of the tread means the pressure is too high, while wear on both outer edges means the tyre needs inflating.
You should also be checking for cuts, lumps and bulges anywhere on the tyre, and don’t forget the inner sidewall.
Finally, check the date of manufacture, which is stamped into one sidewall at the end of what is known as the DOT code. This is a series of letters and numbers beginning with DOT. The date code identifies the tyre’s week and year of manufacture. From 1 January 1990 to 31 December 1999, it was a three-digit code – the first two digits signified the week and the third, the year of that decade. So a code of 327, for example, would indicate week 32 of 1997.
From 1 January 2000, this changed to a four-digit code, where the first two indicate the week of the year and the last two, the year. So 4812 signifies week 48 in 2012. The generally accepted rule is that tyres should not be used after reaching six years of age.
Beneath the bonnet, you should also check the engine oil, coolant (antifreeze), brake and clutch fluid, washer fluid, power-steering fluid, and if applicable, the automatic gearbox fluid. Top up the levels where necessary. And, of course, make sure that the engine starts!
7 Check the appliances
Fire up all of your appliances to confirm they’re working as they should. Run the oven and the gas rings, check the motorhome heating system operates effectively, the water pump is doing its job and the fridge works on all three settings: 12V, mains and gas.
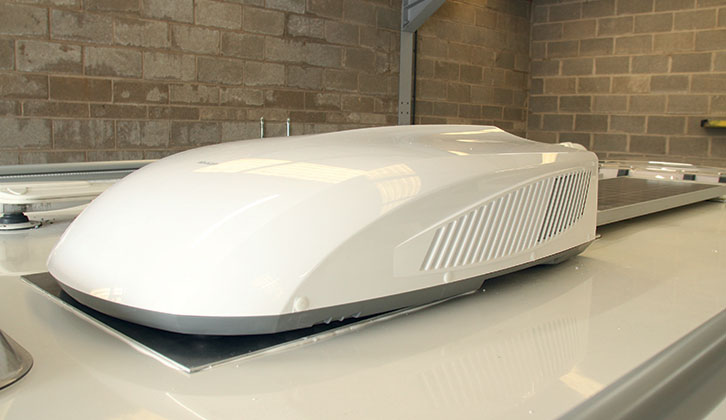
In addition, turn on extractor fans and check your interior and exterior lights. Next, are any added features, such as air-con units/filters and satellite dishes, functioning properly? Finally, check the batteries in smoke alarms and carbon monoxide detectors.
8 Stock up on chemicals
Buying motorhome toilet chemicals in bulk can save you a fortune over the season – and you certainly don’t want to be relying on the site shop in an emergency, because they tend to charge premium prices.
Check prices online and at your local dealer for buying in bulk, and consider decanting the required amount for each trip into a smaller container.
As well as solutions for the cassette, you might want to pick up flush concentrates (usually pink) and some grey-waste chems.
9 Inspect the awning
If you have one, your awning might have been packed away for months, so it’s time to give it a good airing and check it over carefully before embarking on your first tour.
If there was any dampness when it was packed (or rolled) away, there’s a chance mildew might have developed, which looks and smells bad.
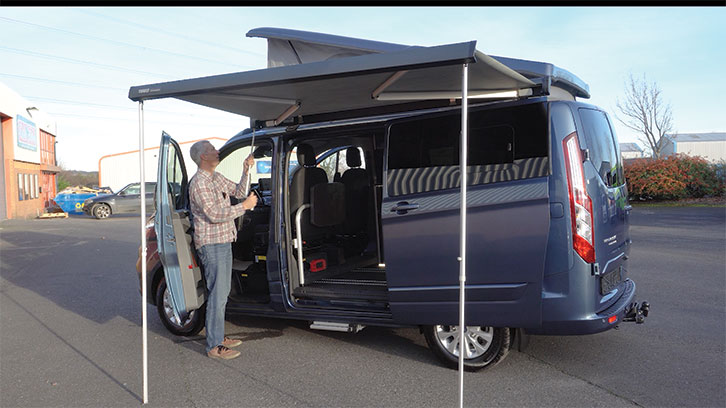
Use a quality awning cleaner to clean and freshen it. Once cleaned, leave your awning spread or rolled out to air for as long as you possibly can – remembering to put it away
well before a dew comes down.
The same thinking also applies to gazebos and pup tents. You don’t want to wait until the first day of your break to find out on your pitch that they have rotted or smell bad.
10 Bulbs and fuses
Quickly run through all of the vehicle electrics to make sure everything, from the lighting to the oven, is working as it should. Then check your stock of spare fuses and bulbs, so you’re prepared for any eventuality.
Future Publishing Limited, the publisher of Practical Motorhome, provides the information in this article in good faith and makes no representation as to its completeness or accuracy. Individuals carrying out the instructions do so at their own risk and must exercise their independent judgement in determining the appropriateness of the advice to their circumstances. Individuals should take appropriate safety precautions and be aware of the risk of electrocution when dealing with electrical products. To the fullest extent permitted by law, neither Future nor its employees or agents shall have any liability in connection with the use of this information. You should check that any van warranty will not be affected before proceeding with DIY projects.
If you’ve enjoyed reading this article, why not get the latest news, reviews and features delivered direct to your door or inbox every month. Take advantage of our brilliant Practical Motorhome magazine SUBSCRIBERS’ OFFER and SIGN UP TO OUR NEWSLETTER for regular weekly updates on all things motorhome related.