


A tyre pressure monitoring system (TPMS) can provide an early warning of any deviations in tyre pressure, so you can take action before anything serious happens. Let’s face it, we all know we should check our tyres regularly, perhaps as often as once a week, but how many of us actually do?
At best, they might get a cursory glance before a longe drive, and that’s about it. Sure, most people will spot when a tyre is flat and the vehicle is leaning at a funny angle, but few would notice a slightly flat tyre.
With motorhome tyres having such stiff sidewalls, a partially flat tyre is very easy to miss. Yet tyre pressure can have a dramatic effect on vehicle handling, and ensuring the pressures are correct not only keeps it safe, but also ensures tyre life is maximised.
Underinflated tyres can heat up and if left unchecked, this can potentially lead to a blow-out.
Early warning
More importantly, they’re the friend of the lazy motorist – you no longer regularly have to check manually, the system does it for you.
Since 2014, new passenger vehicles sold in the EU have to be fitted with a TPMS, but what if you have an older ‘van? Happily, there are lots of systems available on the market, with the latest ones being a real doddle to fit.
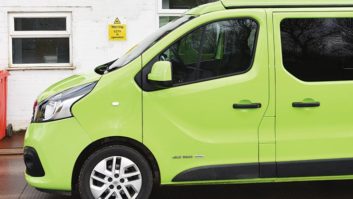
This particular Goolsky-branded version was supplied by Amazon for a very reasonable £30 and is one of the easiest to fit (there are lots of similar items online with a variety of brands – I picked the cheapest!). It’s designed for cars and camper vans – owing to the transmission range of the sensors – and worked fine on the 5.4m-long Renault Traffic LWB test vehicle. If you have a longer motorhome or an RV, you might want to look for a motorhome-specific TPMS – there are lots available for very similar money, with different displays to suit different dash layouts.
It proved easy to fit and, apart from a problem with one sensor not supplying a signal (cured by replacing the button cell battery for £1), worked out of the box, giving readings that were in line with my regular tyre pressure gauge.
High- and low-pressure alerts could be set manually and the unit bleeps as well as flashing a symbol. It’s claimed to be accurate to within 1.5psi. You can set it to display in bar if you prefer newfangled pressure units!
An unexpected bonus was that it also gave tyre temperatures (with a preset warning at over 70ºC), but this is only accurate to plus or minus 3°C, so it’s only going to spot large swings.
To check the system was working, I loosened a valve to simulate a slow puncture, to see what the TPMS would do. After about a 4psi drop, the system started flashing a warning symbol and bleeping – it had triggered the fast leak alarm. So it will not only trigger alarms for low and high pressures, but also for the rate of leakage. This happens long before the minimum pressure alert, so is a useful early warning. With the tyre reinflated and the system reset by switching the engine off and on, the warning cleared.
Out on the road
On a drive, as the tyres heat up with friction, you can see the temperature rising slightly, along with a slight increase in pressure – which is what you’d expect to find (the instructions reckoned pressures can vary by up to 0.3bar/4.5psi in normal driving). The temperature of the tyres when cold tallies with the Renault’s dash display.
Overall, for the £30 outlay, this new system is going to provide some very welcome peace of mind, and this is the perfect product for the less diligent tyre-checkers among us. Guilty!
Step-by-step instructions
1.

Inflate all tyres to correct pressures for vehicle weight. Tyres should be cold.
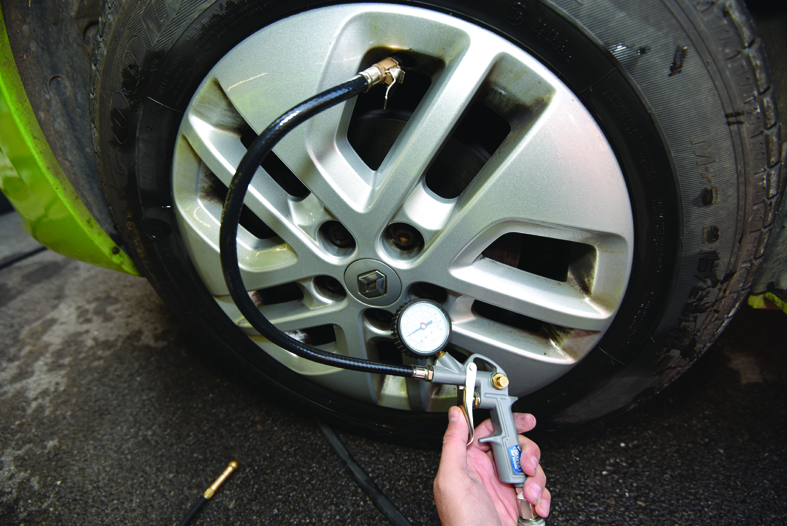
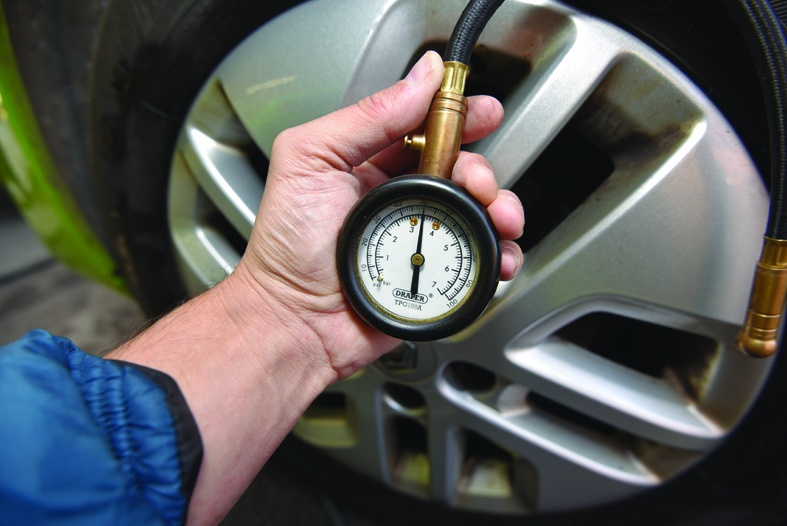
2.

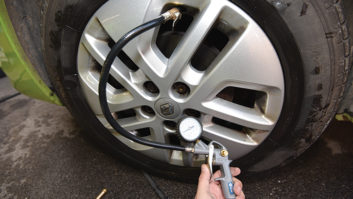
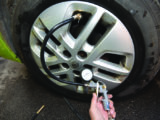
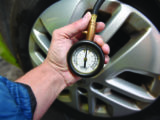
Check tyre pressure with an accurate gauge and adjust as required.
3.
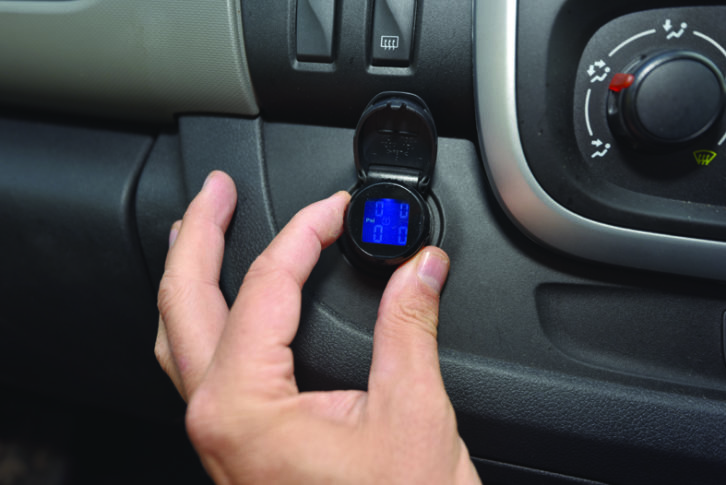
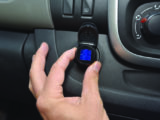
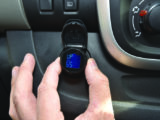
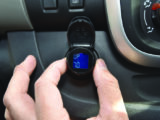
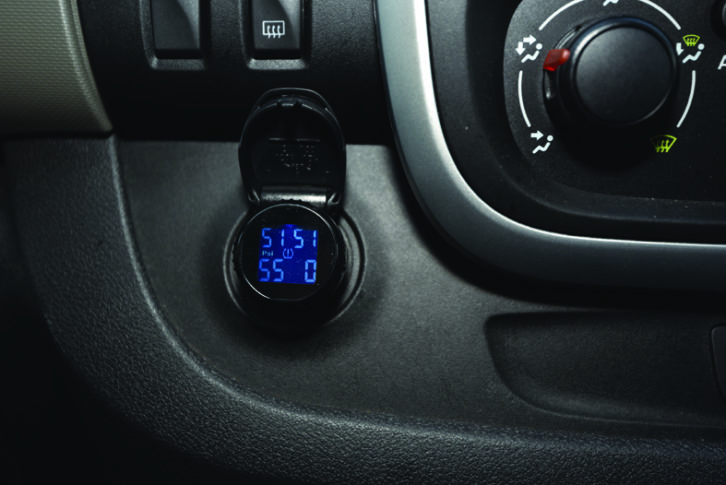
Switch on the ignition, so 12V dash socket is powered up, and plug in the display unit. It reads zero because the sensors haven’t been fitted yet.
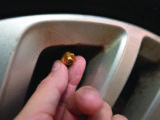
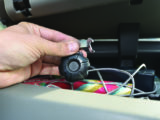
4,
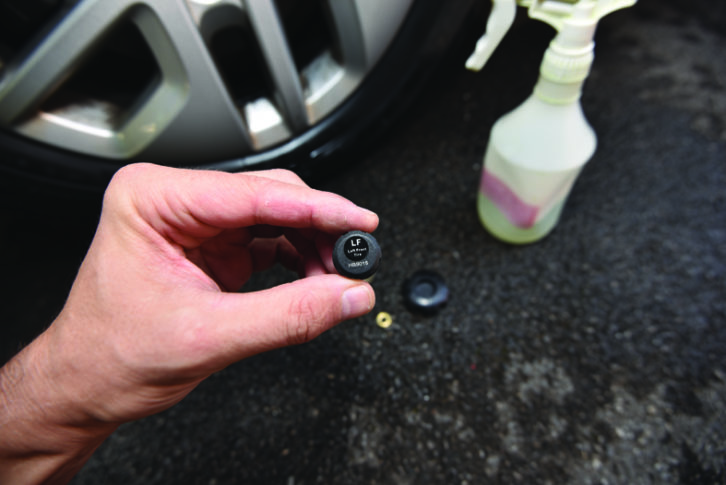
Each of the sensors is clearly labelled – this one is for the left front tyre.
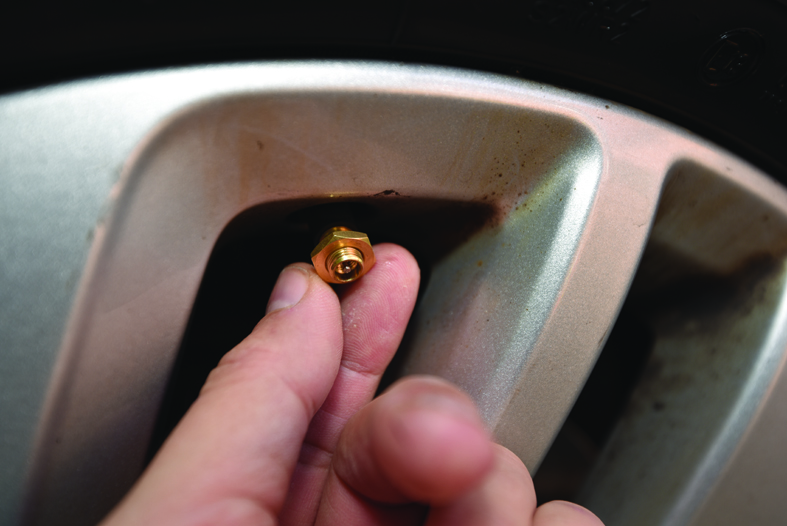
5.

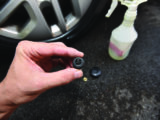
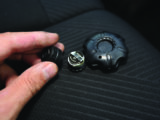
A brass locking nut is supplied and must be used to prevent the caps being stolen or working loose. Screw it in place.
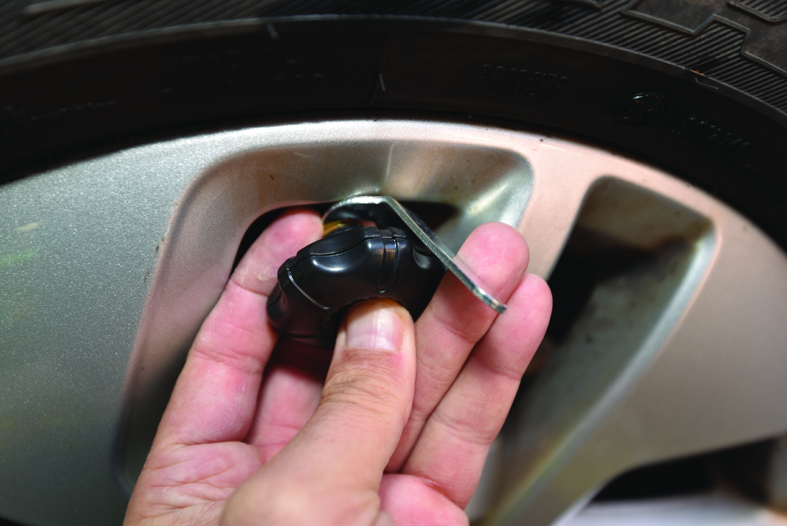
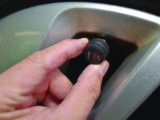
6.
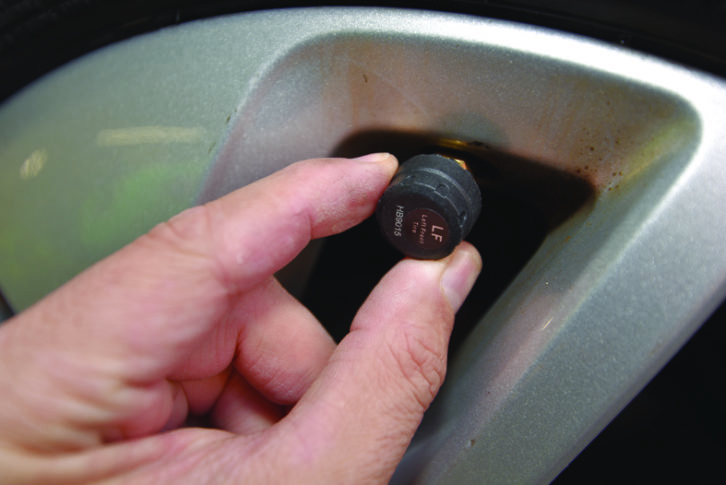
Next, add the tyre valve sensor and screw it on rapidly, until you can feel resistance and hear no air hissing.
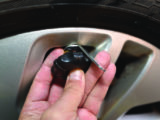
7.

Using the supplied spanner and plastic tool, wind up the brass nut to lock the sensor in place (two hands needed!)
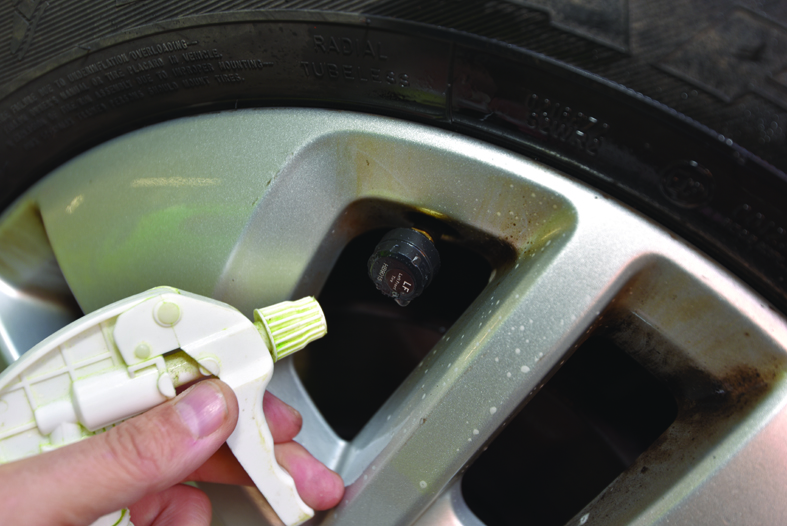
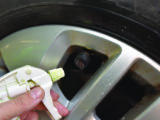
8.

With a plant sprayer filled with water and detergent, spray the sensor and ensure there are no bubbles (indicating an air leak). Tighten it if there are.
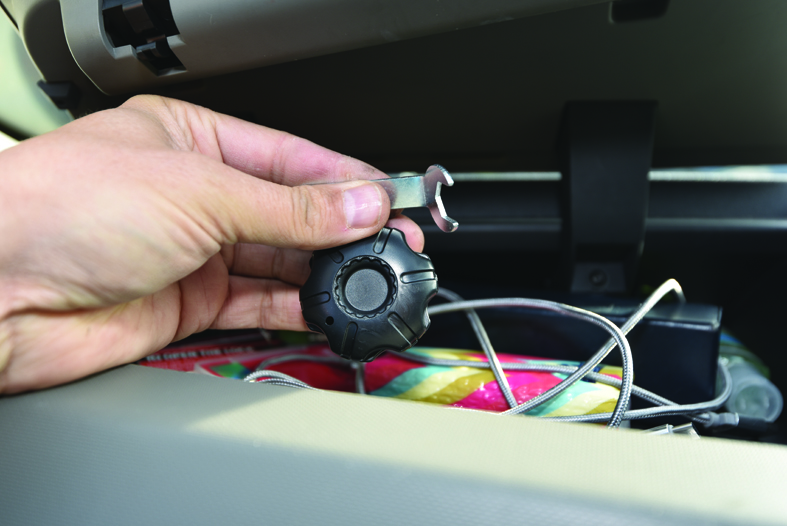
9.

Once you’ve attached all four sensors and checked for leaks, stash the spanner and plastic tool safely in your vehicle.
10.
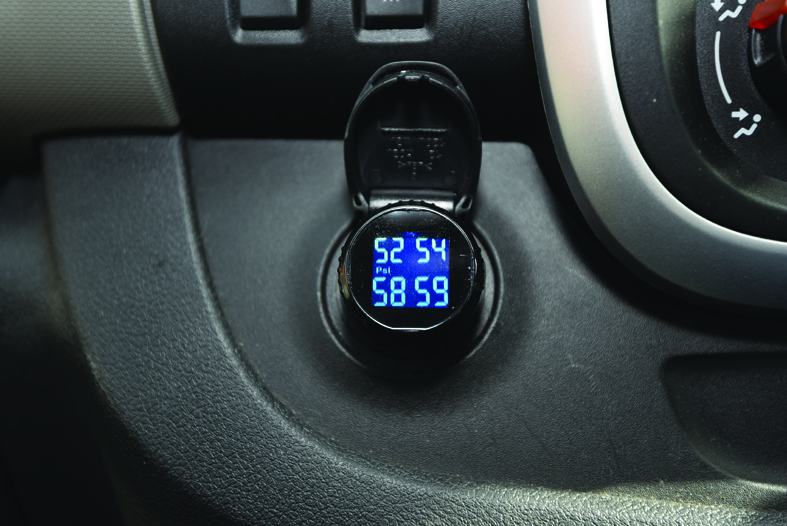
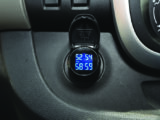
At this point, the display should be showing all four tyre pressures. In this case, one sensor wasn’t being read and a warning symbol was displayed…
11.
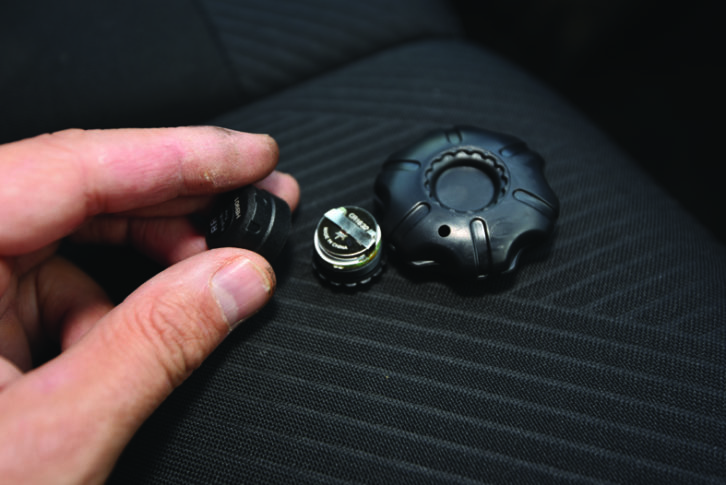
… but happily, the button cell batteries (CR1632, about £1) are easy to replace.
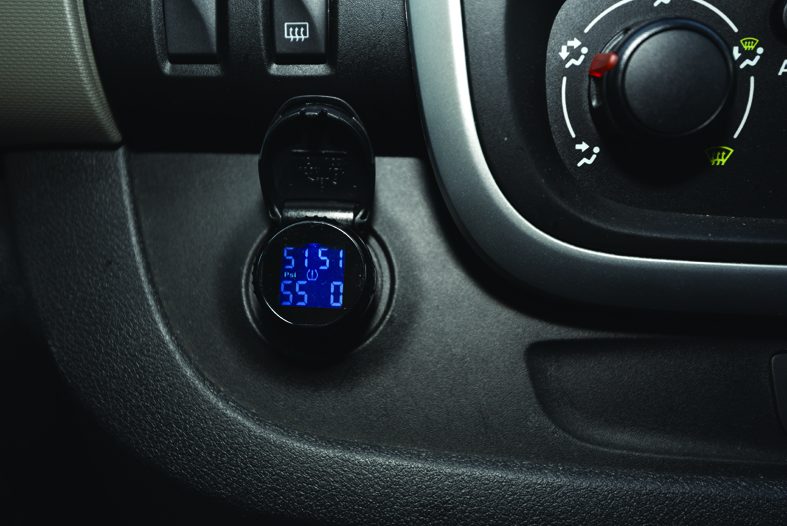
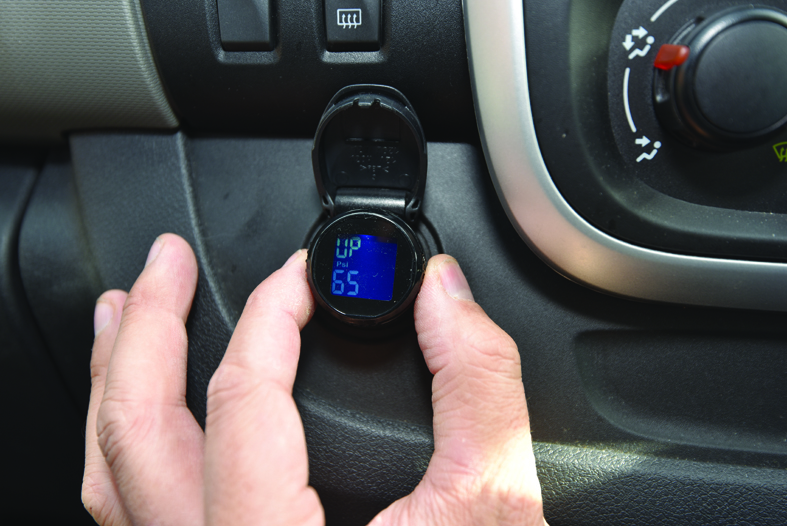
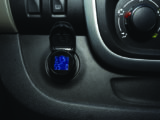
12.

The 12V socket display has a button on the side – press this for three seconds to enter Settings. I set high-pressure alert to 65psi and low-pressure to 29psi.
13.
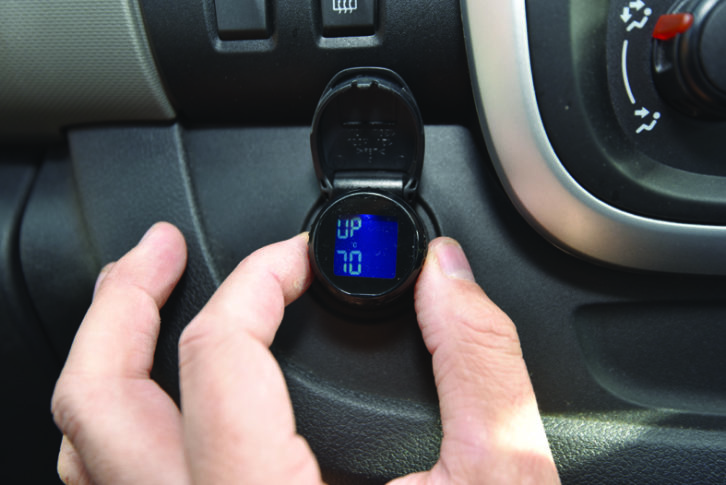
You can also set an alert for a high temperature – this was factory-set to 70°C, which seemed to be a reasonable figure, so was left unchanged.
14.

The tyre sensors will stop broadcasting any signal when the vehicle is parked up, and was again when the speed exceeds 12.4mph (20km/h).
15.
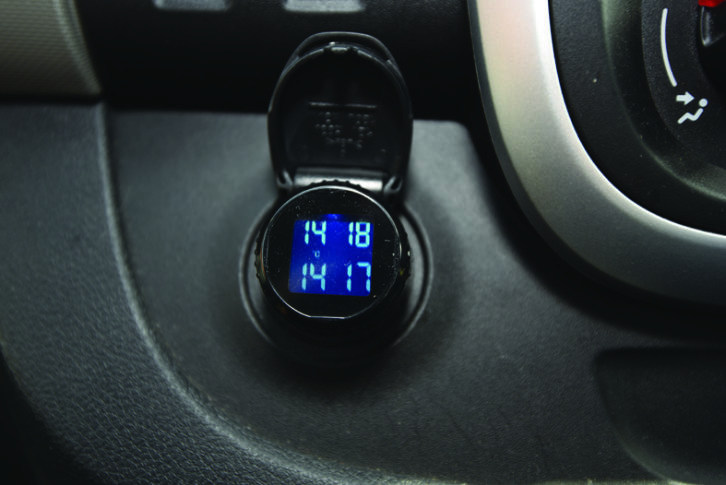
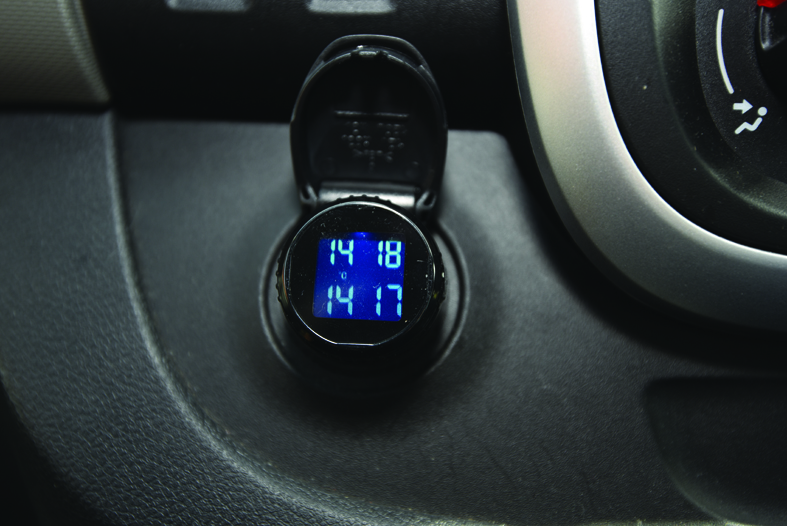
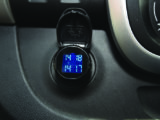
If you press the button on the side briefly, the temperature of each tyre will be displayed for a few seconds, before reverting back to the pressure reading.
If you liked this… READ THESE:
Spotlight on pre-departure checks
If you’ve enjoyed reading this article, why not get the latest news, reviews and features delivered direct to your door or inbox every month. Take advantage of our brilliant Practical Motorhome magazine SUBSCRIBERS’ OFFER and SIGN UP TO OUR NEWSLETTER for regular weekly updates on all things motorhome related.
Future Publishing Limited, the publisher of practicalmotorhome.com, provides the information in this article in good faith and makes no representation as to its completeness or accuracy. Individuals carrying out the instructions do so at their own risk and must exercise their independent judgement in determining the appropriateness of the advice to their circumstances. Individuals should take appropriate safety precautions and be aware of the risk of electrocution when dealing with electrical products. To the fullest extent permitted by law, neither Future nor its employees or agents shall have any liability in connection with the use of this information. You should check that any van warranty will not be affected before proceeding with DIY projects.
Underinflated tyres can heat up and if left unchecked, this can potentially lead to a blow-out