
The Carver Cascade gas-powered water heater was a revelation when introduced in the 1980s. It was efficient and neat, mounted under a seat or bunk.
Rather than having unsightly ‘on demand’ wall-mounted heaters, which generally only supplied hot water to the sink beneath which they were installed, the Carver Cascade could supply hot water to leisure vehicle kitchen sinks, washroom handbasins and – practically unheard of before – even showers!
Incorporating electricity
Several years later, the GE was launched, which incorporated an electric element as well as the gas heating. This was in response to the growing number of campsites with electric hook-ups.
Carver was eventually bought out by Truma and production of the Cascade GE ceased. Although it has been out of production for a number of years now, many leisure vehicles have them fitted, as they’ve proved to be a robust and reliable unit.
Indeed, the one we’re looking at here is of 1999 vintage, and apart from having a plastic union replaced when it was less than a year old, has required no repairs since, despite regular use.
While generally a reliable unit, on occasions, the gas burner can be a little difficult to ignite. I’ve usually found that cleaning the burner cures this (assuming that there’s plenty of gas in the cylinder, of course!) and it’s a very simple task.
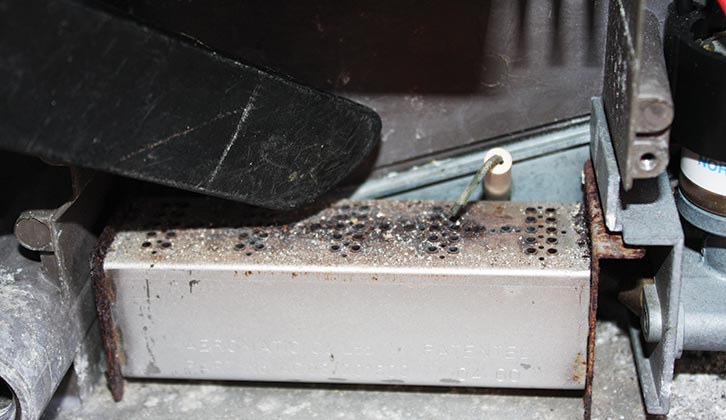
It’s surprising how much dirt and rust collects on the top and in some cases, blocks the burner holes, thus making it hard for the gas to flow.
During the following procedure, neither the gas nor the electricity supply will be touched, but in the interests of safety, it is always strongly advisable to disconnect the vehicle’s gas supply, disconnect/turn off any mains electricity supply, and disconnect the 12V battery.
The tools required for the task are minimal:
- A flat-bladed screwdriver
- A cross-headed screwdriver
- A wire brush
- A vacuum cleaner with nozzle attachment and/or a clean paintbrush
We started with a drained unit, and although this isn’t necessary to complete the burner cleaning, it’s probably worthwhile doing it just to make sure the various parts still operate freely.
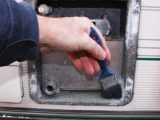
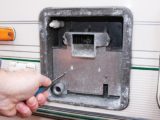
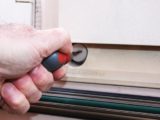
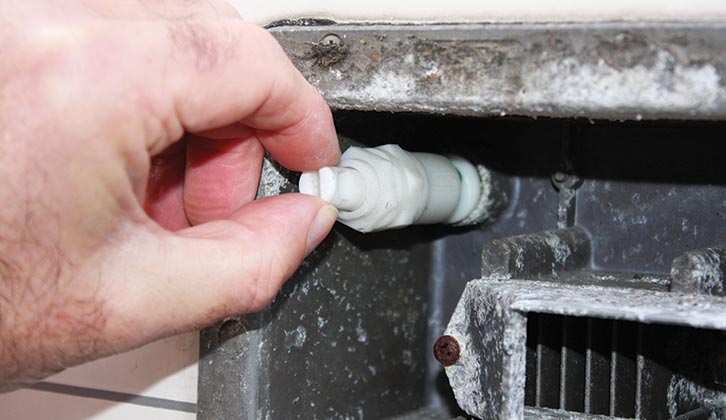
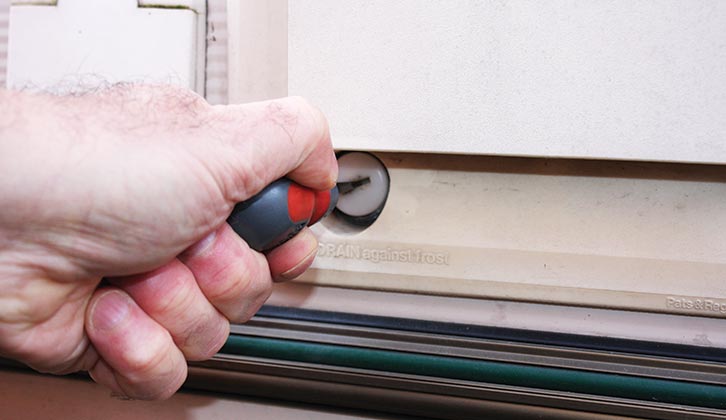
Starting inside the motorhome, open at least one of the hot taps. Then, using the flat-bladed screwdriver, remove the drain plug at the bottom left-hand corner of the Carver Cascade unit when viewed from outside the vehicle.
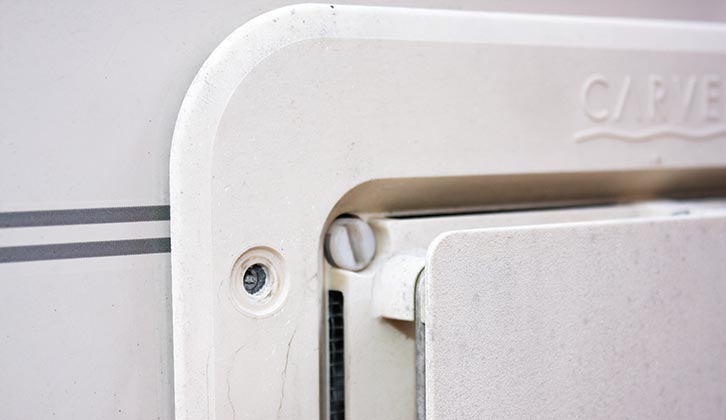
At the top left-hand corner, turn the Fast Drain valve through 90 degrees (into a position where the screwdriver slot is horizontal). It’s likely to take a good five minutes for the water to drain out completely, and sometimes it’s amazing how much grit will drain out, too.
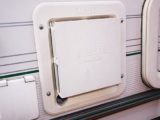
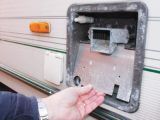
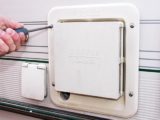
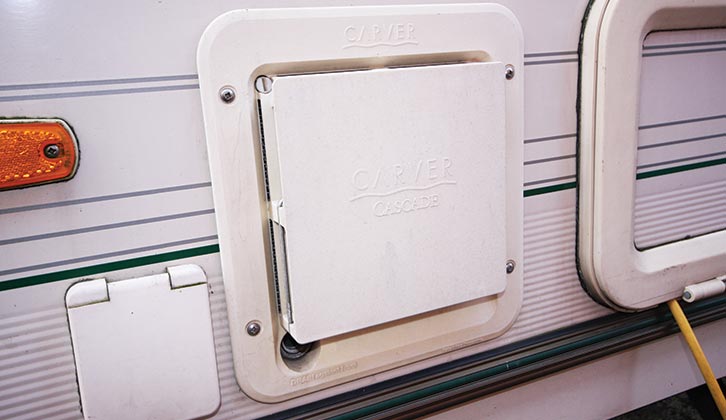
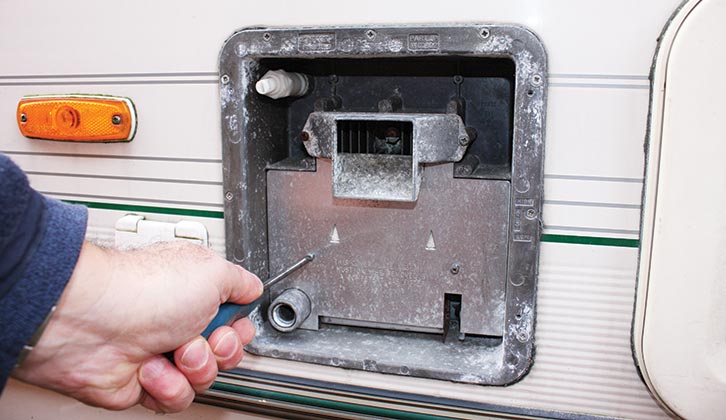
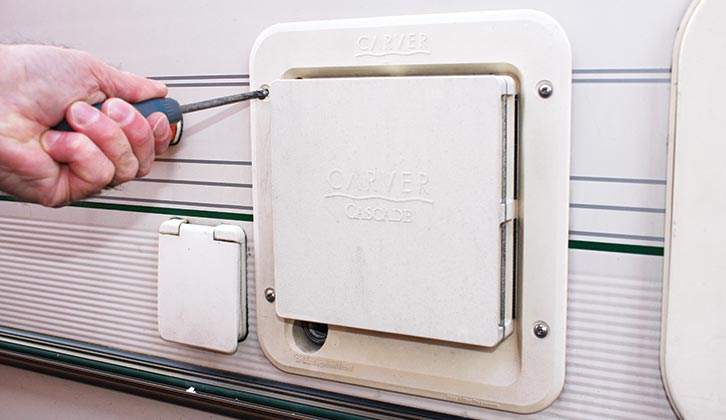
Once the water has drained away, remove the four crosshead screws holding the external cover. With them removed, the cover should just lift away. If there is any resistance, it’s
likely to be a bit of wayward sealant from when the unit was originally installed.
Before dismantling any further, using a wire brush, clean off any signs of surface corrosion from around the edge of the Cascade unit.
Be careful while doing this, though, as you don’t want to damage the ’van’s paintwork.
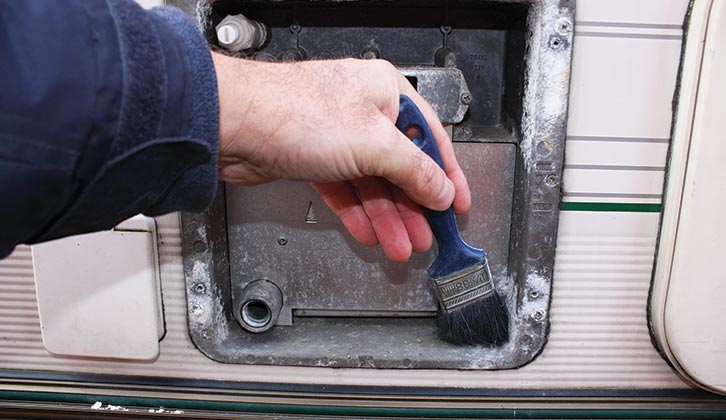
Then, using a vacuum cleaner (or a paintbrush if you’re not near a mains supply), clean away any loose dirt that lies behind the cover.
Clean away any debris
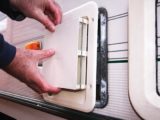
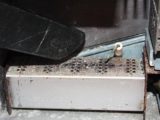
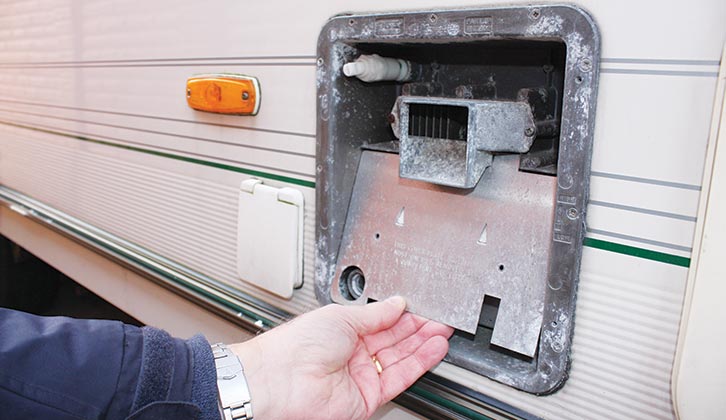
Next, remove the two crosshead screws that hold the vertical plate over the bottom half of the Cascade, and remove this plate.
You’ll probably find that you need to pull out the bottom edge first. Removing this will expose the gas burner, and unless that’s been cleaned recently, you’ll also probably be surprised at the amount of debris on top of the burner.
Carefully clean away the debris, using either the vacuum cleaner or a paintbrush, but while doing this, do be careful not to damage the igniter and its ceramic insulation.
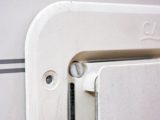
Once you’ve cleared out as much of the debris as possible, replace the plate and its screws, followed by the external cover, making sure that it slots over the Fast Drain valve. Now turn the Fast Drain valve through 90 degrees, so that its screwdriver slot is vertical.
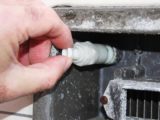
Before you replace the drain plug, check that the rubber ‘O’ ring on it is in good condition. If not, it will need replacing, because it’s likely to allow water to leak out of the heater. Luckily, new ones are still available.
Reconnect and check
Next, close the hot tap that had been opened for draining purposes. You’ll now need to reconnect the 12V battery and the gas supply.
Fill the heater fully with water, so that you’ll have a good supply of water running through the hot tap. Finally, turn on the water heater (on gas
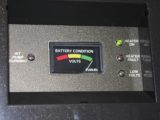
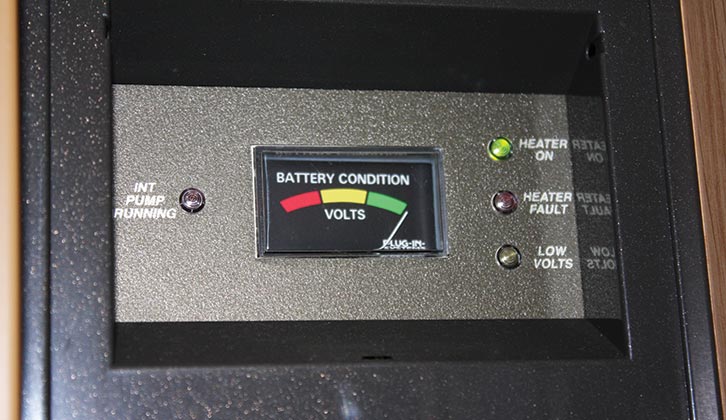
and not electricity) and check that it is operating correctly; that is, the green light on the control panel remains lit, and neither of the other lights illuminates. Now wait for the water to heat up to temperature. If all’s well, don’t forget to drain off the water again if you’re doing this over the winter period.
If there is a fault, and the unit doesn’t ignite, it’s highly unlikely that what you have just done is the issue. Obviously, make sure that there’s a good gas and 12V supply, but if there is, the problem is more likely to be with the burner’s control module. If that’s the case, you might be lucky and find a dealer who’s got one in stock.
There are a few companies who specialise in spares/repairs for the Carver Cascade GE, but it might be more cost-effective to source a used part from a specialist motorhome or caravan breaker.
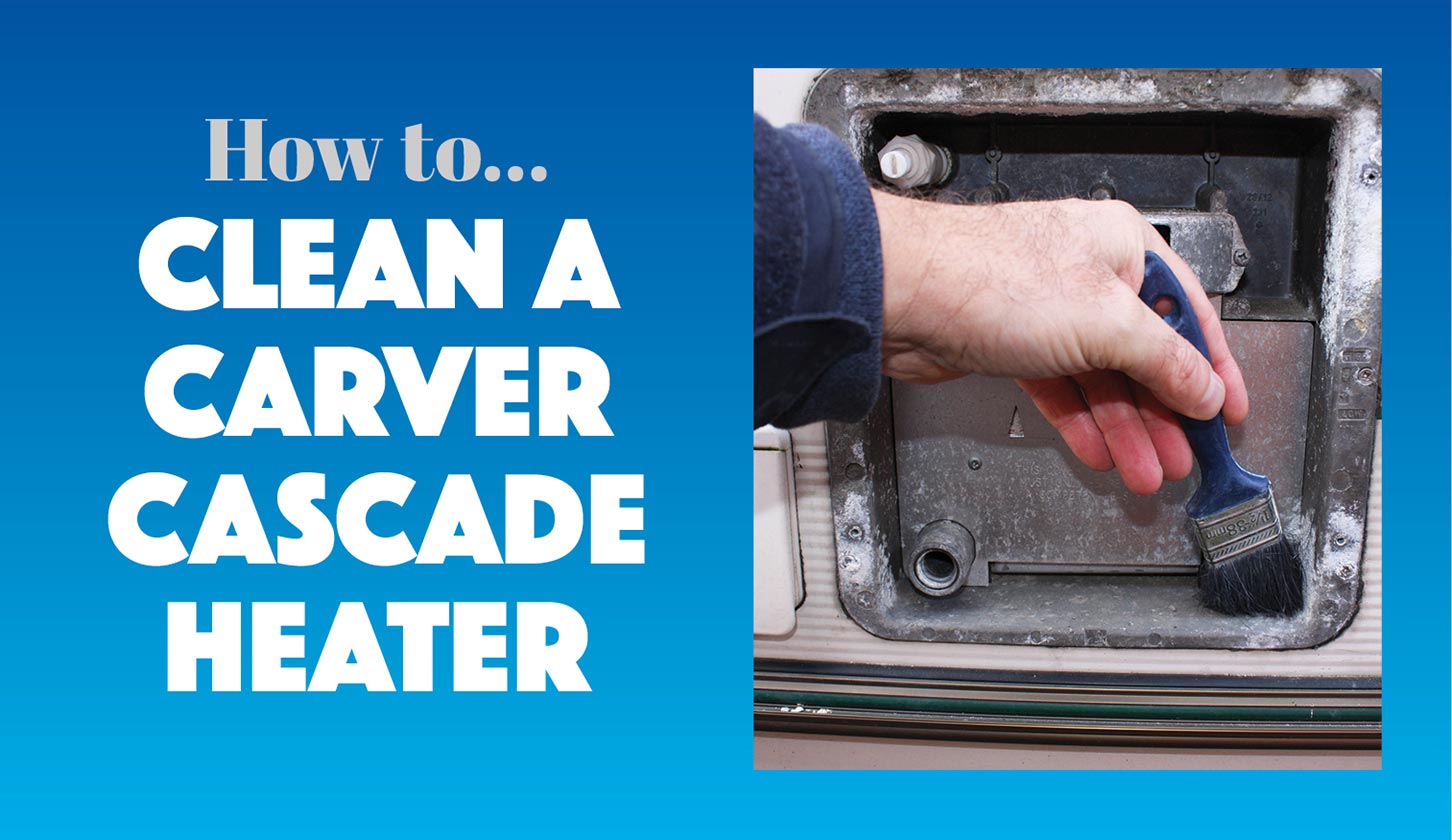
Step by step guide to cleaning the burner on a Carver Cascade GE heater:
1. Undo the two crosshead screws securing the bottom cover plate, and remove the plate.
2. Clean off any loose surface corrosion or dirt that may have accumulated behind the cover.
3. Ensure the Fast Drain valve turns freely. The slot must be horizontal to drain water.
4. Remove the four crosshead screws securing the external cover and take away the cover.

5. Using a flat-bladed screwdriver, remove drain plug (bottom left of cover).
6. Clean any debris from the burner using a vacuum cleaner with a nozzle attachment, or a paintbrush if you’re too far from a mains connection. Take care not to damage the igniter.
7. Replace the bottom cover and refit the screws keeping it in place
8. When refitting the external cover, make sure it slots over the Fast Drain valve.
9. Secure external cover with the four crosshead screws.
10. Check the rubber ‘O’ ring on the drain plug, taking care not to damage it.
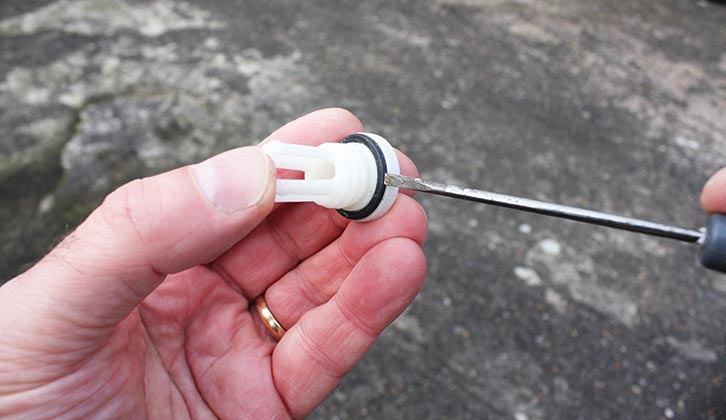
11. Replace drain plug using flat-bladed screwdriver, but don’t overtighten.
12. Control panel’s green indicator light should come on if heater is working.
Future Publishing Limited, the publisher of Practical Motorhome, provides the information in this article in good faith and makes no representation as to its completeness or accuracy. Individuals carrying out the instructions do so at their own risk and must exercise their independent judgement in determining the appropriateness of the advice to their circumstances. Individuals should take appropriate safety precautions and be aware of the risk of electrocution when dealing with electrical products. To the fullest extent permitted by law, neither Future nor its employees or agents shall have any liability in connection with the use of this information. Double check any warranty is not affected before proceeding.
If you enjoyed finding out about how to clean the burner on a Carver Cascade GE heater, take a look at these:
- We explain how you can fit a Truma 65 WP Solarset solar panel kit
- We tell you how to clean your Omnivent
If you’ve enjoyed reading this article, why not get the latest news, reviews and features delivered direct to your door or inbox every month. Take advantage of our brilliant Practical Motorhome magazine SUBSCRIBERS’ OFFER and SIGN UP TO OUR NEWSLETTER for regular weekly updates on all things motorhome related.