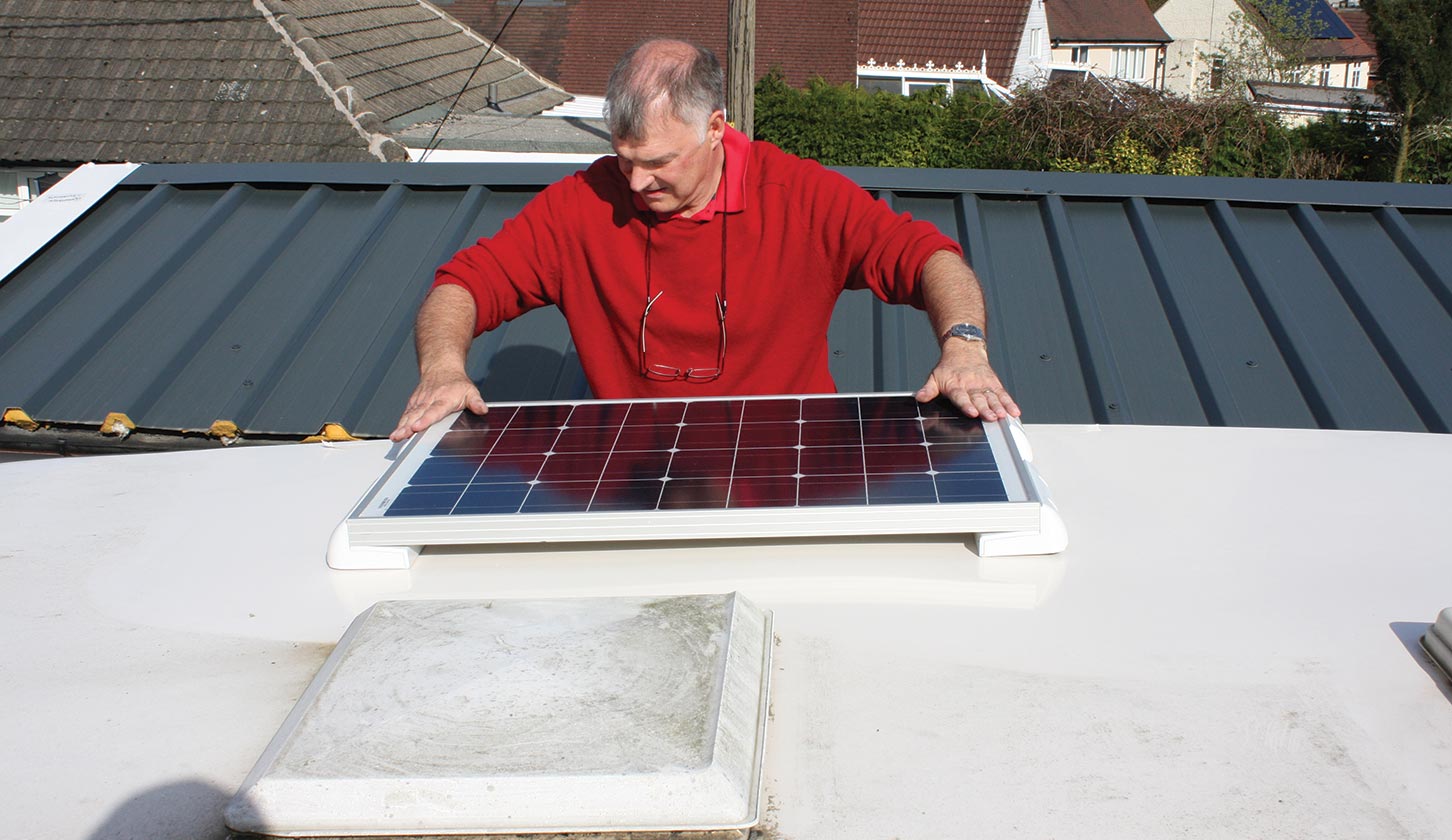


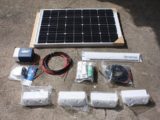


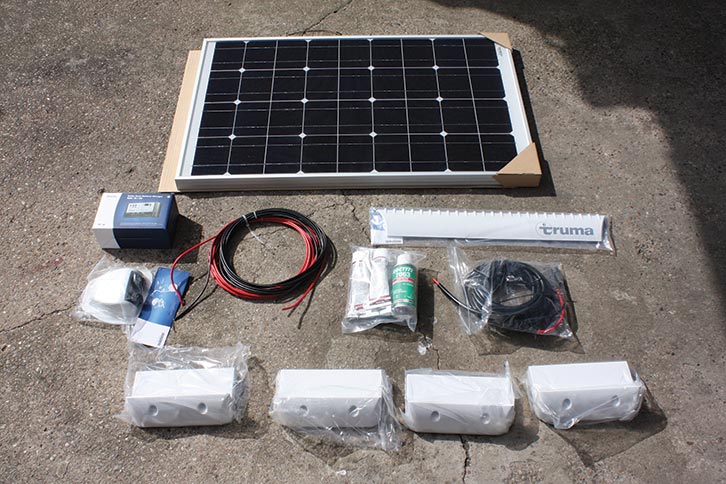
Motorhome solar panels are a useful addition to help keep your battery topped up. The good news is, fitting a solar panel is pretty straightforward, and here, we’ll explain how to fit one. In our case, we chose the Truma 65 Wp SolarSet kit.
First, you need to decide where to mount the panel, bearing in mind that you have to drill a hole in the roof to pass a fairly thick cable. That cable ends up connected to the battery via the control unit. Then, the tools required for the job are:
- Cleaning gear (bucket, sponge, cloths)
- White spirit
- Cleaning spray (included in the kit)
- Drill with 2mm to 12mm bits
- T25 Torx bit
- 24mm and 27mm open-ended spanners
- Electrical crimps (optional)
- Screwdrivers, wirecutters/trimmers
- Stanley type knife
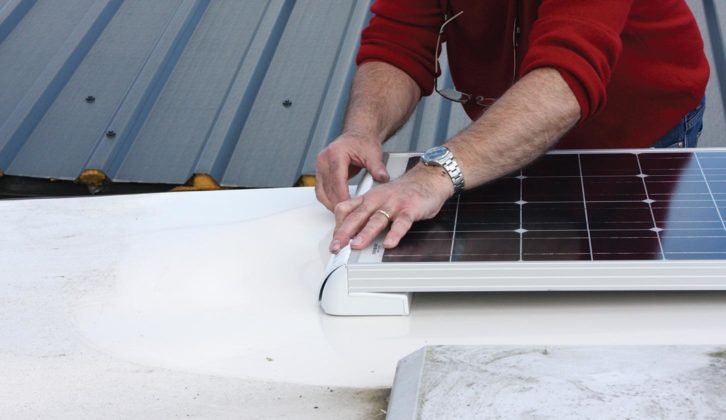
How to fit a solar panel: preparing the roof area
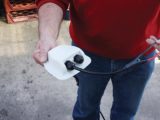
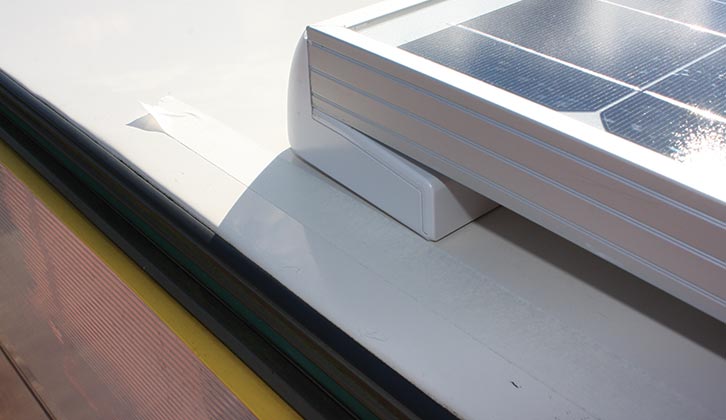
First, thoroughly clean the roof where the solar panel is going to sit. We washed and dried the area before cleaning it with white spirit and then the cleaning spray supplied. Then, from within a roof locker inside the ’van, a 2mm pilot hole was drilled through the roof, followed by a 12mm hole. Truma suggests using a 35mm hole cutter for this, but as the cable was quite flexible and didn’t lift the roof lead-through housing, the 12mm hole was sufficient in our case. Any burr around the hole was removed. Rather than trailing cables on the roof, we fitted the panel over the housing.
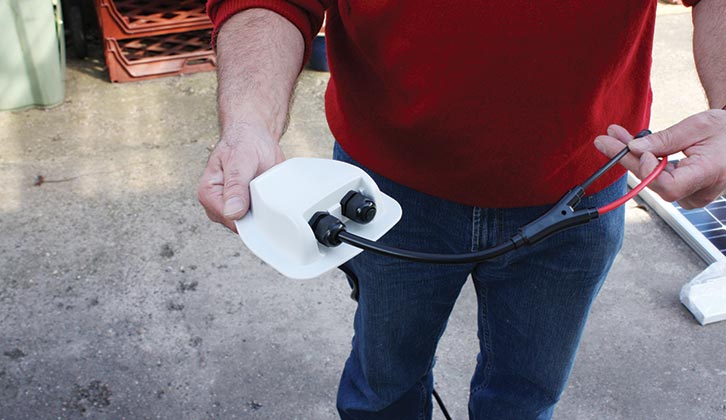
Next, take the cable (with the Y-connector and waterproof connections) and pass it through the roof lead-through housing, ensuring that the Y-connector is on the outside. You’ll need to leave about 50cm to the outside.
Tighten the screw connections around the cable where it passes into the housing, using the 24mm and 27mm spanners to ensure a watertight fit.
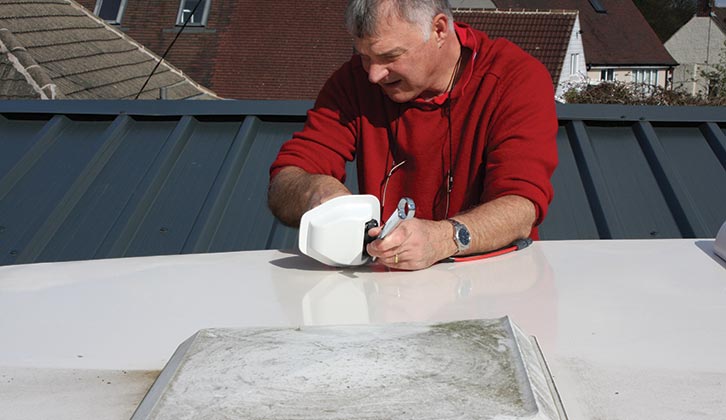
Once that’s done, pass the other end of the cable through the hole in the roof, leaving just enough for you to turn the housing over. Now comes the messy bit! You need to put a bead of the supplied adhesive around the base of the roof lead-through housing. It sounds simple, but one of our tubes split and leaked in the process.
When the adhesive is around the housing, feed the remaining cable through the roof until the housing sits over the hole and gently press the housing into place, ensuring no gaps in the adhesive, which needs to be 1-2mm thick.
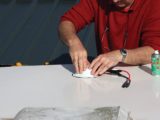
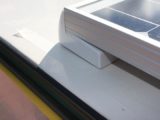
The feet then have to be attached to the solar panel. You could tape some of the cardboard packaging to the panel to protect it from damage. We marked the location for the holes and drilled 2mm pilot holes in the frame, before attaching the feet with the Torx-headed drilling-screws.
Working on the roof, connect the waterproof connections on the cables on the solar panel with the ones on the cable leading into the ’van, then clip/tie any loose cable under the panel.
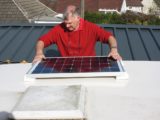
Attaching the panel
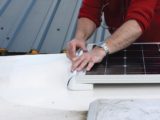
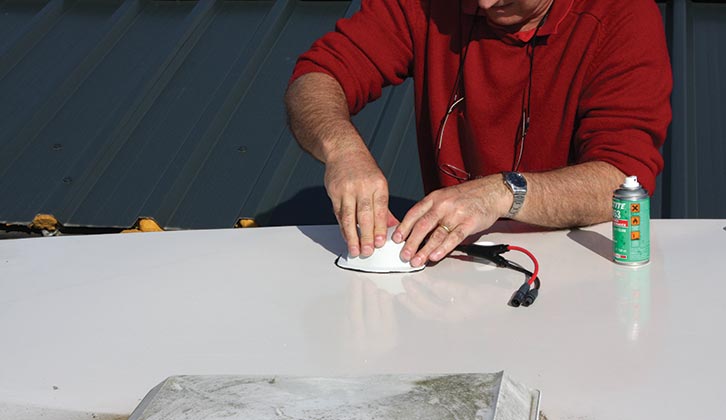
To ensure the panel is fitted squarely, mark the roof with a non-permanent pen or masking tape. Using the supplied adhesive, apply three parallel lines onto the undersides of the feet (follow the guide markings), before turning the unit over and putting it into position.
Press it down for a secure bond (don’t press too hard!), leaving a thickness of 1-2mm of adhesive. If any adhesive oozes out, wipe it away using a cloth and the supplied spray cleaner. Ideally, leave the unit for 24 hours to harden the adhesive before slotting the spoiler into place.
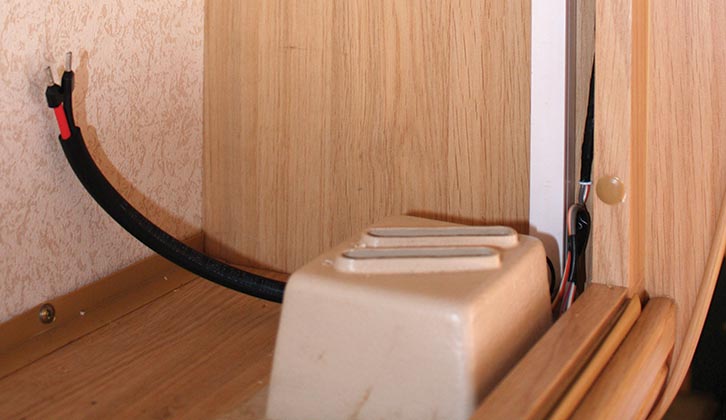
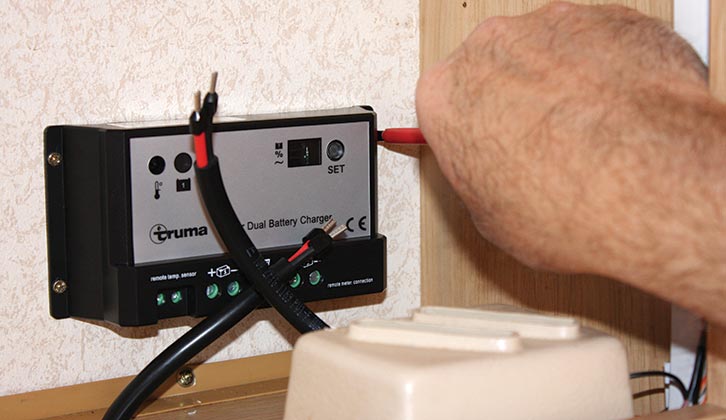
Positioning the control/charger
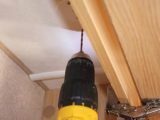
Working inside the ’van, you need to determine where the control/charger unit will be fitted. We mounted ours inside the overhead locker where the cable from the solar panel was fed in.
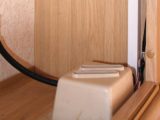
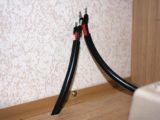
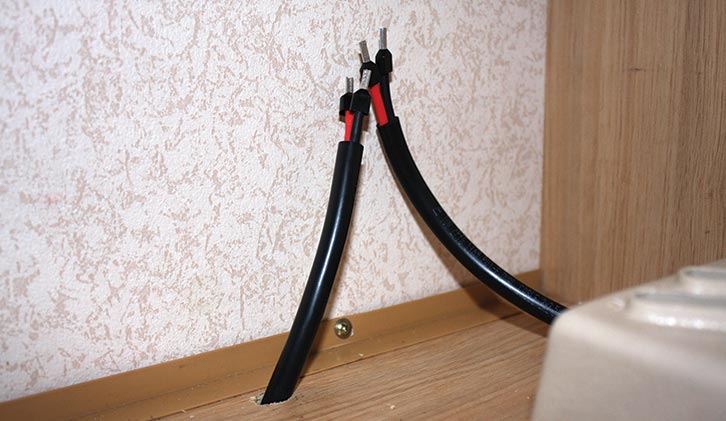
The cable was cut to the required length, then hidden inside self-adhesive trunking (available from any DIY store). The ends of the wires were fitted with electrical crimps.
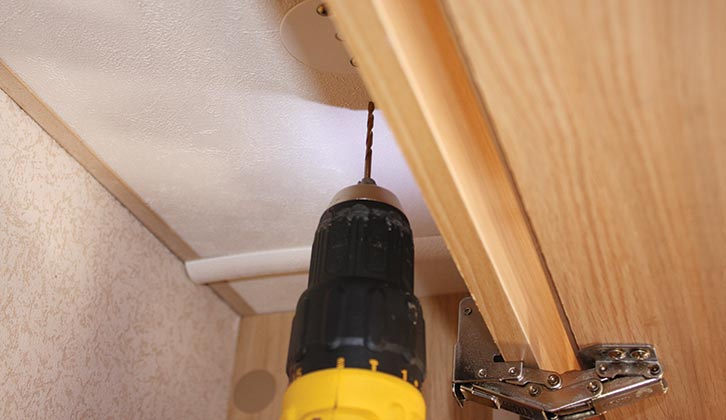
After drilling a 12mm hole through the bottom of the overhead locker (behind a pelmet), the rest of the cable was fed through and into the bed base below. More trunking was used to hide the cable. The wires in the end of the cable inside the locker were trimmed and fitted with electrical crimps.
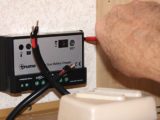
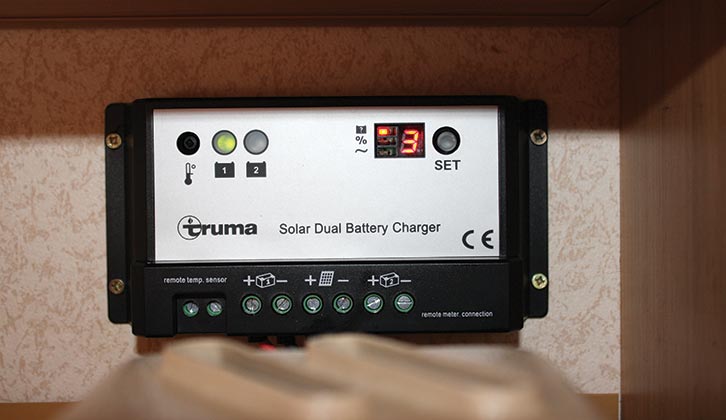
Next, the control/charger unit was secured to the wall of the ’van using short screws (make sure they aren’t long enough to penetrate the outside wall!) before the connections from the solar panel and the cable from the motorhome leisure battery were connected in the appropriate places (pictures on the unit show where these need to be made).
The cable leading to the battery was cable-tied to others along the floor of the bed base before being passed towards the battery’s location.
Next, cut the cable to the same length as the battery connections. With our battery connectors, we could attach the cables to the control/charger unit to them (as well as the ’van’s leads). As usual, the red wire attaches to the positive connection, the black to the negative. Cable-ties were used to keep things tidy.
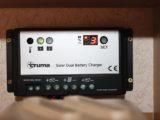
Checking the system
Truma recommends fitting the supplied temperature sensor, especially with AGM batteries. However, we were unable to do so owing to a lack of space next to the leisure battery.
With the battery connected, the system should now be operating, and the green LED illuminated. Following the instructions, you need to select the type of battery you have
(in our case H3 – liquid electrolyte), and the charging current distribution (specifically for motorhomes, because there’s another battery for starting the vehicle), and the pulse width modulation charging frequency. The default setting for this is 25Hz.
Job done! And now, hopefully, a flat leisure battery should be very much a thing of the past.

With thanks to Truma for supplying the SolarSet, and to my son James for his invaluable help
If you enjoyed finding out about how to fit a solar panel, why not check these projects out:
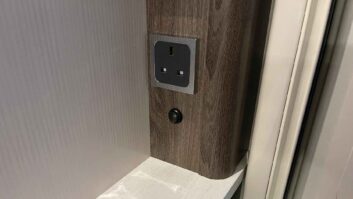
- We explain the process of how to fix an external TV antenna socket
- This project talks you through how to install QC 3.0 USB fast chargers and an 8-way fuse panel
Future Publishing Limited, the publisher of Practical Motorhome, provides the information in this article in good faith and makes no representation as to its completeness or accuracy. Individuals carrying out the instructions do so at their own risk and must exercise their independent judgement in determining the appropriateness of the advice to their circumstances. Individuals should take appropriate safety precautions and be aware of the risk of electrocution when dealing with electrical products. To the fullest extent permitted by law, neither Future nor its employees or agents shall have any liability in connection with the use of this information. Double check any warranty is not affected before proceeding.
If you’ve enjoyed reading this article, why not get the latest news, reviews and features delivered direct to your door or inbox every month. Take advantage of our brilliant Practical Motorhome magazine SUBSCRIBERS’ OFFER and SIGN UP TO OUR NEWSLETTER for regular weekly updates on all things motorhome related.