


I’ve noticed over the years that ‘electrics’ seem to fill many people with dread. I write for motorhome and kit car magazines, and the recurring anxiety is always about the ‘electrics’.
“Modern vehicles are far too complicated,” and “I wouldn’t know where to start!” are common responses. But the reality is, the habitation area of most motorhomes is largely made by human beings. So it can be fixed by a human.
Base vehicle electrics
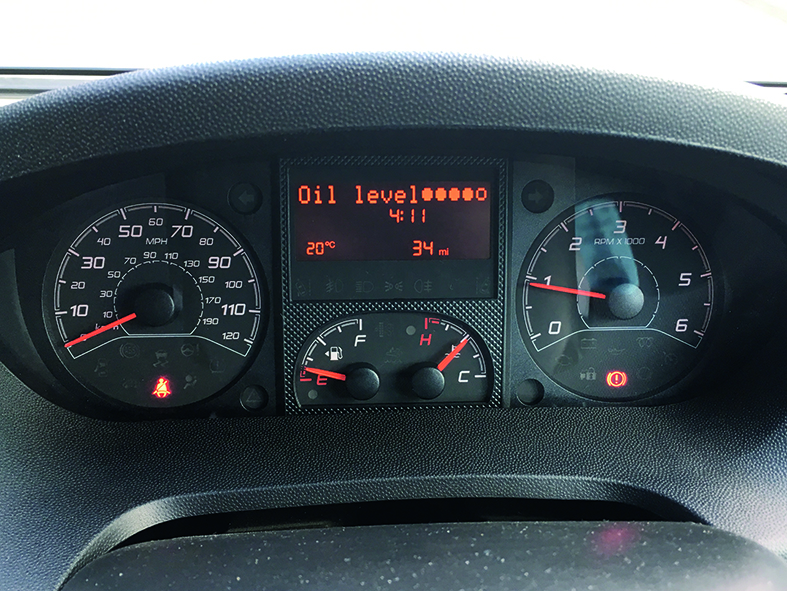
Now that I’ve said how easy modern vehicles are to work on, I’ll add a caveat. If your base vehicle was built in the past 10 years it probably has some form of CANBUS wiring in it.
This clever invention pulses digital signals down the wiring loom, with one wire carrying multiple bits of information. It’s designed to pare back the loom, to reduce cost and weight.
In the case of the most modern base vehicles, the best advice is to leave it to your main dealer – rather than a local garage – as they will have all of the latest diagnostic equipment, which is regularly updated. They also receive technical service bulletins from the manufacturer, detailing revised procedures and recall information.
Even if you did want to tackle your base vehicle electrics yourself, the cost of investing in the test equipment makes it fairly pointless. So leave that to a main dealer.
However, before you contact the dealership, it is always worth checking the base vehicle battery voltage and that the alternator is working. Low voltage can sometimes throw up random error codes that lead you on a wild goose chase.
For example, my Fiat Panda daily driver had some of the dash warning lights suddenly come on, indicating a power-steering fault and an immobiliser issue, yet the steering felt fine and it started with no problem.
Testing the battery, I found a duff cell in it and once replaced, all the warning lights disappeared. I could have wasted a lot of time stripping down the power-assisted steering, had I not checked.
So, step one of any base vehicle electrical issue: always start with a battery voltage check – we’ll show you how to do that later in this feature.
When it comes to habitation equipment, most of this is still analogue and fitted by humans. So you are just as capable of fixing it as anyone else, provided you have a little knowledge.
How does your motorhome work?
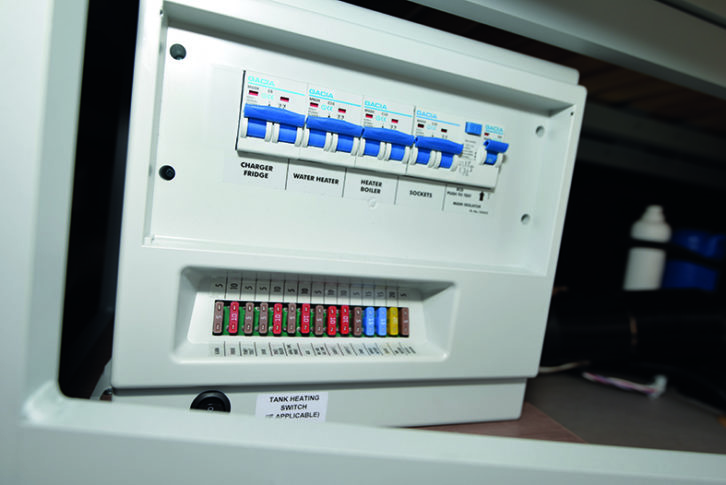
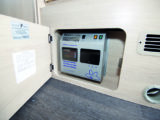
When you plug into electric hook-up, your ‘van becomes a large electrical extension lead for 230V mains. The 230V mains powers your motorhome sockets and a charger for your leisure batteries (and sometimes the vehicle battery, too).
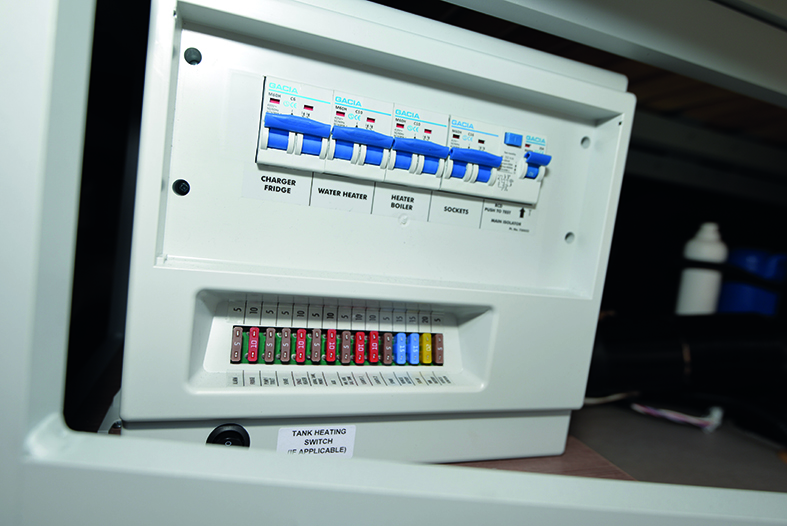
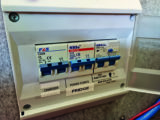
Other built-in 230V items may then be powered downstream of your consumer unit, such as an electric plate on a cooker, or a microwave. The consumer unit is simply a box that distributes the 230V power to the various appliances via a series of trip switches, called residual current devices (RCDs). These measure the difference in current between live and neutral wires and if they sense an imbalance – that is, current leaking to earth – instantly shut off the power. So if you accidentally cut through a wire, they will trip out to protect you from shock.
The mains hook-up bollard on the campsite will also have RCD protection – to protect the mains hook-up lead as well – giving you two layers of safety in your motorhome.

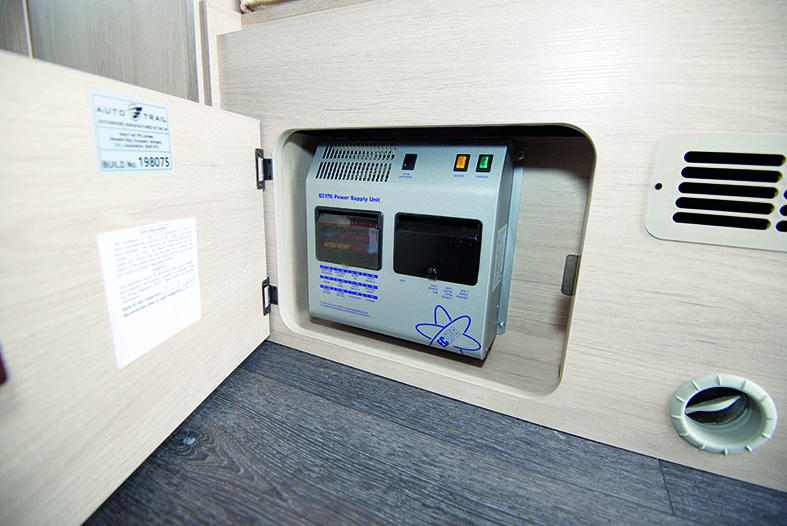
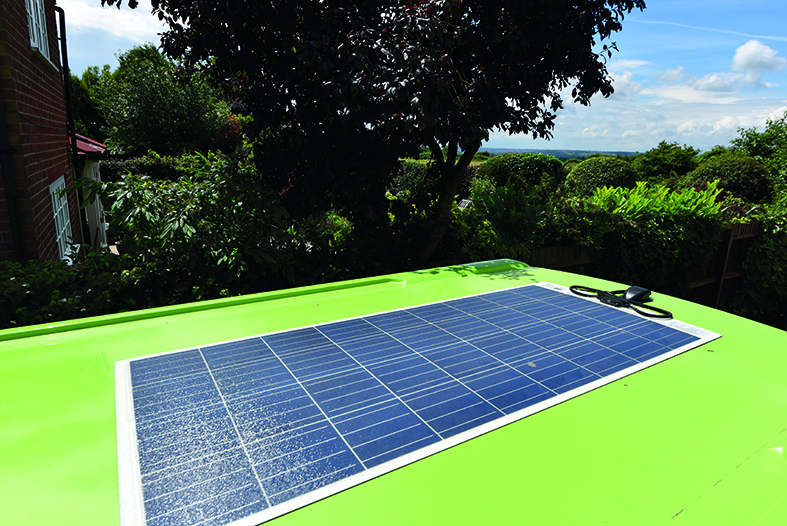
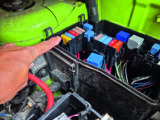
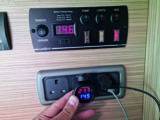
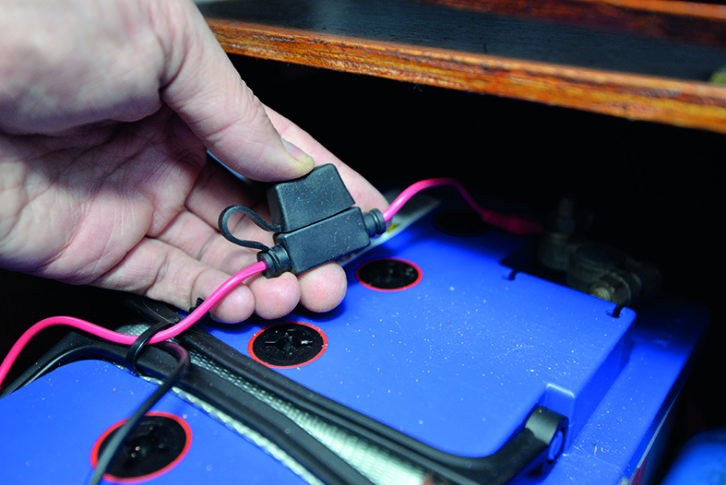
Your 12V leisure battery is recharged by the mains hook-up and may also be topped up via a solar panel or a battery-to-battery charger, depending on your vehicle’s equipment. The positive (red) terminal of the 12V battery then feeds the fusebox and each fuse protects one positive wire feeding one appliance. The black (negative or earth) terminal of the battery usually connects to the vehicle’s chassis or bodywork, to save wiring – all of your appliances will then connect to the negative terminal via the chassis, the bodywork or a return black wire – depending on which of these is most convenient.
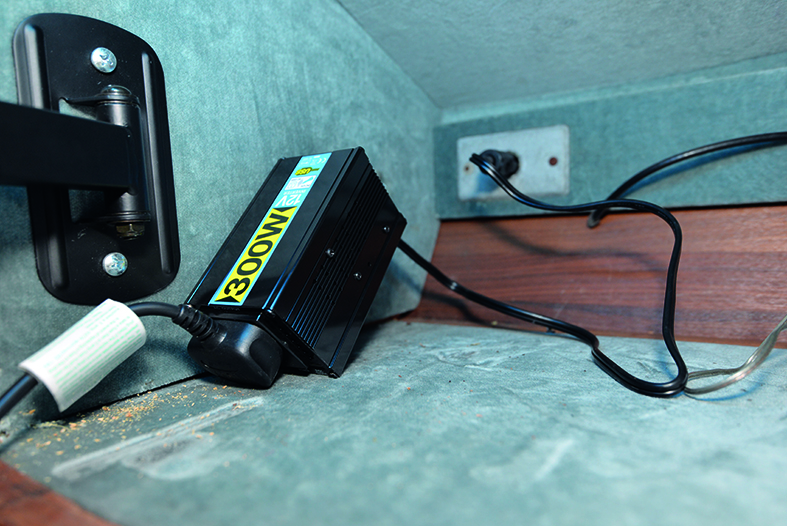
If you want to have mains power when you’re not plugged into a mains hook-up, you will need to use an inverter. These boxes convert 12V DC battery power to mains alternating 230V electricity. They must be fused because they consume massive current (powerful enough to weld with) and if you use high-power appliances (toaster, microwave, hairdryer and so on), they can flatten even the best leisure battery for a campervan in minutes.
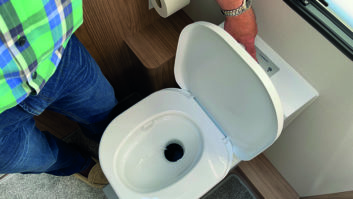
The crucial point here is that everything inside the habitation areas of your motorhome takes its power from the leisure battery From LEDs to the fridge control panel, the auto-ignition cooker and the toilet flush, it all requires 12V battery power to function. So conserving this power source, being aware of the voltage and being able to accurately measure and diagnose problems is enormously helpful.
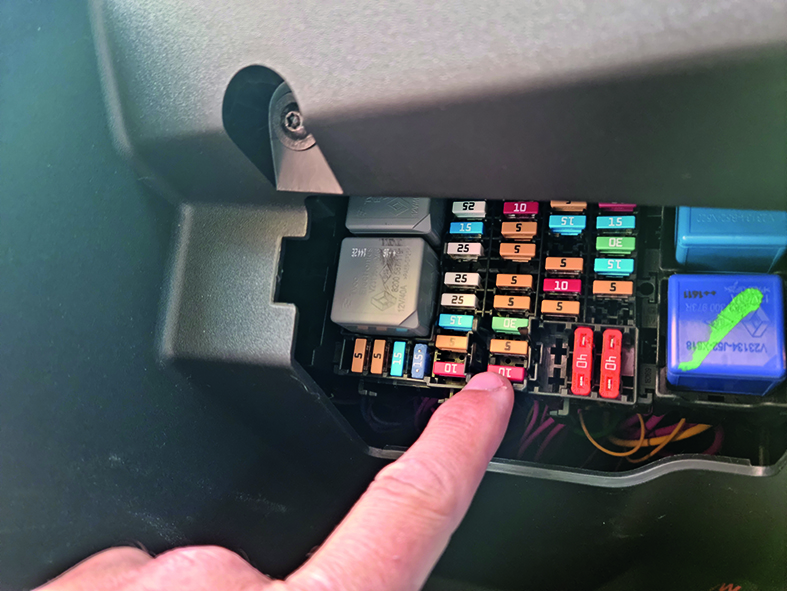
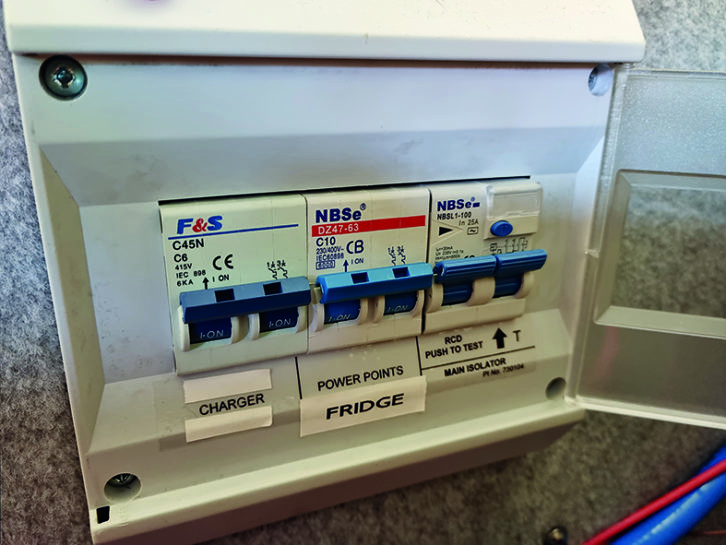
Why fuses matter
Before RCDs, all houses used fuse wire in their mains consumer units; The 12V systems still largely use fuses and they serve a very simple purpose – they protect the wiring from catching fire.
Every single item that is connected to a 12V battery on your vehicle – directly or indirectly – must be protected by its own fuse (especially inverters, which are easily the most dangerous 12V item in your vehicle).
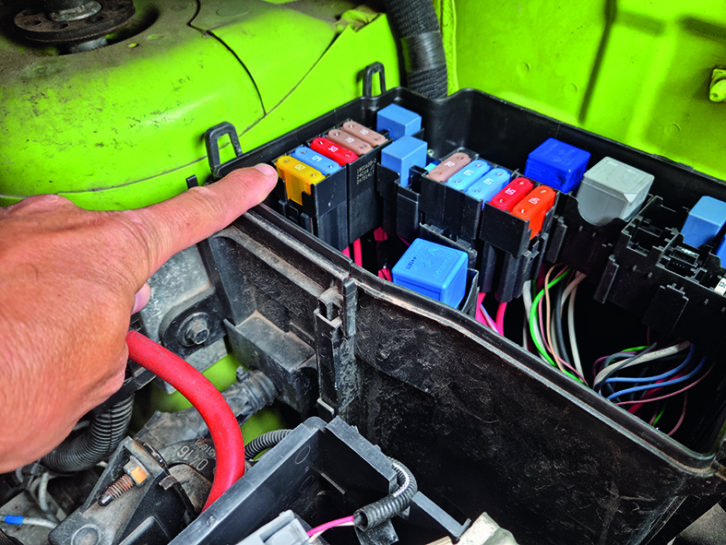
A fuse is simply a strip of metal that is designed to melt at a certain current level . How fast the fuse blows will depend on the over-current;. So a 10A fuse exposed to 11A may take a while to fail, while it will fail instantly, if 30A flows down it.
If you try to draw too much current down a wire (for example, you’ve plugged a large compressor into a 12V socket), the fuse will melt and sever the connection in the wire, preventing further current from flowing. They sometimes make a ‘pop’ sound when they fail.
Fuses must be replaced by one of an identical current rating – this is usually clearly labelled on the fusebox (for example, water pump 10A). Never fit a high-rated fuse.
So if you don’t fit a fuse, what would happen? Well, assuming the wire was correctly sized and you didn’t overload the circuit, it would be fine. However, if you plugged or wired in something that exceeded the wire’s capacity, it would get hot – like a kettle”s heating element – and eventually the insulation would melt, setting light to any nearby inflammables, such as fabric trim, plastic, rubber or wood.
It would carry on heating up until the current was removed (relighting even if you spray it with a fire extinguisher). Electrical fires are incredibly dangerous – so always fit fuses!
You can replace fuses with mini RCDs if you prefer, but these are far more expensive, so most people opt to carry a multipack of fuses. Always buy fuses from motorhome or vehicle dealers. Halfords, motor factors or similar, rather than less reputable suppliers – these are known to cause issues.
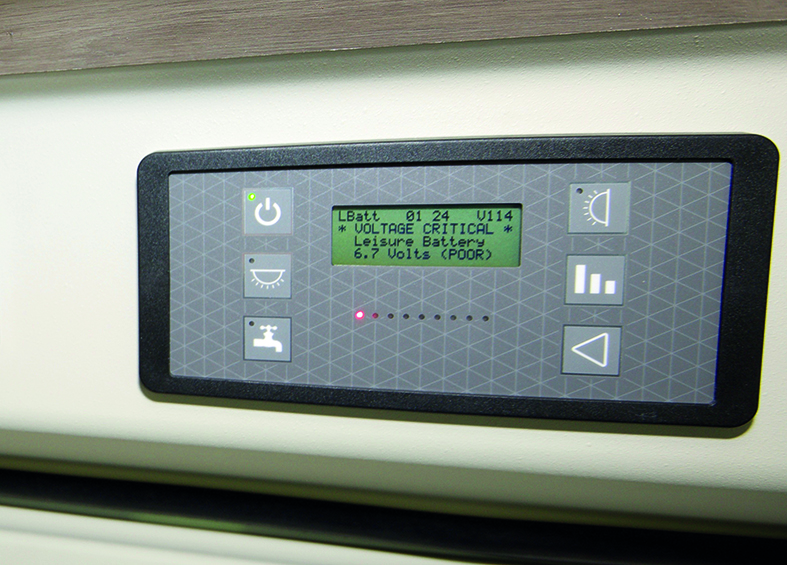
When is a battery flat?
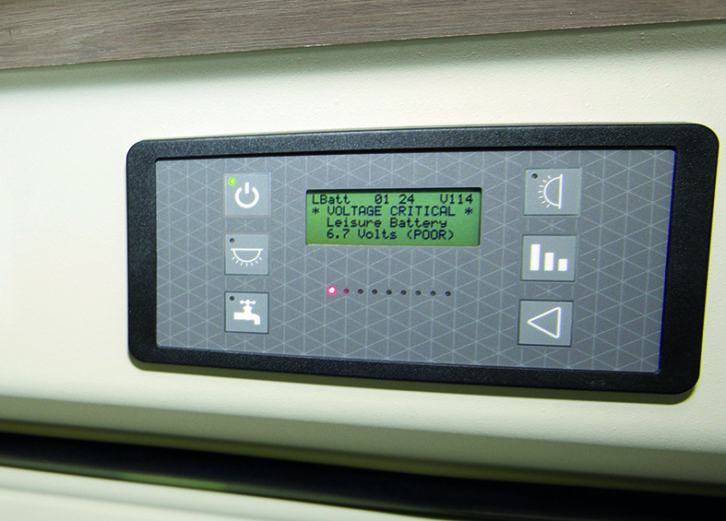
So when is a 12V battery flat? Rather surprisingly, it’s when it is at 12V. A fully charged lead-acid or AGM battery should measure 12.8-12.9V. When it’s half-flat, it will measure around 12.4V. Anything under 12V means that the battery needs to be recharged.
In motorhomes, a really low battery voltage can make other electrical items misbehave, including the control panel, so as with the base vehicle battery, the first step in diagnosing any electrical problem is accurate measurement of the battery voltage.
Basic electrical test kit
You don’t need to be an auto-electrician to use a digital multimeter, and any DIY store, Screwfix, Lidl or Aldi stocks them for around a tenner.
The key reason to become familiar with your multimeter is that ti gives you an independent method fo testing the battery, rather than relying on the control panel reading, which can go a bit haywire if battery voltage is low. Belt and braces!
The multimeter allows you to check battery voltage, if your battery has a slow drain acting on it (known as quiescent or parasitic drain), or any earth points are faulty. So how do you use one?

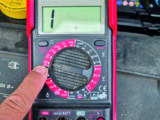
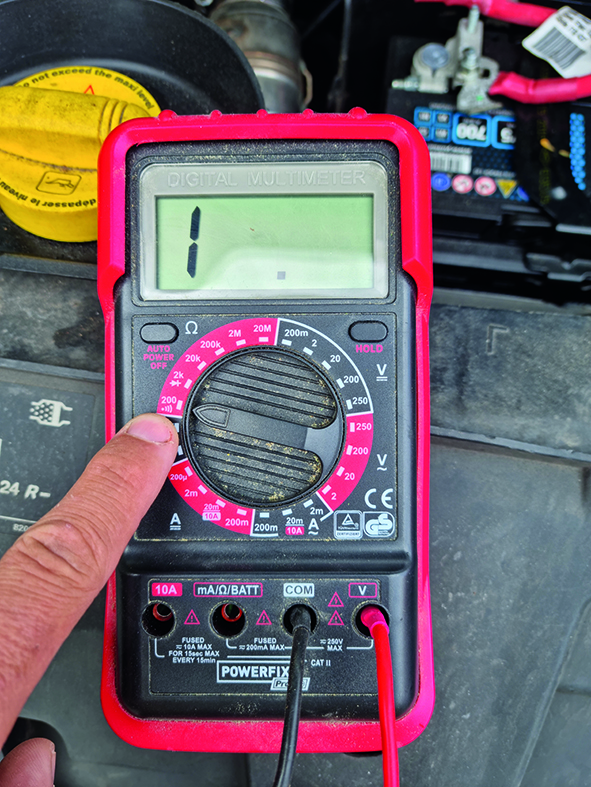
A digital multimeter has a screen, a dial and several terminals at the bottom for plugging in the test problem. The dial allows you to select voltage (in a variety of ranges – choose the one closest to what you’re measuring). ‘V’ indicates voltage, ‘A’ indicates current, and ‘Ω’ (the ohms symbol) indicates resistance.
Make sure that you’ve selected DC voltage and current – this is indicated by a flat line above dots. A wiggly line next to the dial ranges V or A symbols indicates AC mains – don’t use these.

You might also have an additional setting with a musical note marked next to it – this measures continuity and will beep if it detects electricity flowing form one test probe to the other. It is used to test if wires are broken. If it doesn’t beep you have a break in the wire (or a fuse has blown).
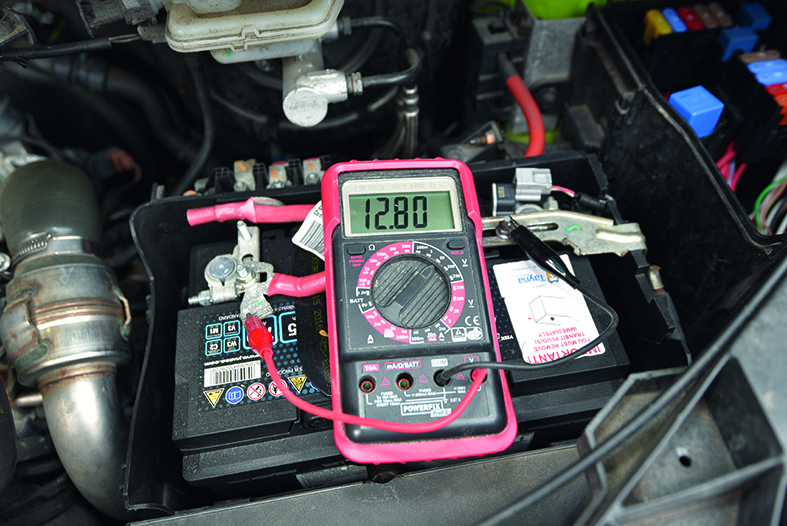
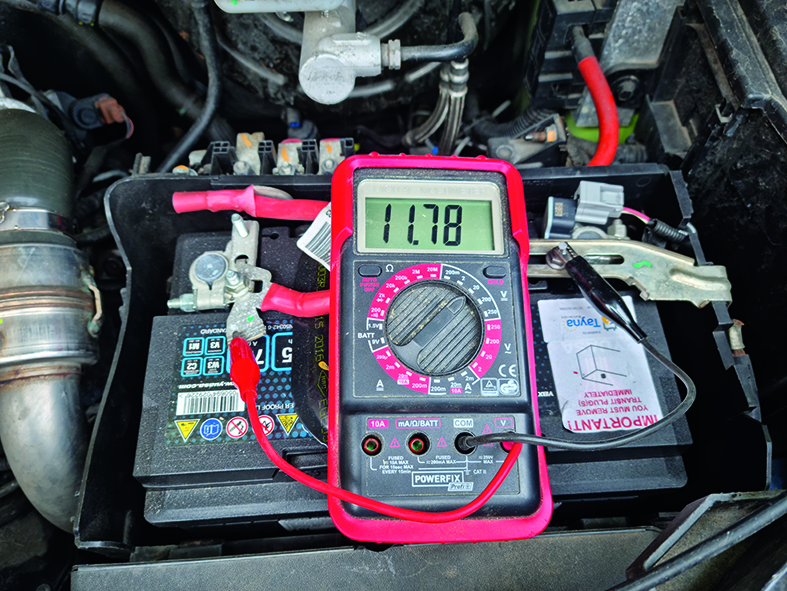
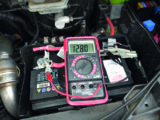
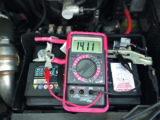
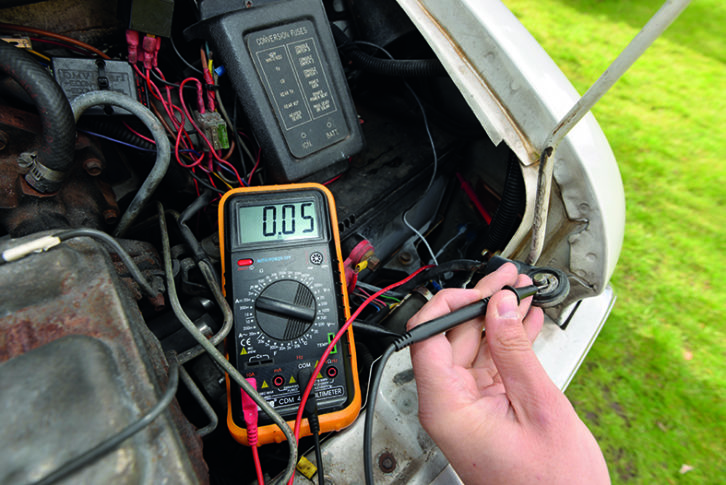
To test battery voltage, plug the red test probe into the terminal marked V, and the black probe into the ‘COM’ or black-market terminal, and set the dial range to 20V (if you set it wrong, the dial won’t blow it up, but you’ll get odd readings and will need to move it).
To check battery voltage, attach the red test probe tip to the positive (+) red terminal and the black test probe tip to the negative (-) black/earth terminal. Voltage should be zero to 12.9V. Under 12.4V means the battery needs recharging.
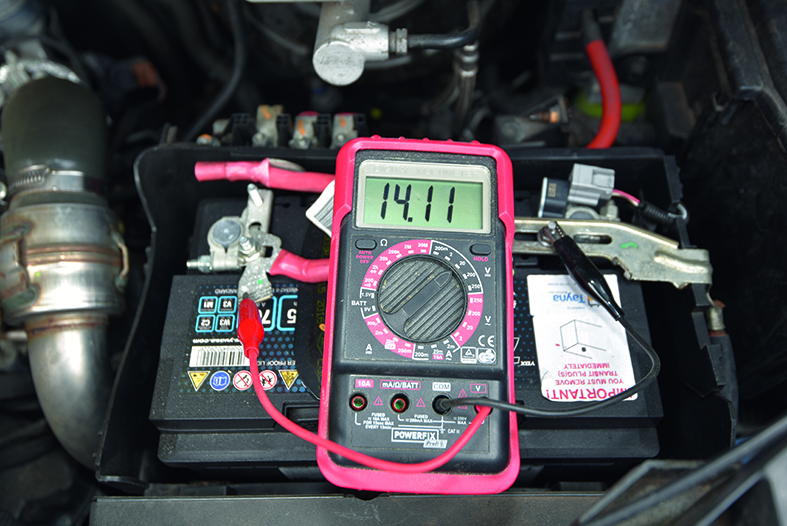
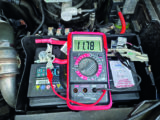
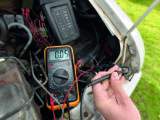
With the probes in the same place, you can test two other things. If it’s the base vehicle battery, start the engine, give the throttle a blip (it triggers the alternator) and remeasure the voltage.
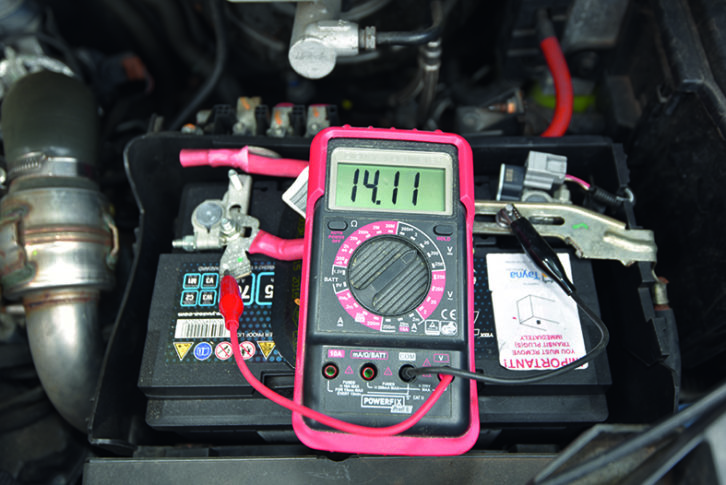
It should have risen to about 14V. This indicates the alternator is working. If the voltage doesn’t change, check the alternator. Smart alternators can switch on and off with engine load.
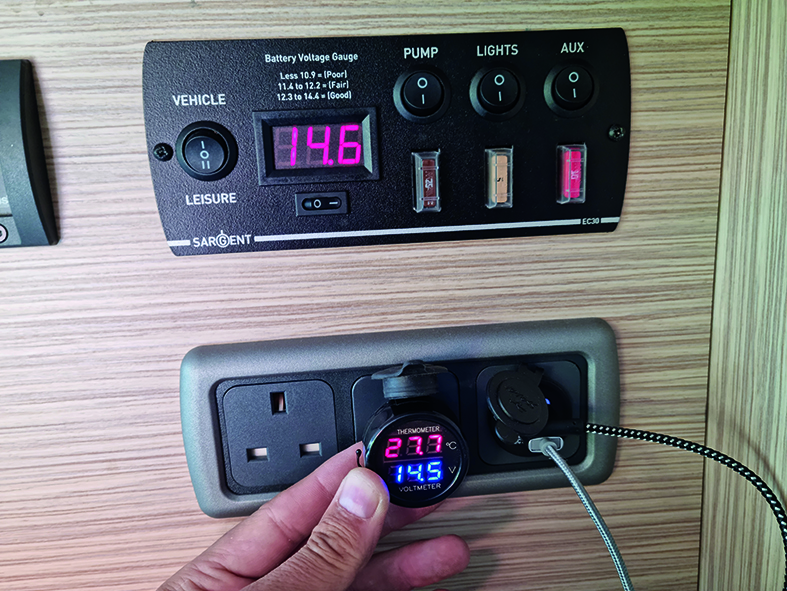
If you’re measuring the leisure battery, plug the vehicle into the mains and switch on the charging system. Remeasure the leisure battery voltage, which should have risen to around 13.8-14V, indicating the battery is being charged. If there’s no change in voltage with the mains hooked up and the charger on, the battery isn’t recharging; check the charger’s settings and that the fuse hasn’t blown. If you have a solar panel, you might need to isolate it to test the charging system (unless it’s night-time!).
When you switch on your engine, if the multimeter’s reading goes down, your vehicle might have a smart alternator fitted, which is not always on. Try putting on the main beam headlights. If the voltage immediately jumps up to around 14V, the vehicle has a smart alternator and it’s working fine. If it doesn’t change, your alternator isn’t working.
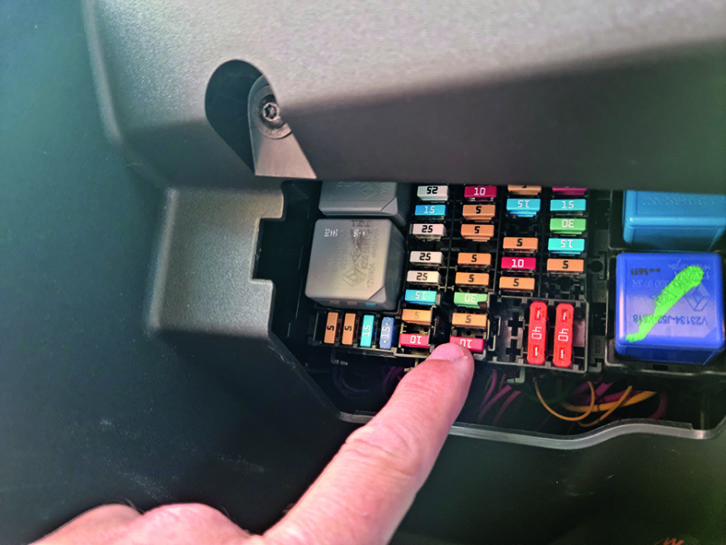
The other thing you can measure with your multimeter is if there are any slow drains on your battery. If you’re testing the vehicle battery, make sure you know your radio code (if you have one) and how to reset your alarm system if it is an aftermarket one.
Next, remove the negative lead on the battery. Make sure that all vehicle doors are shut, and the ignition and interior lights are off (do not open a door with the multimeter connected). Set your multimeter dial to read current ‘A’ and connect the red test probe to the 10A unfused connection.
Place one test probe tip on the negative terminal on the battery and the other on the removed terminal clamp. Make sure the terminal clamp doesn’t touch the battery terminal.
The current on modern vehicles can be as high as 85mA (0.085A) thanks to ECUs, and additional tracking devices or alarms naturally add a small drain. Any reading over 100mA needs investigating.
The way to check which circuit is causing the drain is to keep the multimeter connected and – with all internal lights switched off – to remove the fuses one at a time. Every time you remove a fuse, check the current reading. If it’s unchanged, replace the fuse and try another circuit. Eventually you’ll remove the fuse causing a significant drop in the current – the excessive drain is in that circuit.
All vehicle batteries have a small drain acting on them, so it’s important to keep the battery topped up over winter, by plugging into a mains conditioner or using a solar panel of at least 100W.
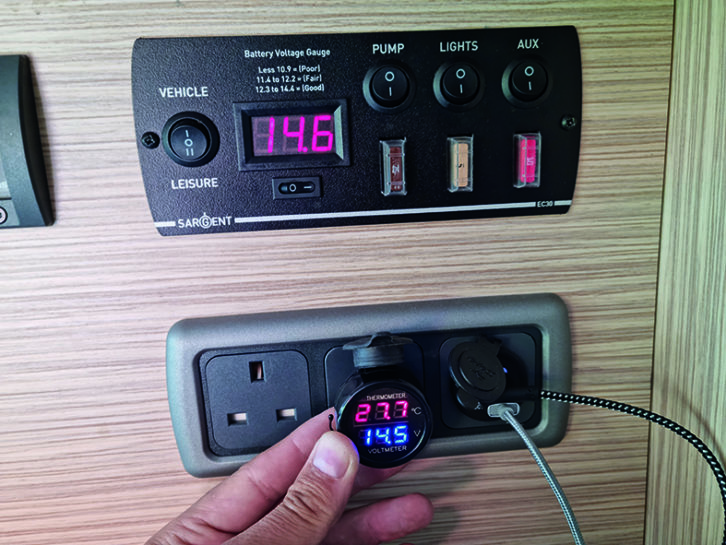
If this all sounds a bit complicated, a multimeter might not be for you. But at least buy yourself a plug-in voltmeter that can be used to test any 12V socket. They’re not as useful as a multimeter, but do provide you with a reliable second opinion about your battery voltage.
It’s a good idea to choose a voltmeter that other customers have recommended online, rather than just going for the cheapest model – you can buy one for as little as £2 shipped direct from abroad, but they are not always that accurate, so it’s well worth spending around a fiver and buying your voltmeter from a UK stockist.
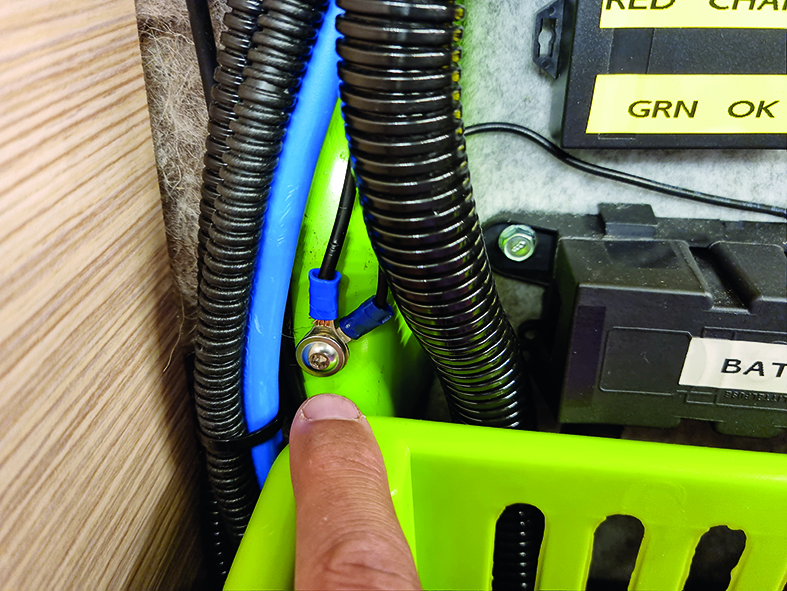
It’s all about the earths
After low voltage, the second most common electrical problem is probably a bad earth.
Vehicle and leisure batteries have their negative terminal connected to the chassis or bodywork. This avoids having to run lots of negative wires back to the batteries, saving weight and cost.
But either wires can break if the terminal or fixing goes rusty and, particularly with engine earths, they’re exposed to rainwater, road debris and vibration, which can make them conduit electricity poorly. So if your battery voltages are all healthy and you’ve checked the fuses but still have problems, then suspect an earth.
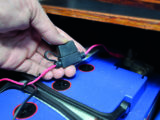
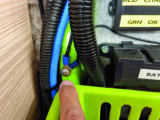
If your vehicle has starting difficulties, but the battery voltage seems fine, check your engine earth – somewhere on the engine or gearbox is a metal strap or cable connecting it to the bodywork. It’s a good idea to add a second earth strap between a handy bracket and bodywork fixing. You can buy earth straps pre-terminated in Halfords or order them online in custom lengths. Fit the largest-diameter cable you can – starter motors need a high current.
Most appliances will have a black earth wire coming out of them and attaching to the chassis at some point, so trace the wire and check where it meets the chassis.
In my campervan, the water pump stopped working and the earth bolt turned out to be very rusty. I removed the bolt, cleaned the terminal and fitted a stainless-steel bolt – the water pump now functions perfectly again.
If you can’t see where the black wire connects to the chassis, you can still check its efficiency by setting your multimeter to continuity (or resistance) and placing one probe on any metal earthed part of the appliance and the other probe on any exposed part of vehicle metalwork.
If the continuity range doesn’t;’t beep to indicate a good connection, or the resistance rating is high, you have a bad earth.
If you can’t get to the original wiring, you can always add an extra earth wire – use an existing bolt on the device and attach it to the vehicle bodywork via a ring terminal.
Where voltage can fool you

So you’ve tested your vehicle battery – it holds voltage and has no large drains – the alternator is working perfectly and the engine earths are all good. But the vehicle struggles to start as the starter motor tries to crank it over and rapidly flattens the battery.
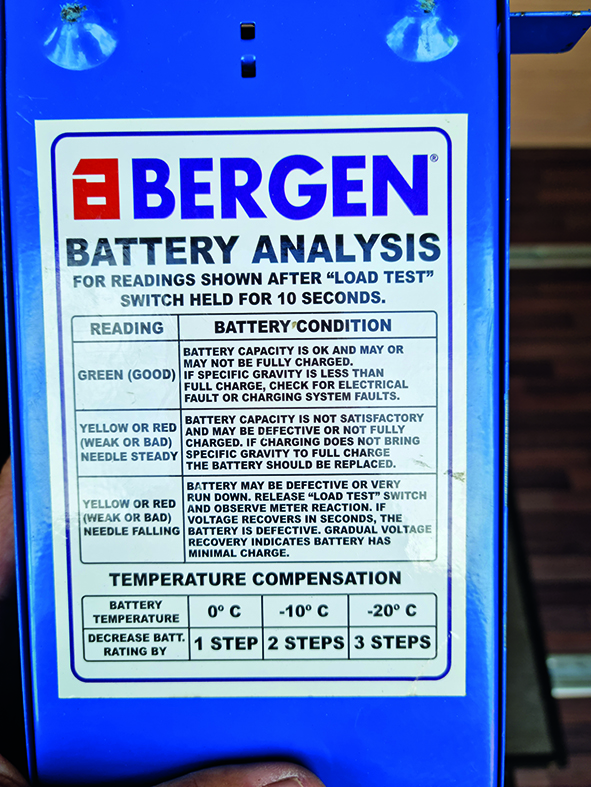
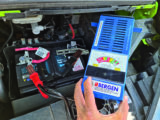
This is the limitation of a multimeter voltage test – it can’t replicate the high current load on start-up. You need to load-test the battery,. A basic load-tester, costing about £30, consists of a box holding a high-resistance load (usually a kettle-like heating element). You flick a switch and see if the battery can sustain a high load for 10 seconds. If not, the battery must be replaced.
Any local garage will have a load-tester or battery test machine, so if your battery checks out on voltage but still won’t start the vehicle, then it’s time to get it tested.
Checking 230V mains
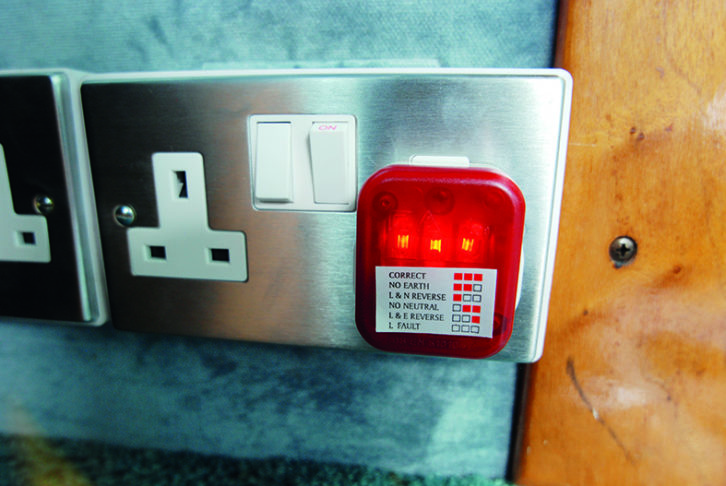
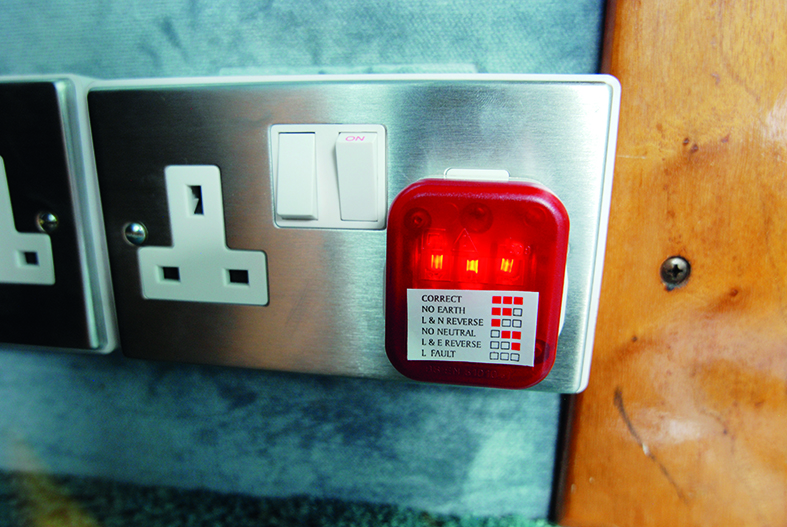
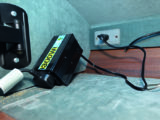
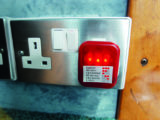
While you could purchase all manner of test equipment for your mains system, we would suggest keeping it simple and limiting the DIY to replacing plug fuses, checking the RCDs and using a basic mains test plug.
Test plugs are a normal three-pin plug with a series of LEDs (or a screen) built in. You simply plug it into a mains socket on your motorhome every time you plug into a mains hook-up. The screen, or LEDs, will then indicate if there are any problems with the mains supply.
If it indicates an earthing fault, that is serious, and you’ll need to unplug your mains hook-up lead and alert the campsite. With an earth fault, your RCDs might not function correctly and there is a risk of electric shock if any appliance has an issue or a cable is severed.
Occasionally, you will see ‘reversed polarity’ indicated on your test socket or control panel. This means the AC neutral and live wires are transposed in the mains supply. While most devices won’t notice and will function perfectly well, the problem is that even if the device is switched off at the plug socket (or switched off on the device), it might still have live electricity flowing through it., So unplug every device when it is not in use, or try using a different hook-up.
You can make up an adaptor lead to reverse the polarity correctly (or buy one), but take great care with these, because you don’t want to use one on a correctly wired socket. Make sure it’s clearly labelled or colour-coded, so it doesn’t;t get mixed up with any other adaptors.
Fault-finding
All electrical fault-finding needs to follow a set series of steps. The first thing to do is to identify the power source you’re dealing with.
If it’s 230V mains electricity (plug sockets, microwave and so on), check your consumer unit. Is the master switch on? Have any RCD trip switches been activated in the ;van or on the hook-up bollard? If so, reset them.
If they keep tripping out, try unplugging the last item you plugged into your motorhome mains socket (such as the toaster).
If the RCD does not trip out, that last item is going to be the culprit – for example, your toaster might be too powerful for the current available, or could even be faulty.
If you’re looking at the 12V system – either on the base vehicle or in the habitation area – step one is always to check the battery voltage.
Low battery voltage can cause any appliance in your motorhome to malfunction; so before you start ripping apart the fridge searching for a fault, check the battery voltage with a multimeter.
If appliances are not working correctly with a fully charged battery, then you need to check their supply fuse in the main fusebox.
If that is still good, then look for fuses on or around the individual appliance itself. If they are all intact, you’ll need to get a specialist dealer to look at the appliance – but at least you’ve saved them time diagnosing the problem.
Verdict

You have very little to fear with working on 12V electrics, and becoming familiar with a simple multimeter can save you not only money, but also time. Being able to identify problems yourself is rewarding, and can mean not having to seek out a motorhome dealer while you’re on holiday, or make a costly distress purchase.
Familiarising yourself with your fusebox and 230V mains consumer unit is essential to self-sufficient touring – a little homework pays dividends!
Something you may be wondering is “do campervans need electric hook-up?” – if this applies to you, don’t miss our guide, where we explain all you need to know.
If you liked this…. READ THESE:
Spotlight on Leisure Batteries
Troubleshoot your water system
Best motorhome for full-time living in 2022
If you’ve enjoyed reading this article, why not get the latest news, reviews and features delivered direct to your door or inbox every month. Take advantage of our brilliant Practical Motorhome magazine SUBSCRIBERS’ OFFER and SIGN UP TO OUR NEWSLETTER for regular weekly updates on all things motorhome related.
Future Publishing Limited, the publisher of practicalmotorhome.com, provides the information in this article in good faith and makes no representation as to its completeness or accuracy. Individuals carrying out the instructions do so at their own risk and must exercise their independent judgement in determining the appropriateness of the advice to their circumstances. Individuals should take appropriate safety precautions and be aware of the risk of electrocution when dealing with electrical products. To the fullest extent permitted by law, neither Future nor its employees or agents shall have any liability in connection with the use of this information. You should check that any van warranty will not be affected before proceeding with DIY projects.
All vehicle batteries have a small drain acting on them, so it’s important to keep the battery topped up over winter, either by plugging into a mains conditioner or using a solar panel