


There’s a bit of a knowledge gap about solar panels. Just whacking a 130W panel on your ‘van will not give limitless power. It’s not going to power a large inverter or run the toaster.
They’re best viewed as a battery top-up that works at its peak in summer. In winter, they’re not that useful as they don’t output much power.
So they’re not the answer to off-grid winter touring. Understanding their limitations and uses is the key to getting the most out of a solar panel.
Despite those winter limitations, however, a solar panel is a great addition to your vehicle and every motorhome should have one – not least because once it is fitted, you don’t have to do anything, apart from clean it.
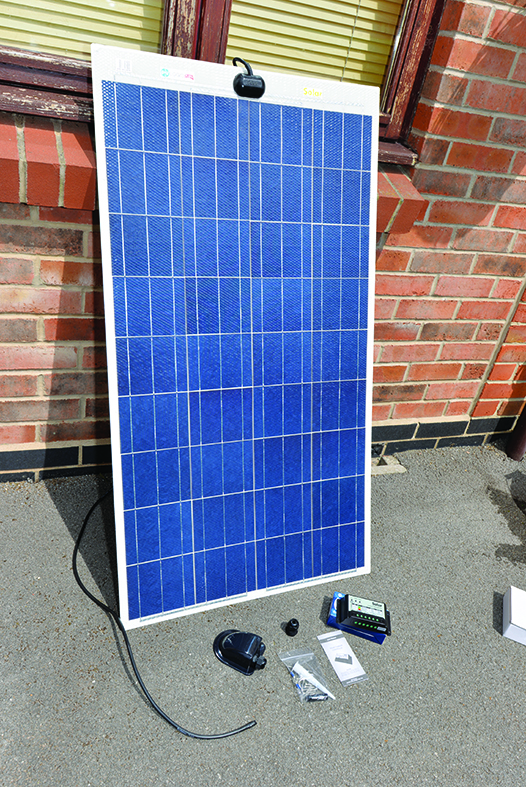
Thanks to a market saturated in cheap panels, you can buy a basic 100W rigid solar panel and regulator – with everything needed to attach to a battery – for around £120. Larger-capacity panels or flexible types can cost a little more, but you’ll typically pay £100 to £200 per 100W with a rigid panel and £200 to £300 per 100W for a semi-flexible one.
Before you fit the panel
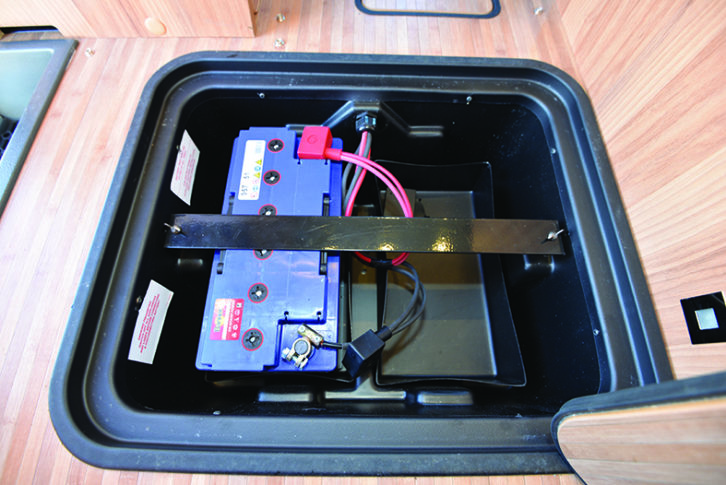
Fitting a solar panel is not the first thing that you should do to extend your wild camping or off-grid ability. Fitting a second leisure battery (or two) should always be the first step. Ideally, you want to add an identical battery, so match the brand, capacity, age and size. Two leisure batteries will instantly double your off-grid capability.
All motorhome systems are powered by 12V – think of your leisure battery as a bathtub full of water. When you switch everything on in your ‘van (especially high-current items such as large inverters running microwaves), it’s like pulling out the plug and watching the water rush away.
Connecting to the mains hook-up is rather like switching on the bath taps – most chargers output 15-30A, which is plenty of current to keep on top of any fridge, heating systems or lighting circuit. But you do need to avoid having any high-drain items with just a single battery.
The big drains
Anything that heats, cools, pumps or contains a fan will be a large consumer of current. Most standard motorhome appliances, such as fridges and heaters, are matched to the charging system and leisure battery, so will often cope well when plugged into the hook-up. Few of these items need more than 10A, so they can last for quite a while off the hook-up.
The ‘100Ah’ rating labelled on a battery means it can output around 100A for an hour at 20°C. However, in practice, it can’t. For lead-acid, it’s safest to assume a 50% depth of discharge (they can be damaged at 100%), so it can supply 50A for an hour. As capacity reduces with temperature (and it’s rarely 20°C in the UK), this also impacts capacity. So typically, a 100Ah battery provides just under 50A for an hour, or 5A for 10 hours.
It’s the accessories you need to be careful with, especially large inverters and air-con units fitted in the habitation area. Large inverters are the heaviest current consumers of your leisure battery, so use them sparingly. To give you an idea, the 1500W inverter in my campervan will use around 105A when I’m using my coffee machine. This would flatten a 100Ah battery in less than half an hour if it ran continuously.
As the Nespresso machine only takes about a minute to heat up and produce a coffee, I can get away with this massive drain – it only happens for a short duration. But make 30 drinks in a row and I’d be sure to flatten a 100Ah battery. Having two batteries and using it sparingly gets around this.
Selecting your solar panel
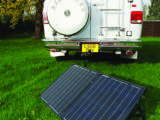
You’re likely to be asking “what size solar panel do I need for a campervan?“. Which solar panel you pick depends entirely on your motorhome’s roof. Campers with a pop-up roof lend themselves to thin, semi-flexible panels, while larger motorhomes don’t need particularly flat panels and might suit a rigid design better.
No two motorhome roofs are alike, and you’ll need to choose solar panels that can fit around your skylights, roof lights, vents and aerials.
Take a look at your roof, using a tape measure to work out which set-up works best. The layout might mean you need four 50W panels dotted around the roof, or one larger panel. The key is to go for the largest array you can fit or afford.
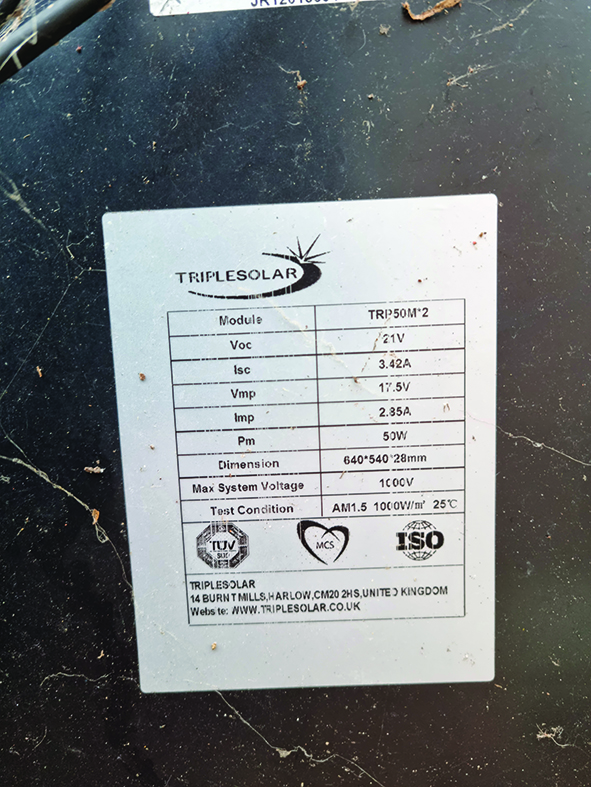
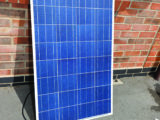
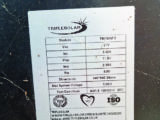
Solar panels are available; in several different types – mono crystalline and polycrystalline rigid panels are the most widely available, with mono crystalline being more efficient.
The latest types are passivated emitter and rear cell panels (known as PERC), with an additional internal reflective surface that is said to increase efficiency by an extra 5%.
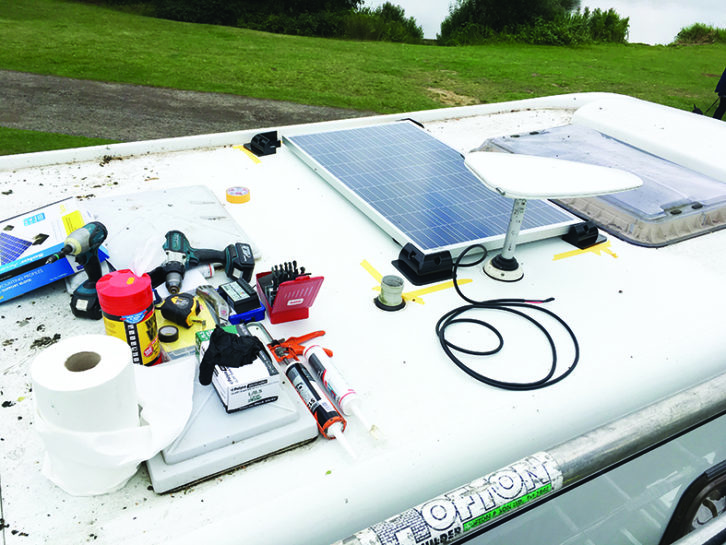
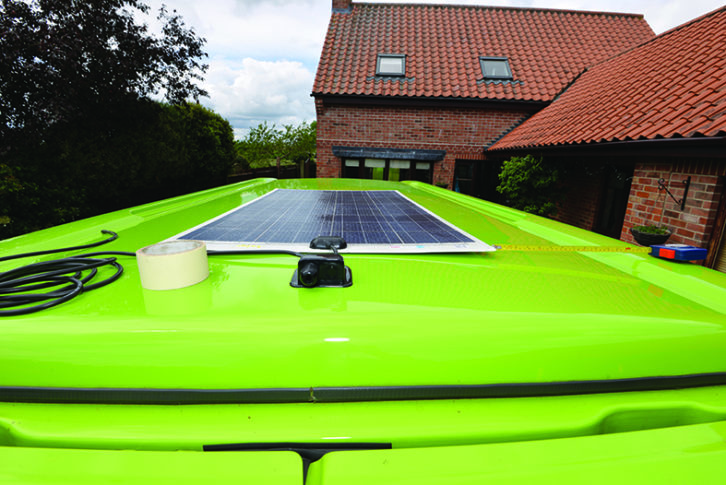
Typically, a rigid panel can’t be walked on, and comes in an aluminium frame that is screwed or bonded onto the roof using dedicated brackets. You’ll need the appropriate grade of polyurethane sealant for your roof type and must chemically clean it before bonding the brackets in place.
There are also various thin-film type panels, which are designed to be flexible.These are semi-rigid models, bonded onto an aluminium sheet which can curve in one direction, or fully flexible panels designed for more extreme curves.
Semi-flexible types often feature self-healing top layer protection, which makes them more durable and allows them to be walked on (they’re often specified on canal barges). Thin-film solar panels are not as efficient as rigid panels.
Which size of panel is best?
In the UK, bigger is always going to be better. Anything under 40W or that comes with a cigar lighter socket and sits on your dashboard will output so little current in winter that it’s not worth bothering with.
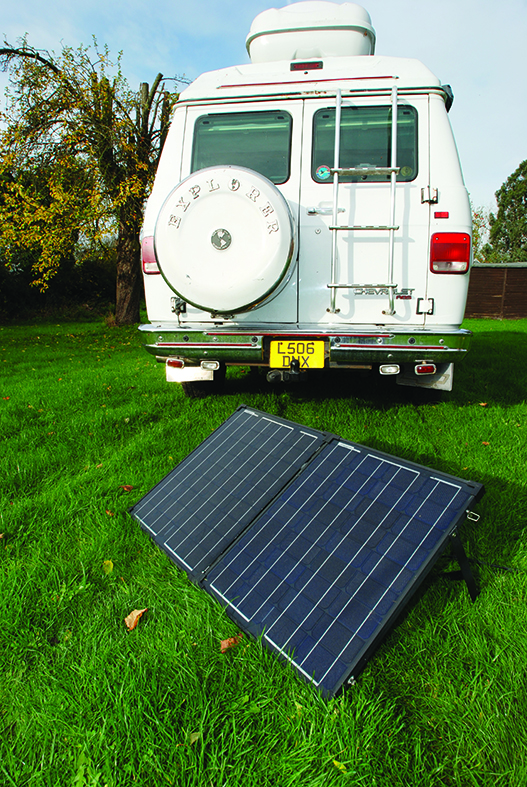
Solar is cheap, so look for a minimum of 100W, but if you can fit more – 300W, 400W or 500W – do so. More is always better and, apart from payload and cost, there is no downside to having the largest solar array possible.
In summer you may find you no longer need the expense of a mains hook-up pitch, while in winter, it will help to keep your batteries topped up (but perhaps not fully – we’ll get to that).
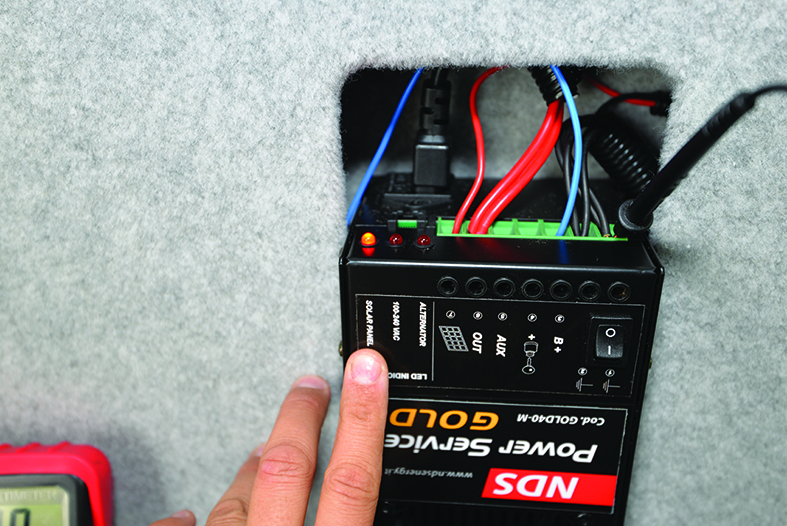
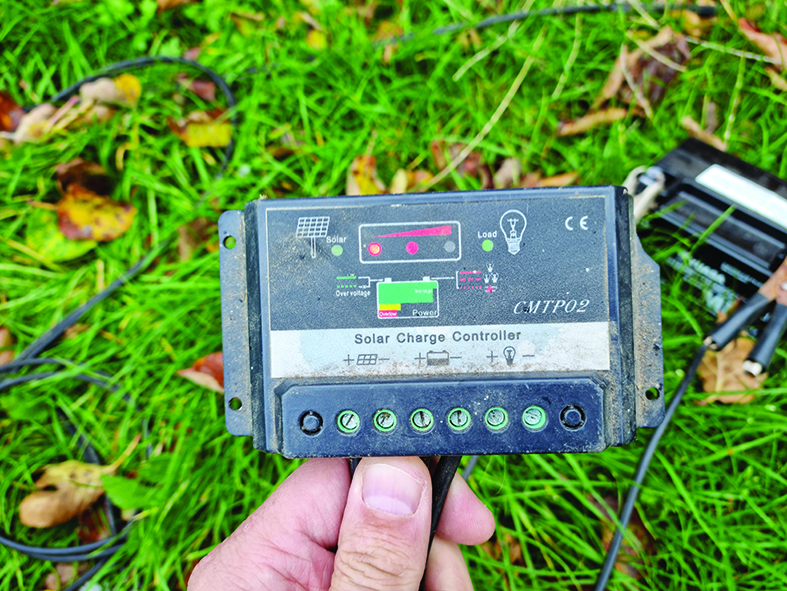
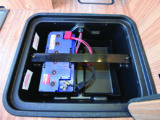
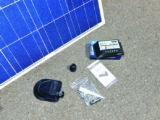
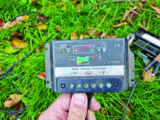
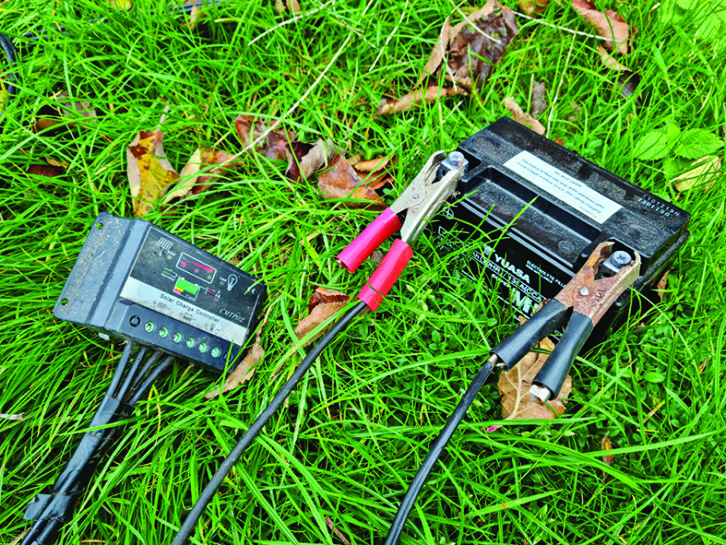
Always use a regulator
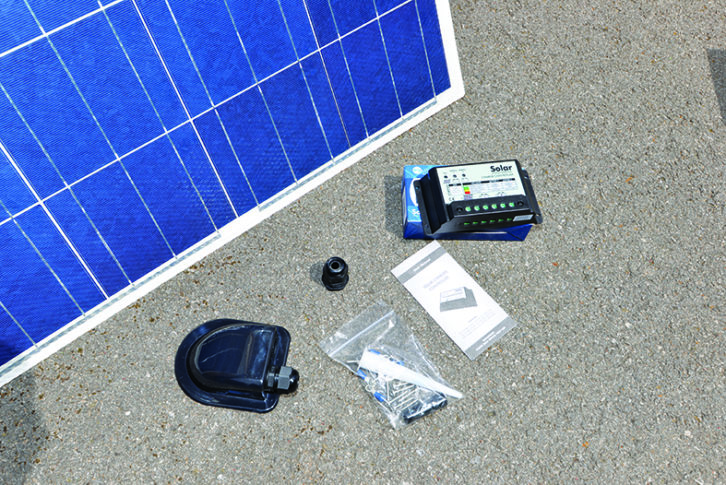
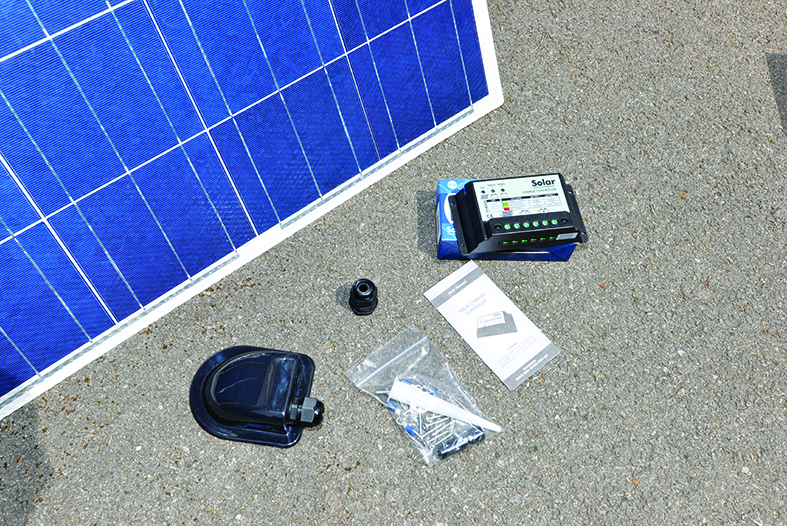
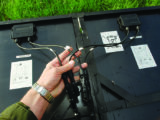
All solar panels must be used with a suitably sized regulator. The regulator’s job is to protect the battery from too high a voltage, reverse current (wrongly wired connectors), and to manage the current so it won’t fry the battery. It’s dangerous not to use a regulator, so ensure you have one.
The only exception is if your motorhome’s charging system has an inbuilt solar regulator. Check the manual to find out. If in doubt, simply wire the solar panel, via a regulator, directly to the battery you’re looking to recharge.
The regulator capacity must match the solar panel output. So for a 100W panel, you’ll need a 10A regulator, while a 300W panel will require a 30A regulator. Regulators are available in several types: pulse width modulation are older models, so look for the more efficient maximum power point tracking (MPPT) versions.
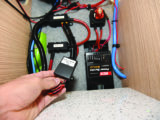
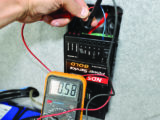
Some of the better solar regulators feature an LCD-display to indicate the level of charge going into your battery, with some of the best types (such as Victron) linking to an app on your phone so you can monitor the charge remotely.
Be careful of any small solar panel (under 40W) that plugs into a cigar lighter socket and lacks a regulator. If it can generate so little that it’s supplied with a cigar lighter socket, it will be pretty hopeless at recharging a leisure battery. At best, it will keep pace with the natural drain of the battery, but at worst, it won’t do a thing – you’re better off saving your money.
How to wire up your panel
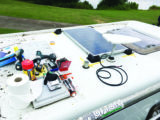
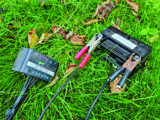
All solar panels are pretty easy to fit. If you can fit a fuse and know that the red wire is positive and the black wire is negative, you shouldn’t struggle to connect up a panel.
Many freestanding models come with crocodile clips, so you don’t need to do any wiring at all: just clip the leads in place.

Whenever you work on a solar panel, cover it with a sheet or a section of cardboard (such as the box it came in) while you’re working on it, to avoid any current flowing. If the panel can see any light at all, it will produce current and could cause a spark, so cover it up!
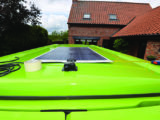
If your vehicle has a flat roof (as is the case for most glass fibre campervan pop-tops), the easiest thing to get is a semi-flexible panel. These often come with a self-adhesive backing, so you just clean the roof, remove the backing and stick the panel carefully in place.
Some can be specified with internal wiring – you simply cut an oversized hole under the panel for this – so nothing sticks up on the roof and no wires or boxes are visible externally.
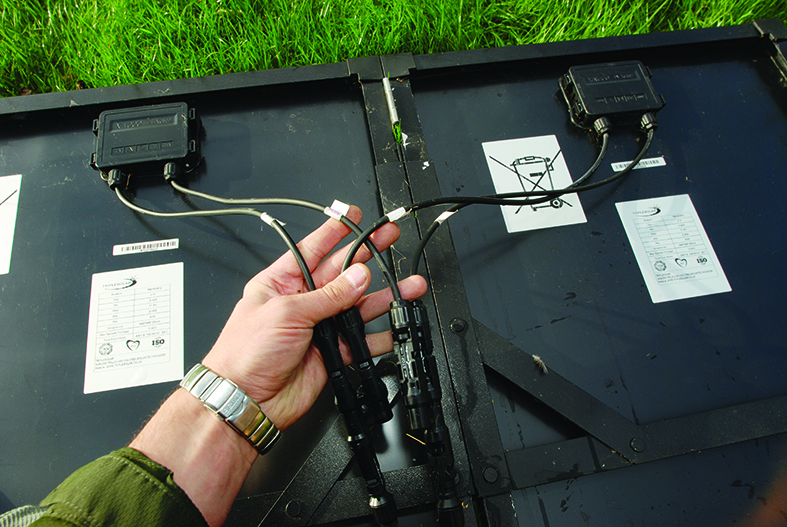
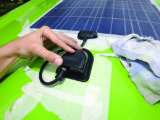
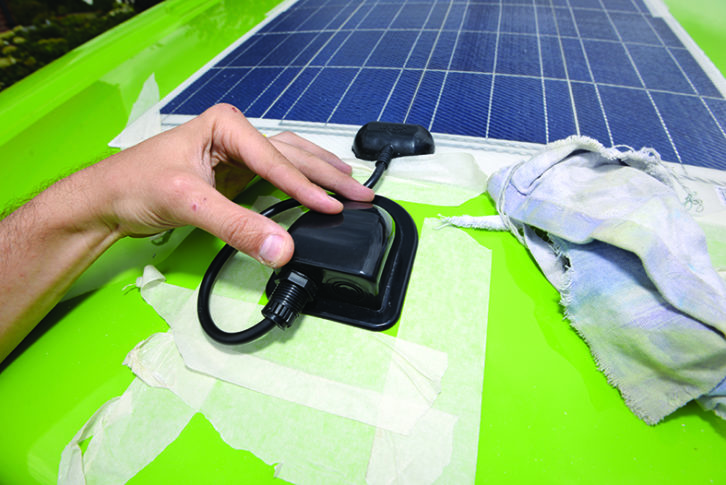
Most rigid solar panels have an output box on the rear – they need to be mounted about an inch above the roof panel on dedicated brackets – and use clip-together MC4 connectors.
These tend to use 4-6mm cross-sectional cable and can be grouped together. At the battery end, you’ll need to add a fuse to the positive lead where it attaches to the terminal.
Any wires that pass through the motorhome’s roof must go via a cable gland box, which has waterproof rubber seals, and any cables passing through any panels must be protected by rubber grommets and sealant.

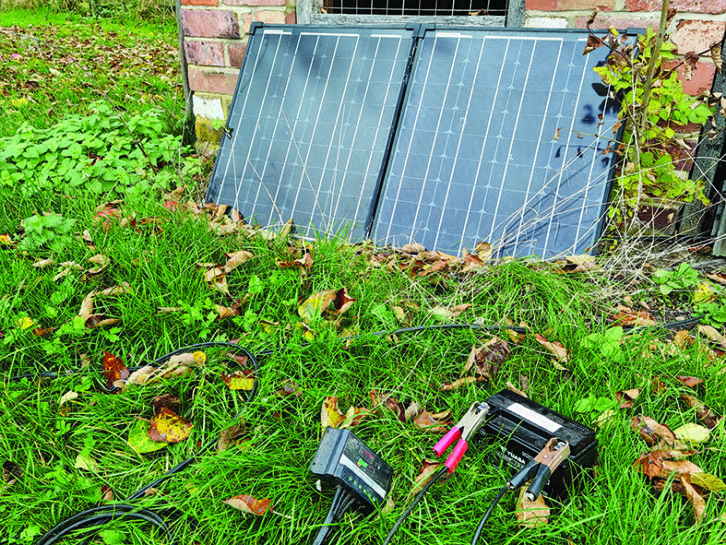
If you’re using more than one solar panel, it’s most efficient to wire them in series. This means the positive and negative terminal of the two panels are connected together. The remaining positive lead on one panel connects to the regulator, while the remaining negative lead on the other panel connected to the regulator.
Using the panels in series raises their voltage and improves their efficiency. The regulator will reduce the voltage and output to suit the battery.
Regulators really are a doddle to wire up – in general, they have several positive and negative terminals, to which you simply screw the wire ends. Input means from the solar panel, output means to the battery.

Fit two fuses inline on the positive feed – one between the solar panel and regular, and the other between the regulator and battery.
Some regulators have two output feeds, so you can connect them to both your leisure battery and vehicle battery at the same time, to split the charge between both. However, it’s better to use a battery-charging device, because this will recharge the vehicle battery at all times, not just via solar during the summer.
How much power do you get in summer?

This is where everyone tends to overestimate the efficiency of solar panels. First, they’re not 100% efficient – their output varies with light intensity, angle of the sun, clouds, shadows and the number of daylight hours.
A typical 100W solar panel outputs a maximum of about 5A in the peak of summer. That’s 5A per hour over daylight hours. So a 500W panel could output a useful 25A per hour to leisure batteries during the summer months and keep you free from hook-ups for days – or even weeks with careful energy use.
Shade greatly affects their output, as does the cleanliness of the panel, Remove any bird dirt or road debris immediately to keep your solar panel producing maximum power.
What about in winter?

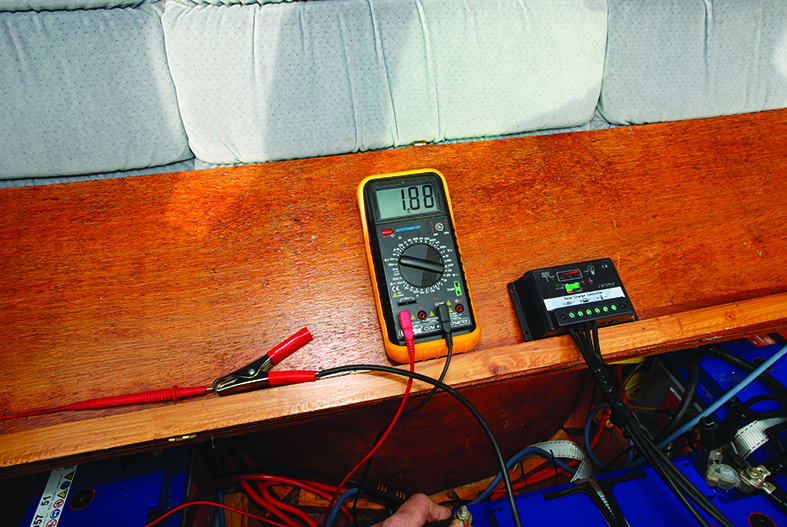
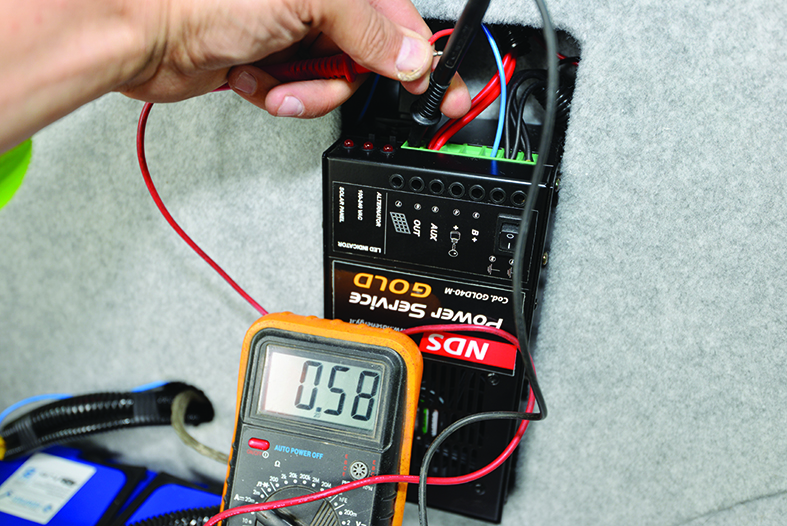
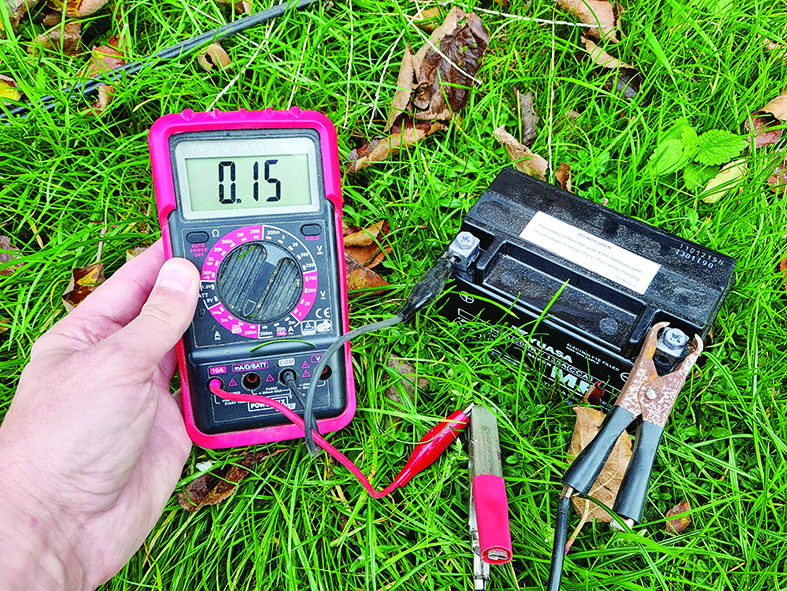
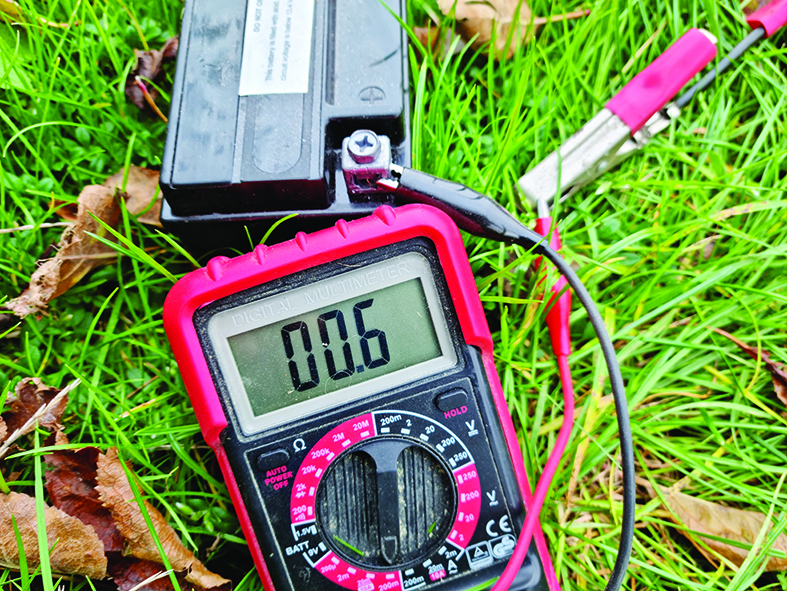
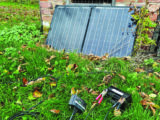
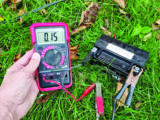
In winter, the power output could fall to less than a tenth of the summer output. To give you an idea of the problem, I carried out some measurements on the 100W solar panel I have in my garden, which is used to recharge my lawnmower battery because there’s no mains socket nearby.
In summer, I have measured its output at just under 2A, while in winter on a slightly dull day, it was only outputting around 0.17A – this might not be enough to keep up with the drain of a motorhome’s alarm system. Around 0.25-0.5A is considered a normal rate of drain for most modern motorhome base vehicle batteries.
So in this case, just to keep on top of normal motorhome battery drain, you’d need to use at least 300W of solar to keep pace with the drain during the daytime. And that’s before you’ve switched anything on! Use LED lights or a TV and you can see solar will struggle to keep up. Equally, at night while the panel is inactive, your vehicle battery will still be slowly discharging.
In winter, it’s simple: just plug into a mains hook-up whenever you can. During this season, it’s always best to use a mains hook-up – you’ll be using the heating system and lighting more and the battery capacity will be reduced because of the temperature, so it might not keep pace with the additional use. Two batteries will help and give you more leeway between hook-ups.
Some charging systems can be left permanently plugged in over the winter, so for off-season lay-up, just leave your motorhome plugged in.
If your motorhomes’s charger is a more basic model it’s worth investing in a separate smart battery conditioner and plugging that into your mains socket. Switch off the built-in battery charger and connect the battery conditioner directly to a mains socket in the motorhome, and then directly to the battery terminals.
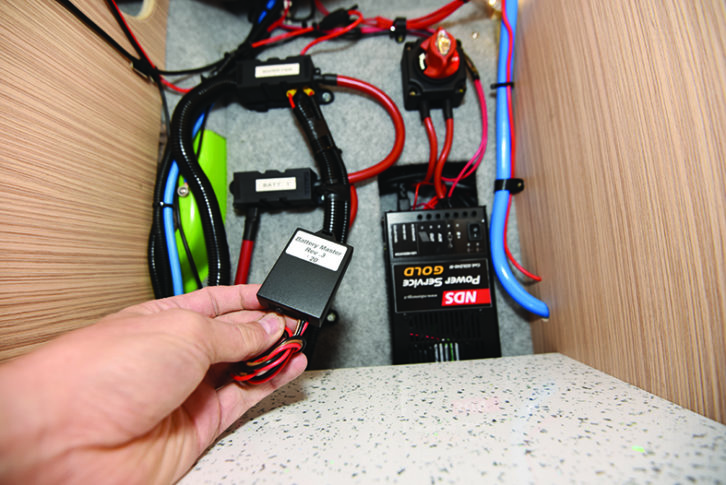
If your vehicle battery isn’t recharged by your motorhome’s built-in charging system, it’s worth adding a separate charging circuit that will do this automatically (for example, a Van Bitz Battery Master or Sterling battery-to-battery maintainer).
These devices also work well with solar panels and help to prevent flat vehicle batteries. They can’t flatten your vehicle battery – charge can only flow in one way from leisure battery to vehicle battery.
Angle of the sun

One aspect of solar panels that affects use in your motorhome is the angle of the sun. For maximum efficiency, the panels need to be perpendicular to the midday sun.
In winter, in the northern hemisphere, the sun sits lower down in the sky and to get the panel perpendicular at midday, you’d need to have it significantly angled. It’s reckoned that the angle of the sun relative to the panel can affect its efficiency by as much as 50%.
If you have a fixed panel on your motorhome roof, the angle can’t be altered and this reduces its efficiency. Ideally, you’d want a panel that tracks the sun and angles itself optimally at all times – these exist for domestic applications but are less practical for a motorhome (you would need several motors and complicated satellite tracking for it to work – expensive and heavy).
Freestanding panels can be angled to the sun more easily, but it’s more of a faff to do this, so most people simply accept the reduced efficiency of the panels during winter over the convenience of having them fixed on the roof.
Campervans with elevating roofs could get a better angle on their solar panels, but again, unless you’re willing to be constantly moving your vehicle during the day, it’s a minor benefit; pop-tops are also more prone to problems with shading at certain times of the day.
Verdict
Solar panels work really well during the summer months and are well worth having – they will definitely help to top up your batteries.
Fitting the panels won’t spoil the look of your motorhome, they require no effort to set up and they will automatically boost your batteries at all times during the daylight hours. It’s like having magical free power in summer.
In the winter months, solar is less convincing and doesn’t really do very much, so always make sure that you plug into a mains hook-up or use a battery conditioner whenever you are laying up your motorhome.
If you liked this… READ THESE:
The pros and cons of electric motorhomes
If you’ve enjoyed reading this article, why not get the latest news, reviews and features delivered direct to your door or inbox every month. Take advantage of our brilliant Practical Motorhome magazine SUBSCRIBERS’ OFFER and SIGN UP TO OUR NEWSLETTER for regular weekly updates on all things motorhome related.
Future Publishing Limited, the publisher of practicalmotorhome.com, provides the information in this article in good faith and makes no representation as to its completeness or accuracy. Individuals carrying out the instructions do so at their own risk and must exercise their independent judgement in determining the appropriateness of the advice to their circumstances. Individuals should take appropriate safety precautions and be aware of the risk of electrocution when dealing with electrical products. To the fullest extent permitted by law, neither Future nor its employees or agents shall have any liability in connection with the use of this information. You should check that any van warranty will not be affected before proceeding with DIY projects.