


For many motorcaravanners, time on tour is a time to escape the TV, but an equal number love evenings in the ‘van with their favourite shows. Many people like to watch television on tour, or DVDs while they’re away – perfect after a day spent outdoors. But there are lots of ways to watch TV in your ‘van. Here’s what you need to know to help you choose the best motorhome TV…
TVs AND OTHER KIT
Choosing your TV
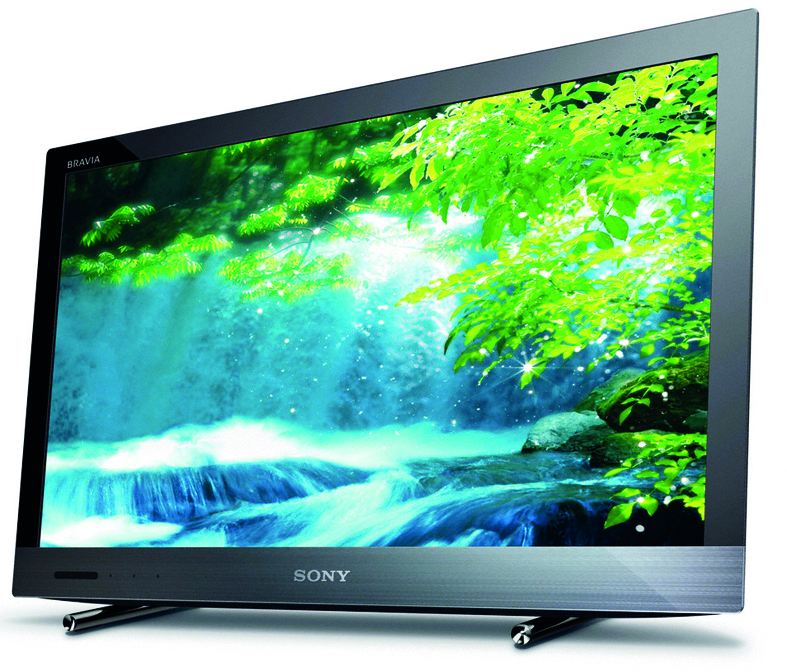
Buying a TV is easy. They’ve never been cheaper and you can pick one up from the supermarket, the internet or wherever you like. But what do you need to consider? There are three main things – size, power and portability.
Size really matters here. Even a big motorhome isn’t large enough to give up too much space for a TV, so you want to park ideas of huge televisions. A smaller set will be easy to store, nicer to watch at close range and cheaper to buy.
Don’t buy the biggest you can fit in the ‘van – buy one you can easily stow when not in use. That’s not as easy as you might think these days. Buy with care. Domestic TVs are considered small if below 40in. It won’t feel small in a motorhome – smaller is better.
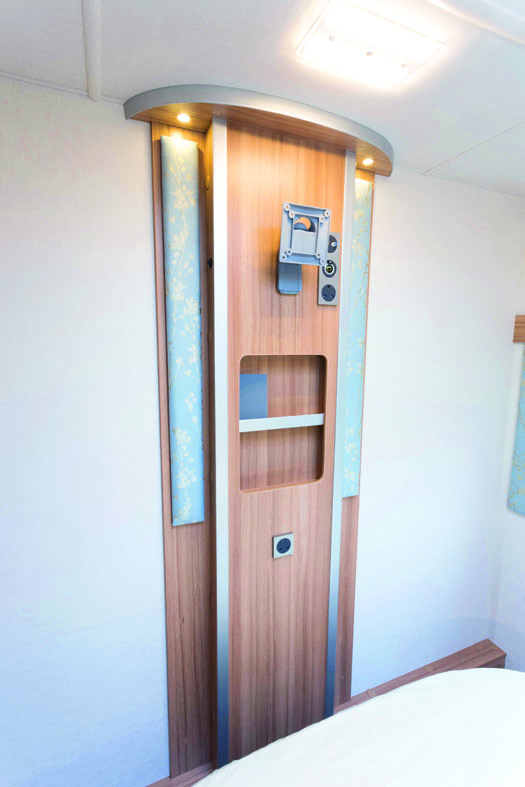
If you are lucky enough to have a vehicle with a dedicated TV mounting bracket, get the tape measure out to ensure your TV fits the standard VESA mounting on the back, and that you can latch it and move it freely without clouting the cabinets.
If you don’t have a mounting bracket, you can add one with a bit of simple-ish DIY. If you don’t fancy that, you need to think about how to store your set when you are on the road. TVs don’t like bouncing about, and continuous jolting will cause damage. Cover the screen with blankets or lay it flat in the middle of the fixed bed, surrounded by cushions. Ensure it can’t tip or fall and minimise the exposure to shocks and bangs as you move.
Dedicated padded carrying bags are available for flat-screen TVs, and offer extra protection. Bags2Cover sells a range of slip-over screen covers and carry-bags, starting at around £20.
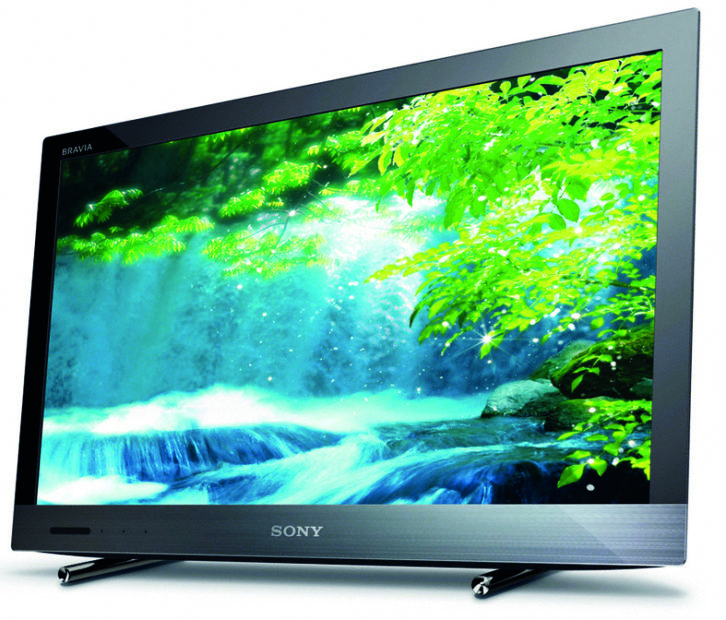
If you always head to sites with hook-up, you don’t need a specialist 12V touring telly – standard domestic models will do the job, and are cheaper.
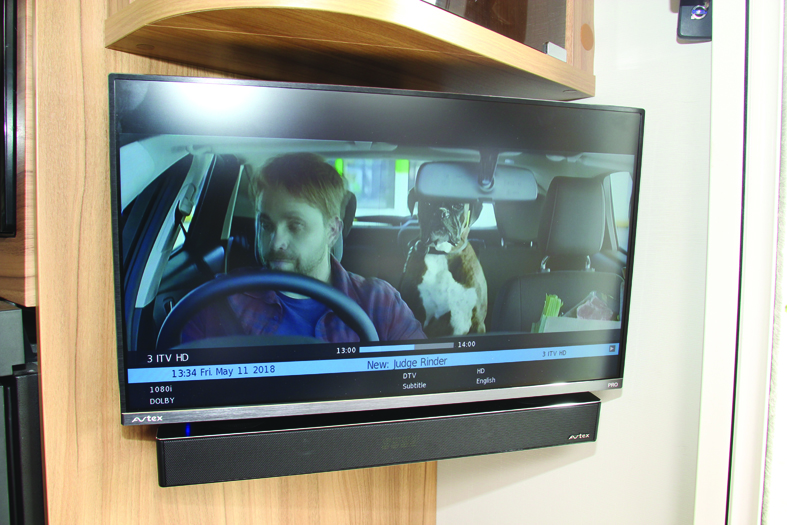
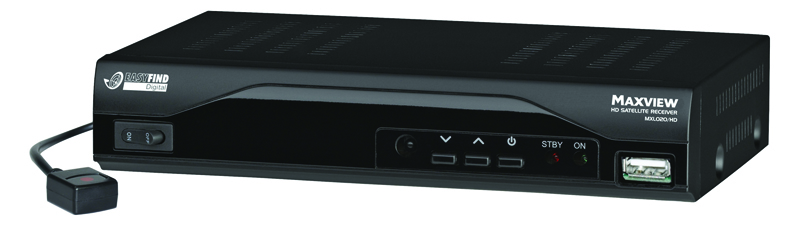
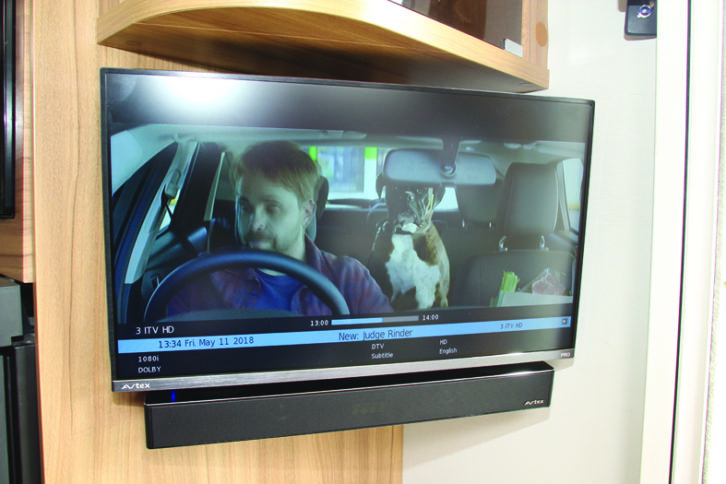
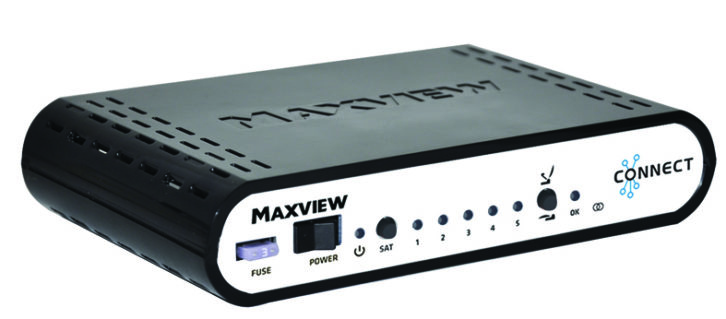
If you head off-grid, however, you will need something a bit more specialised. Dedicated 12V TVs are out there, typically stocked by good accessory shops. As these are specifically designed for leisure use, they are typically quite pricey, but they are available in smaller sizes, and are tough and usually feature-packed. Most crucial of all, if you have sufficient battery power, they allow you to watch the TV wherever you pitch up. Look for models from Avtex or Cello.
A 12V television is designed to run on a voltage at or near 12V DC. In a ‘van using battery power, the voltage can fluctuate (as widely as 10-15V), which if not regulated, can damage the sensitive electronics in your TV. Many dedicated touring 12V TVs are designed to cope with these fluctuations. That said, there are plenty of folk using cheaper, high-street-bought TVs reporting their flat-screens working perfectly for years in the motorhome, regardless of such fluctuations.
In our guide to the best TVs for motorhomes, we’re taking a look at a selection of models that vary from 19-inch to 32-inch, to help you pick out the screen that will suit you and your needs.
Sound bars
Modern flat-screen television sets feature slimline designs, which look fabulous but have too little internal space to create bass sounds.
However, adding a sound bar to your set-up can replace the rather tinny sound produced by the TV and provide much more rounded acoustics.
There are plenty of these clever pieces of kit on the market, but Avtex, for example, makes the SB195BT Bluetooth sound bar (priced from £139), while among other options is one from Sony, the HT-SD35 (available from £179).
Both will deliver excellent sound quality in your motorhome, connecting instantly to your TV, with or without a cable. But do remember, the sound bar requires a power point.
Bear in mind that motorhomes are not designed with the aim of being soundproof. A sound bar might add drama to your movie night, but you do need to consider how much of the action is being transmitted beyond the walls. Be a good neighbour and keep the noise down.
TV aerials
Many motorhomes come with a TV aerial built in. The most basic are circular ‘omni-directional’ ones which were standard a decade or so ago. They will get you a picture in strong signal areas, but if you are serious about watching TV, you will quickly realise that they aren’t much cop.
Directional ones are a definite improvement. Standard ones are typically roof-mounted, with a handle on the inside of the ‘van, which allows you to rotate the aerial into position and/or turn it to locate the correct angle for the best picture.
If you are serious about a strong TV signal, a standalone, pole-mounted aerial mounted high up will get the job done. These look like ones you would see on a house, so are pretty unattractive, but with a good mounting pole, you can get them up much higher than a standard roof-mounted aerial – a vital step in getting a strong signal. That’s why houses have big TV aerials mounted at the highest points on the roof, rather than little plastic ones at head-height.
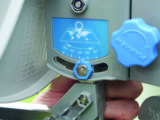
With the right aerial, you want a signal-finder device to fine-tune and get the strongest signal. These simple devices can be picked up at DIY stores for around £15 and once rigged up to your aerial, let you tweak the aerial orientation for the best results. Higher-spec systems might also have a signal-finder built in.
The quality and strength of the signal are really all-important in achieving a good picture and clear sound, so many people will use a booster/digital amplifier (costing from around £20) to enhance the signal being sent to the television. These can work if you have a weak signal or long cable run between the aerial and the TV, but if you have a very poor signal to start with, they won’t solve it.
ACCESSING CONTENT
DVD/Blu-ray
The easiest way to watch movies on tour is to buy a 12V TV with a built-in DVD player, or connect your 12V TV to a separate DVD player No worry about signals, aerials or anything else. Sorted!
Streaming
To stream content to your TV, you’ll need a good internet in a motorhome feed. This can come from the campsite Wi-Fi, via a dongle or through a phone. The cost could be prohibitive, but if you have an unlimited 3/4/5G data deal with your phone or done, it might be viable.
Using campsite Wi-Fi can be expensive. Back in 2012, touring in France, we wanted to watch the Murray vs Federer Wimbledon final. The Wi-Fi post was right on our pitch, so the signal was good. I opted for the ‘three hours for €12’ package, rather than all day for €20. Of course, the match went to five sets, and lasted three hours and 24 minutes, so we had to spend another €12 to see the finale… and watch Murray lose!
Things have got better, and cheaper, since then, although campsite Wi-Fi can still be a lottery.
Smart TVs can be linked to your internet/Wi-Fi source; if the broadband is good enough, you’ll be able to access all the channels you can at home, or use your Sky Go or Virgin TV Go services. Otherwise, you could watch on a laptop or tablet.
To minimise your reliance on Wi-Fi, Netflix, BBC iPlayer and various other platforms allow you to download some content for offline viewing. That means you can watch, regardless of a spotty data connection. You do need to predict what you will want to watch in advance, though.
SATELLITE DISHES
How satellite works
Satellite TV is theoretically simple, but a reading is key to getting a good result. Major UK channels, including BBC, ITV, Freesat and Sky TV, broadcast from satellites at 28.3° to 28.5° E, known as Astra 2E, Astra 2F and Astra 2G.
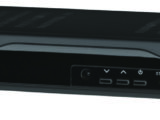
These satellites are in geostationary orbit (they move with the Earth’s rotation) in the southern sky. A dish pointing the correct way receives the signal. A receiver unit – either a separate device, or built into your TV – decodes the signal into something you can watch on your television.
Before rushing out and buying all of the kit, speak to knowledgeable experts, such as the team at RoadPro to ensure that what you are buying will do what you need.
Size matters
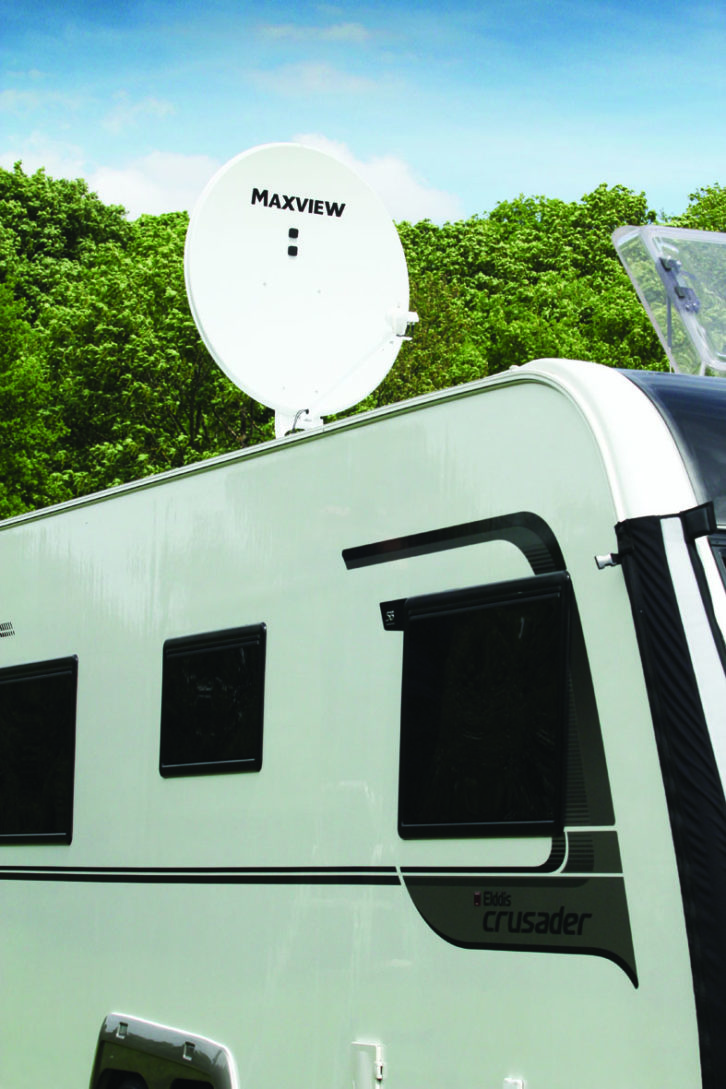
Satellite dishes are all about size, and if you tour in Europe, bigger is definitely better -certainly if you want to watch all of your UK channels.
In the UK, a 35-65cm dish will do, but the further you are staying from the UK. the bigger the dish you’ll need: 65-75cm in France, and up to about 85cm if you’re after the UK channels while you’re in Spain and Portugal.
If you are content to have just a selection of free-to-air channels, rather than all of your UK favourites, any dish will keep you up-to-date with some English-language news.
What you’ll need
- A satellite system (as mentioned above, the size depends on where you’re planning to tour).
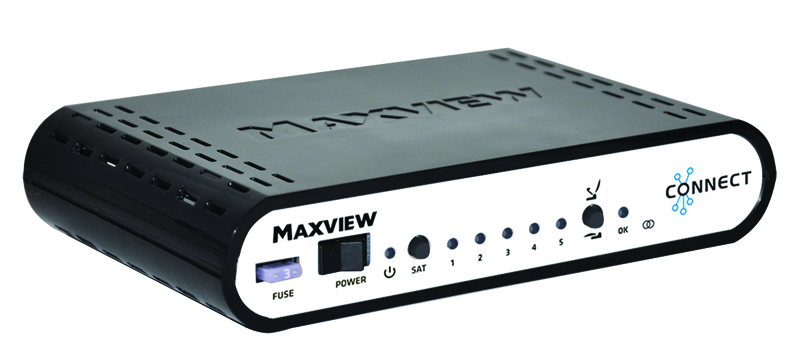
- A satellite decoder (many new 12V TVs will have one of these built in).
- A compatible TV.
- The relevant cables.
- An elevation guide that details the precise angle that is required for your satellite dish.
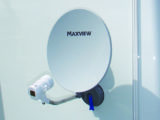
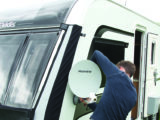
Suction-cup manual dish

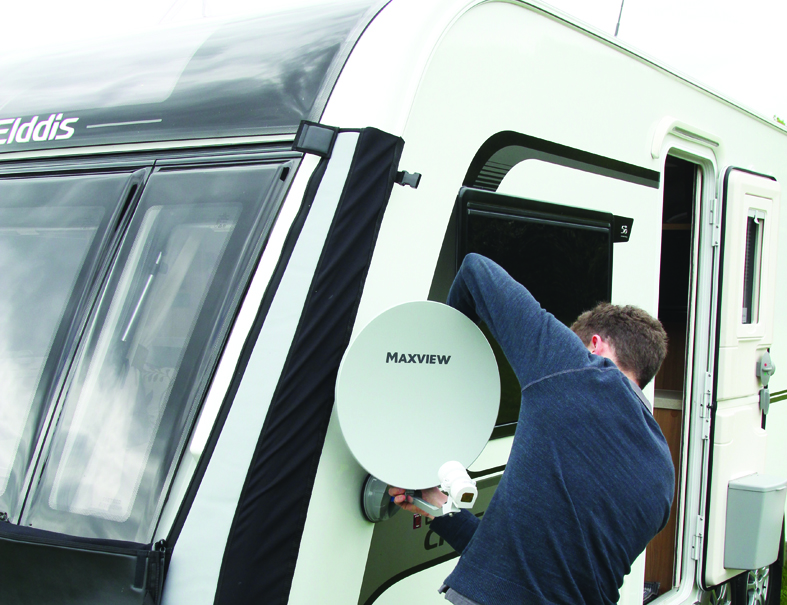
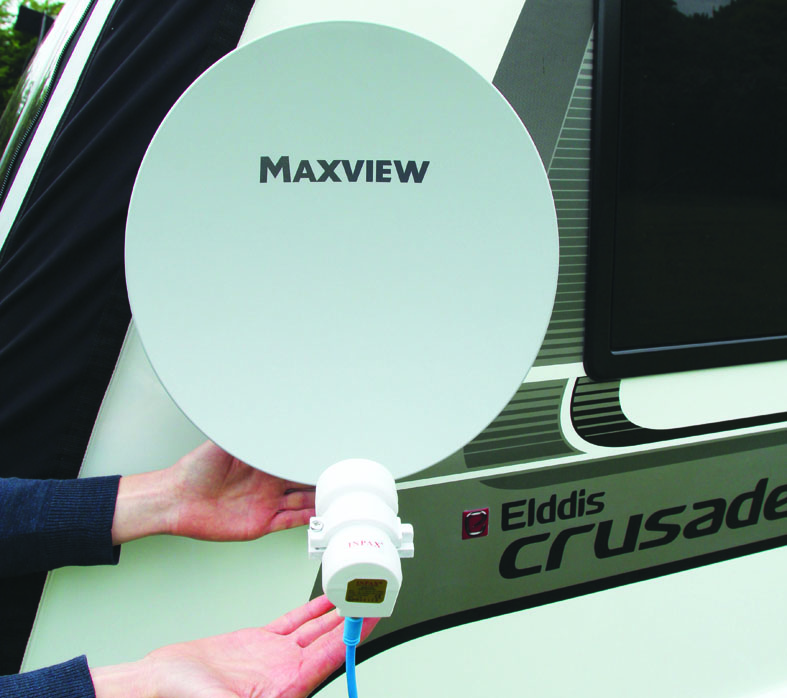
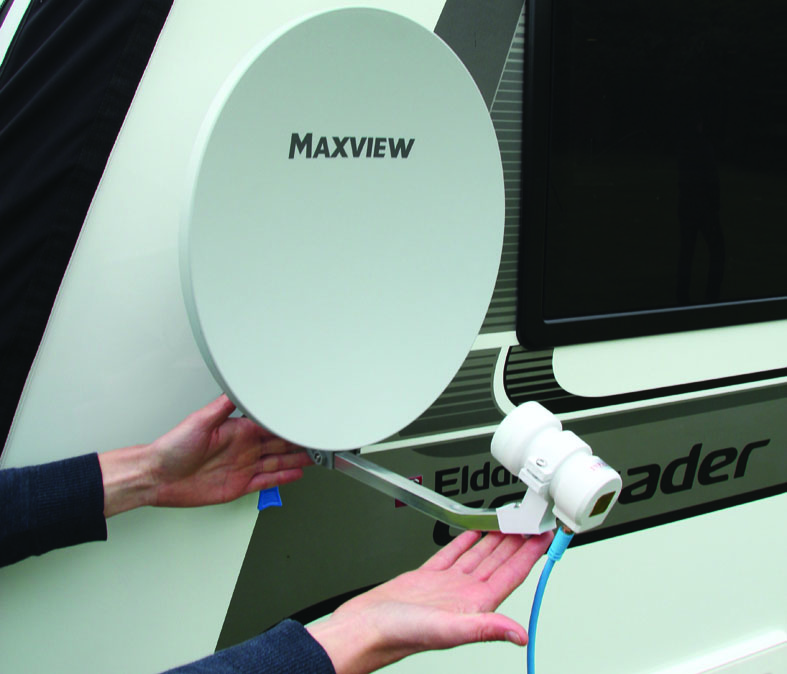
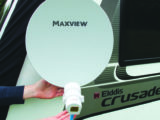
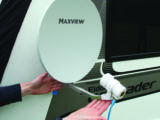
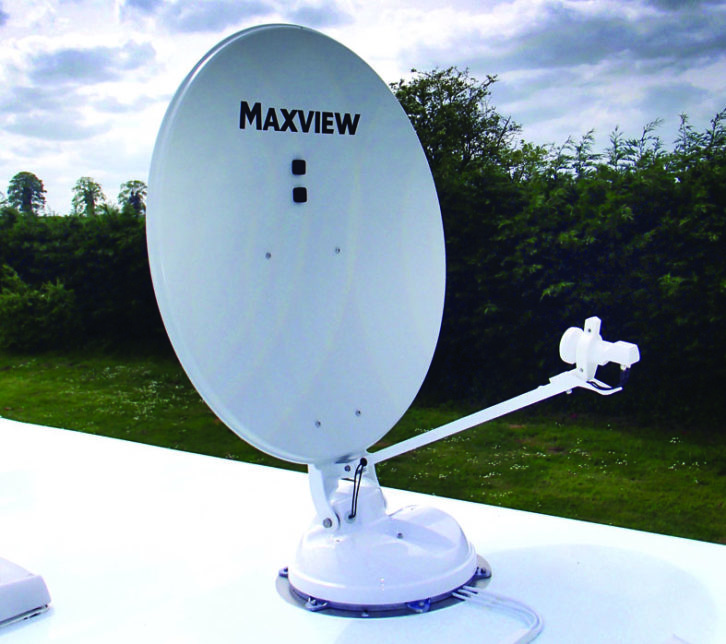
As an example, the Maxview Remora Pro dish has two suction cups and is perfect fo attaching to the smooth sides of a motorhome. Assembling the dish is simple, and only takes a couple of minutes:
- Attach the dish securely to the motorhome, ensuring that it is level and there’s a clear line of sight to the southern sky.
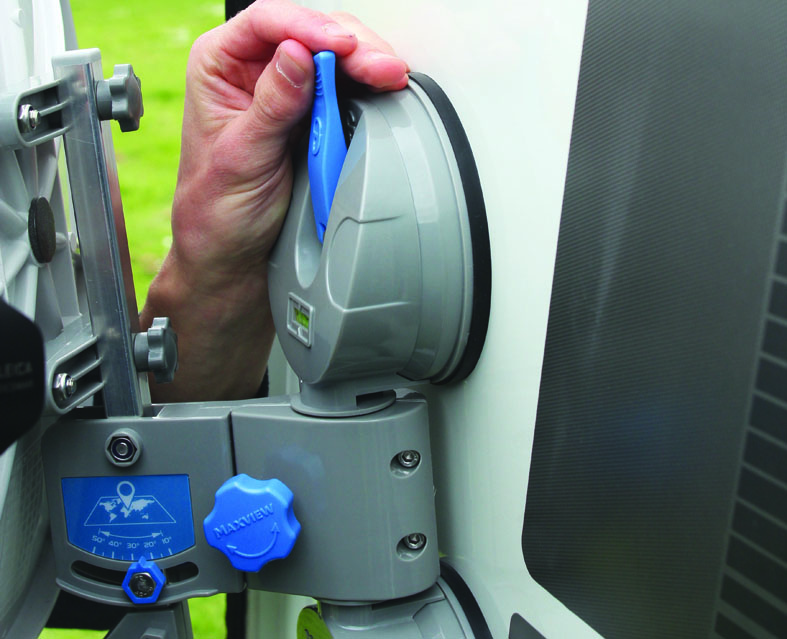
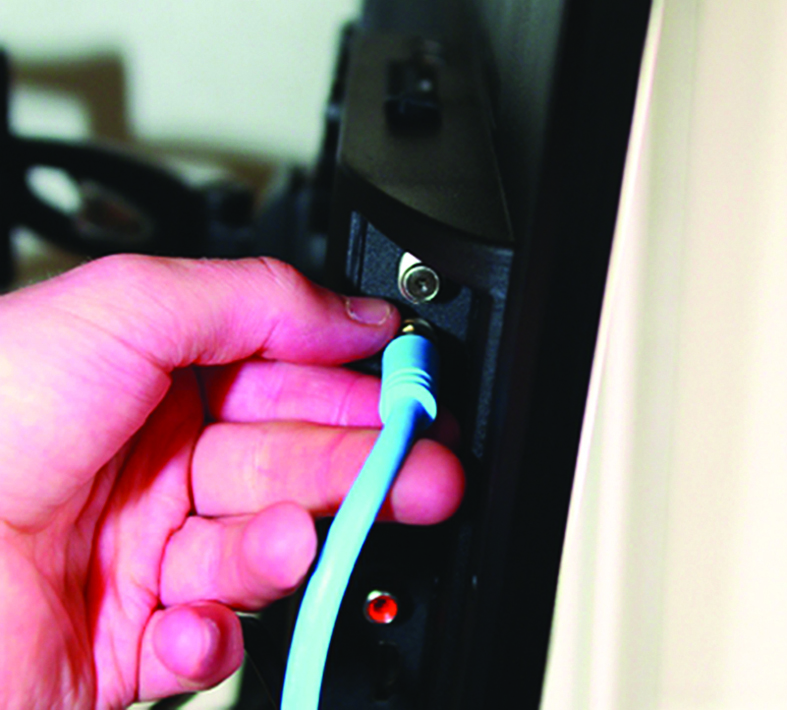
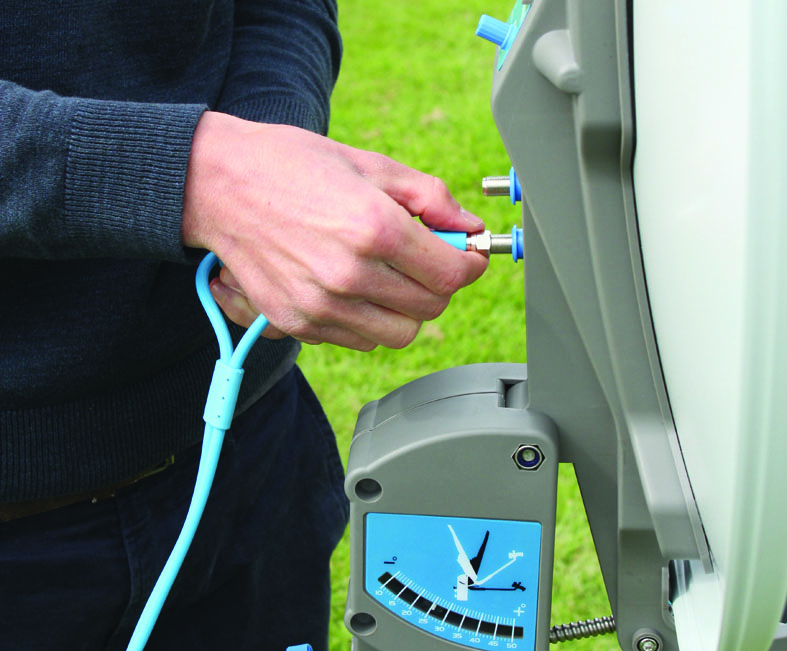
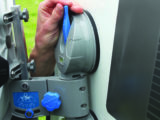
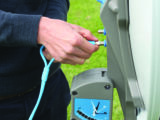
- Connect the coaxial cable to the low-noise block downconverter (LNB).
- Connect the other end of the cable to the TV (with built-in decoder) or to the receiver box. Some ‘vans have a cable entry point. If needed, connect the decoder box to the TV.
- Turn on your TV.
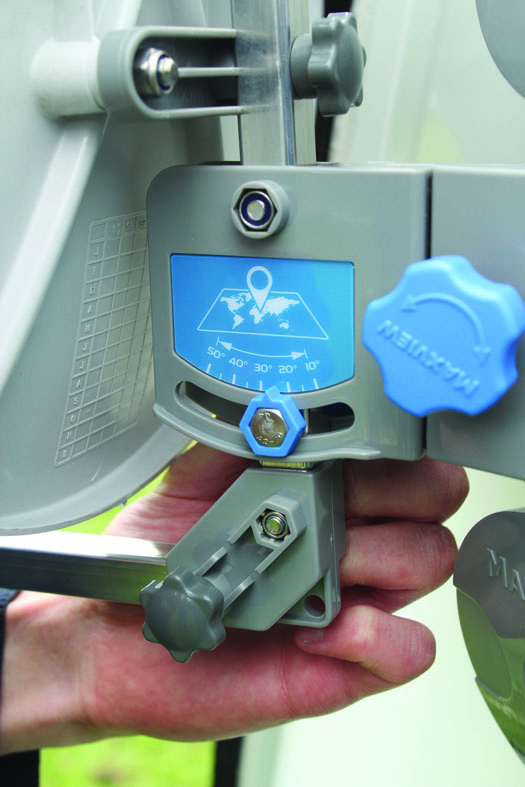
- Set the elevation angle to suit your location, using the map that comes with your dish.
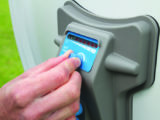
- Rotate the dish slowly on its horizontal axis (the azimuth) from left to right. Stop when you see/hear the TV find a channel.
- Alternatively, you can use a sat-finder drive, or your dish’s integrated sat-finder (if it has one), to locate the satellite. Turn it on, then slowly rotate the dish from left to right. The LEDs will light up or the needle will move; you might hear a beep or change of tone when the satellite has been located. A clear picture should appear on your TV.
- Lock the dish at that angle.
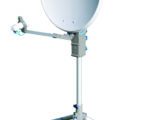
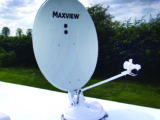
Tripod-mounted manual dish
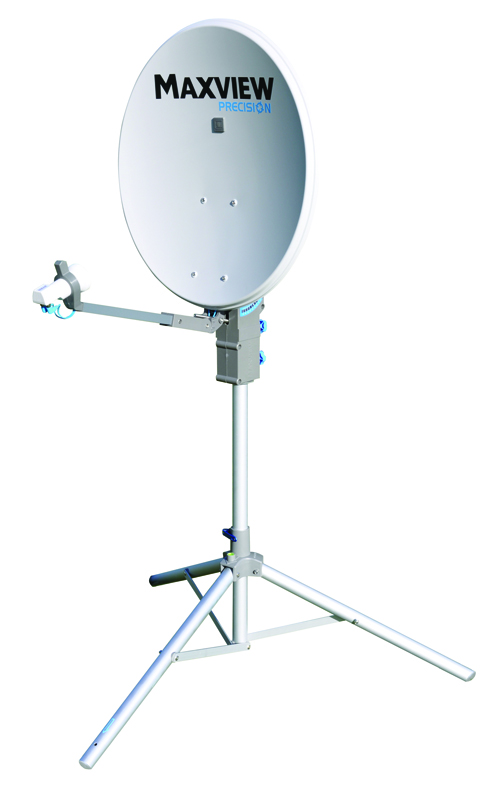
- Assemble the dish and tripod. Position it on firm flat ground, pointing towards the southern sky. Ensure it is level, using the integral spirit level.
- Use the compass to make sure the ‘south leg’ of the tripod is actually pointing south.
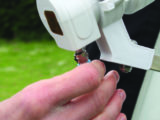
- Pull the LNB arm down into the correct position.
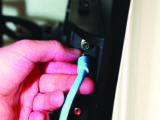
- Connect the flexible cable.
- Connect the other end of the cable to the TV (if it has a built-in decoder), or the satellite box (which is connected to the TV).
- Turn on the TV,
- Set the elevation angle to suit your current location, using the elevation map, which you will find on the back of the dish.
- Rotate the dish slowly on its horizontal axis from left to right (the azimuth). Stop when you see/hear the TV find a channel.
- Alternatively, you can use a separate sat-finder device, or your dish’s integrated sat-finder (if it has one), to locate the satellite. Turn it on, then slowly rotate the dish from left to right.
- The LEDs will light up or the needle will move; you might also hear a beep or change of tone when the satellite has been located. A clear picture should appear on your TV.
- Lock the dish at that angle.
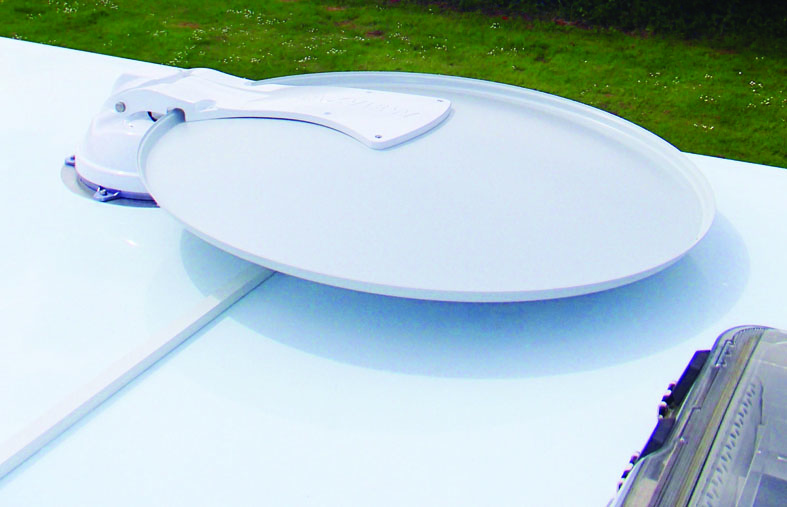
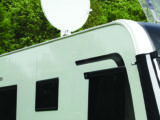
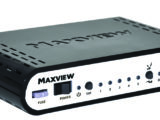
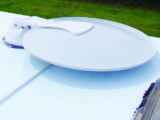
Automated roof-mounted dish
If you have a fully automated roof-mounted satellite dish, finding a perfect channel signal really couldn’t be easier.
- Turn on the unit and your TV.
- Activate the dish by pressing the button on the control box. That’s all you need to do!
- It’s even easier if you download the system’s app to your smartphone.
- However, it is activated, the dish will rise to the correct angle and swivel until it finds the ideal angle for perfect channel reception.
TV and SATELLITE Q&A
Where can I find information about satellite dish angles?
There are many sources, but I use DishPointer. If you’re ‘going rural’, check your destination before you leave; if you can access Wi-Fi, you can do this at the campsite.
- Go to dishpointer.com, then select your satellite (the Astra series at 28.2° E) from the list.
- Click on your camping location on the map. Your current position will be highlighted; add your location if you’re not already there.
- Clock on the pointer and a panel appears, which provides all of the relevant details.
How do I set up my system for first use, before the TV has memorised the stations?
Many new TVs, including Avtex models, have pre-loaded channels. Once you find the signal, the TV places the signals with the correct channels. For TVs and receivers with no-pre-loaded channels, you just find the satellite (using a satellite finder) and then go through the usual ‘scan’ process to locate each channel. For manual systems, a satellite-finder device will help to locate the satellite.
Can I use a Sky box in my motorhome?
Early Sky boxes (before Sky Q) could be used in a ‘van. Sky Q boxes are configured differently. As a consequence, Maxview launched Sky Q-compatible Precision (tripod-mounted, manual) and Target (roof-mounted, auto) systems. So they now have a Sky Q offering for all price brackets.
Can I record TV shows on my Virgin Media 500Gb TiVo, take it touring and use it as a personal video recorder?
Sounds like a cunning plan, but your TiVo has to be connected to the Virgin cable to work.
Does my current TV licence cover me for my motorhome?
Yes.
Contacts and information
Manufacturers, retailers
Service providers
If you liked this… READ THESE:
Spotlight on… leisure batteries
If you’ve enjoyed reading this article, why not get the latest news, reviews and features delivered direct to your door or inbox every month. Take advantage of our brilliant Practical Motorhome magazine SUBSCRIBERS’ OFFER and SIGN UP TO OUR NEWSLETTER for regular weekly updates on all things motorhome related.
Future Publishing Limited, the publisher of practicalmotorhome.com, provides the information in this article in good faith and makes no representation as to its completeness or accuracy. Individuals carrying out the instructions do so at their own risk and must exercise their independent judgement in determining the appropriateness of the advice to their circumstances. Individuals should take appropriate safety precautions and be aware of the risk of electrocution when dealing with electrical products. To the fullest extent permitted by law, neither Future nor its employees or agents shall have any liability in connection with the use of this information. You should check that any van warranty will not be affected before proceeding with DIY projects.
If you always head to sites with hook-up, you don't need a specialist 12V touring telly - standard domestic models will do the job, and are cheaper