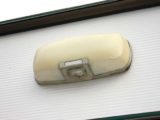

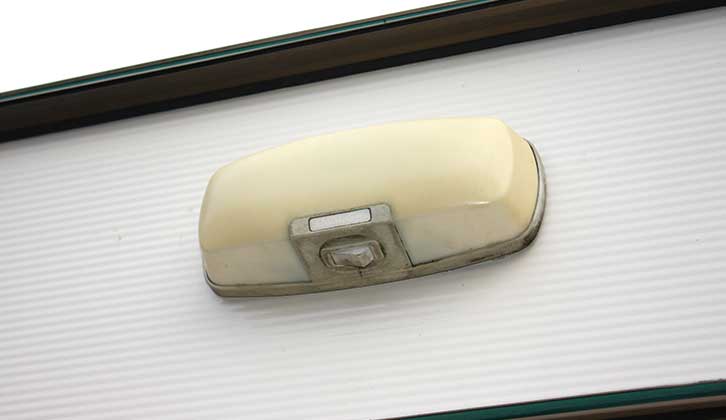
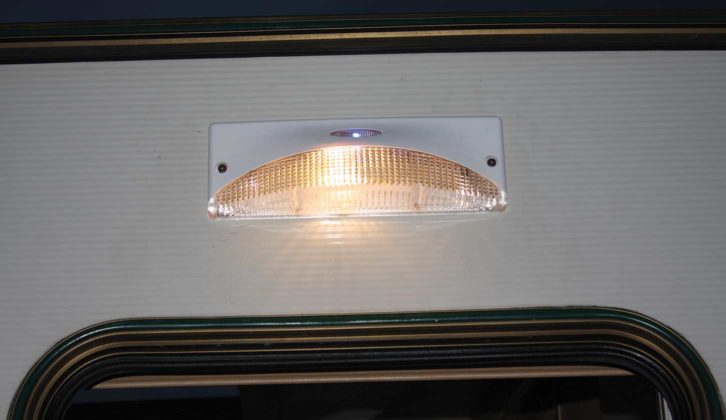
The 20-year-old awning light fitted to my parents’ elderly ’van still worked, but shone a rather dull yellow rather than its original white. We’d cleaned the opaque cover several times, but the plastic had discoloured with age. Not only that, but it was still using the original bulbs, rather than energy- saving LEDs. So it was time for a change.
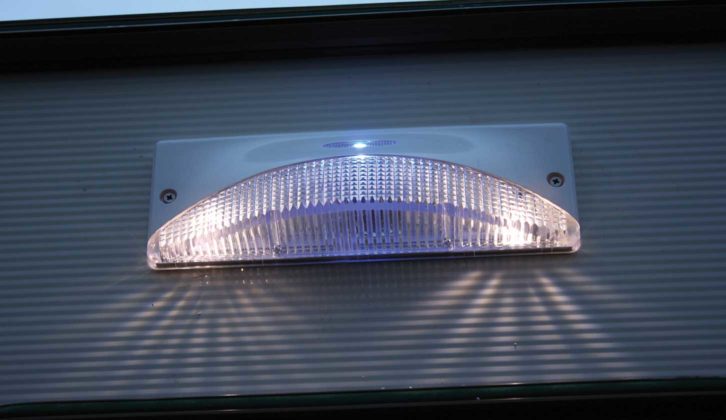
We could have just replaced like for like, but we thought that it might be handy to fit a unit with a photocell, which would cause the light to switch on when it was dark outside.
If you use brightly lit full-facility campsites, a motorhome awning light isn’t really a necessity, but on a smaller site or a CL/CS, they can be invaluable. What better way to help you find your keys (and see the lock!) when it is pitch dark outside than a light that switches itself on?
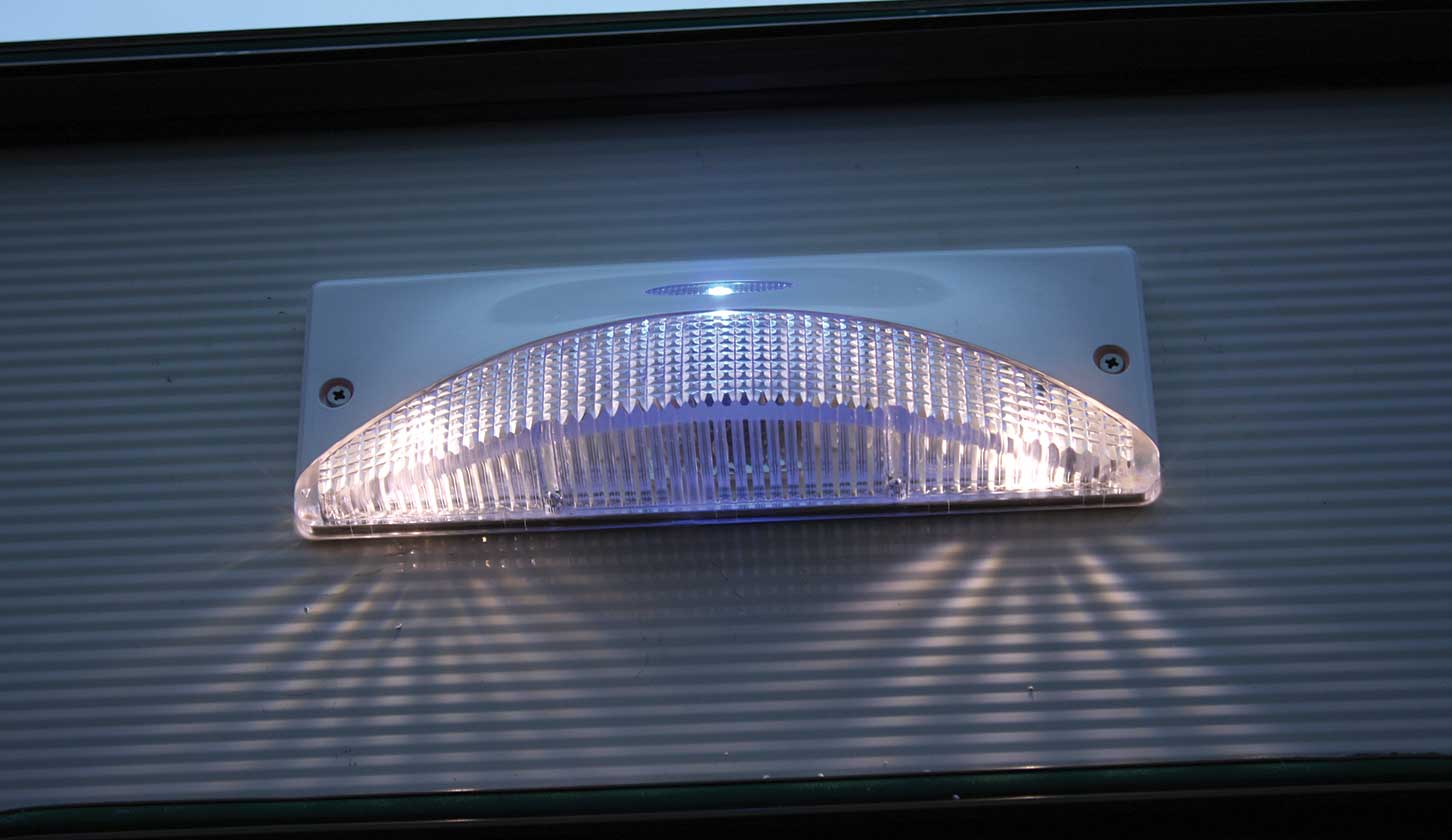
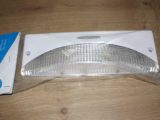
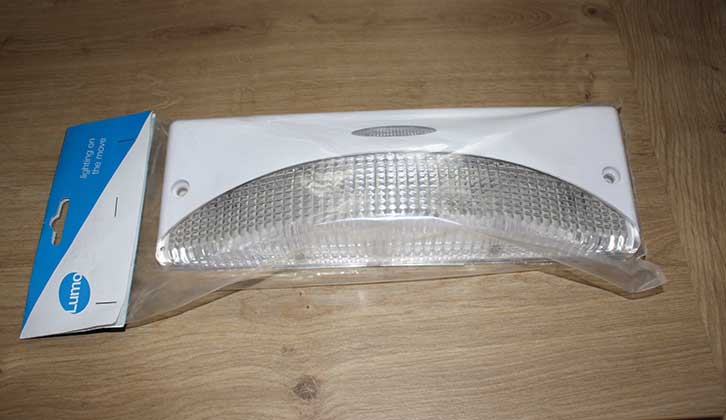
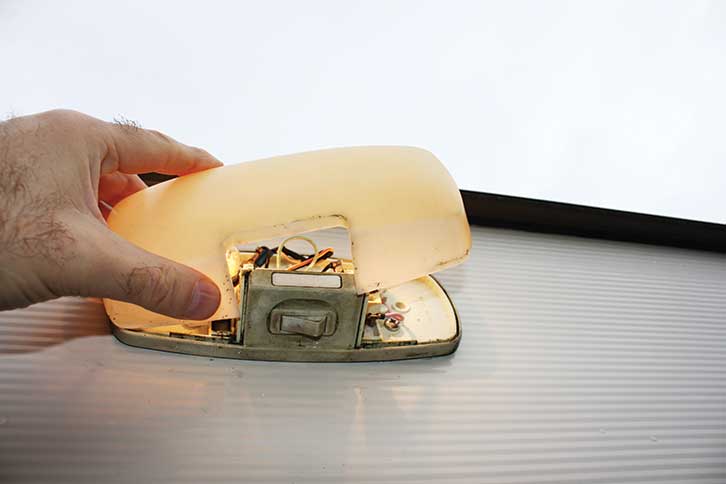
We duly bought a new light unit incorporating a photocell that switched on a couple of LEDs. We then realised that, although this was one unit, the lights operated independently of each other; that is, the photocell LEDs were wired separately to the main light – which was a power-hungry halogen bulb. So a new light switch would also be required, together with some rewiring, and at the same time, the halogen bulb would be changed for another energy-saving LED.
For this project, we were working with the 12V system, so before anything else, the mains power and 12V batteries were safely disconnected.
- Take a look at our guide to how to fit a Truma 65 WP Solarset solar panel kit for another handy DIY project
Tools required for the job:
- Cross-head screwdriver
- Small flat-head screwdriver
- Electric drill with 2mm and 8mm bits, plus 22mm wood bit
- Stanley knife
- Mastic gun and cartridge of sealant
- Wire strippers and crimps
- Insulating tape
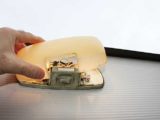
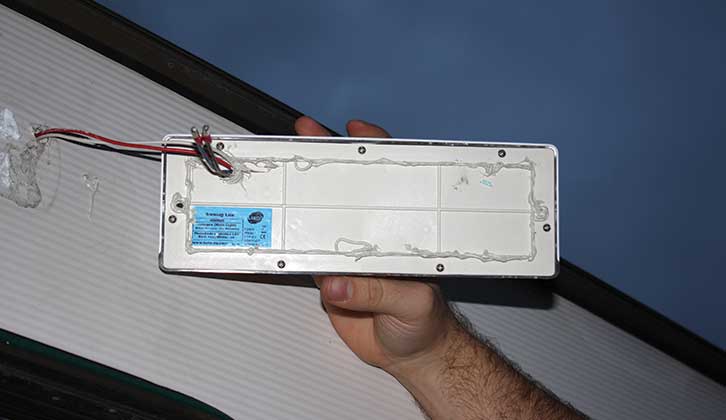
The first step was to ensure the new light unit was slightly larger than the original, because the screw holes securing it to the side of the ’van would be in different positions. The power cables were in different places, too, of course.
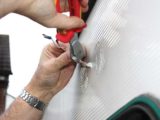
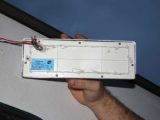
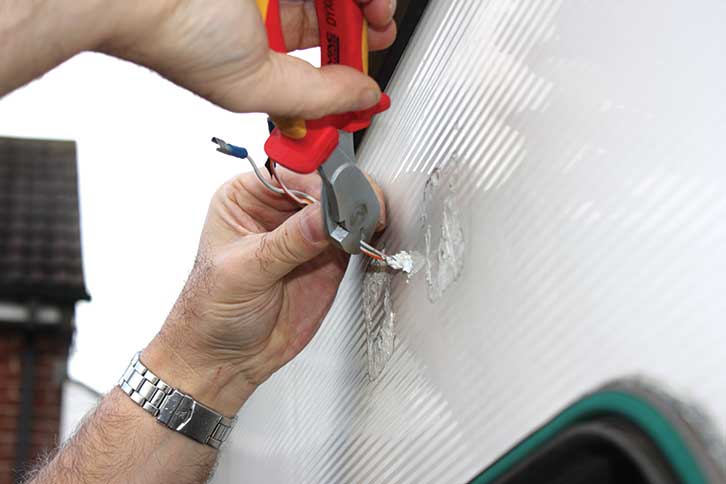
The old cover was unclipped from the light unit, and the screws securing it were removed. It was amazing the light had still worked so well, because when we started to remove the various electrical connections, most simply disintegrated. It might have been possible to reuse the power cables on a new unit if it only required a switched single live feed and single earth, but our new unit required two of each, so rewiring was needed.
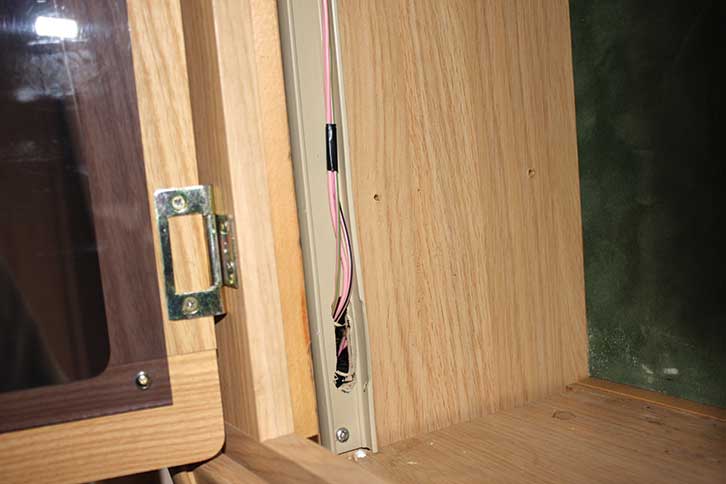
Because the original wiring ran inside the wall and roof of the ’van, we had to make the job as neat as possible, using trunking.
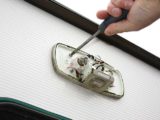
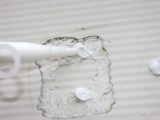
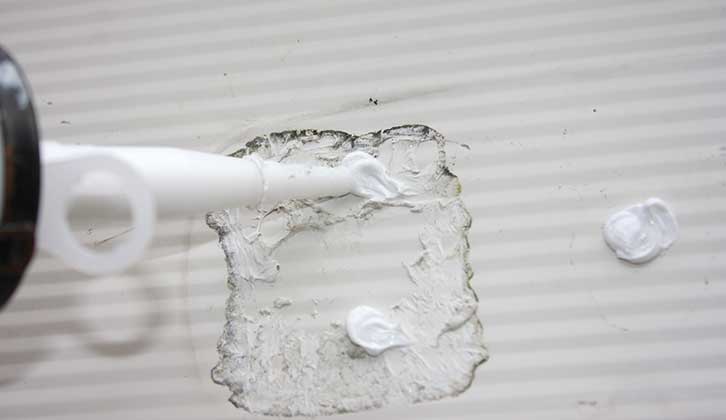
With the old unit removed, the power cables were trimmed and the ends insulated with tape (the other end of the power supply would be disconnected from the switch, so would no longer be live), before being tucked inside the wall. All of the old holes were then well filled with sealant (Carafax IDL99 110).
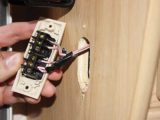
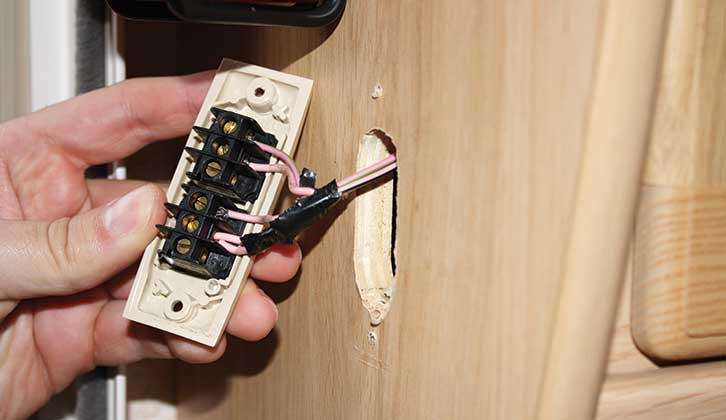
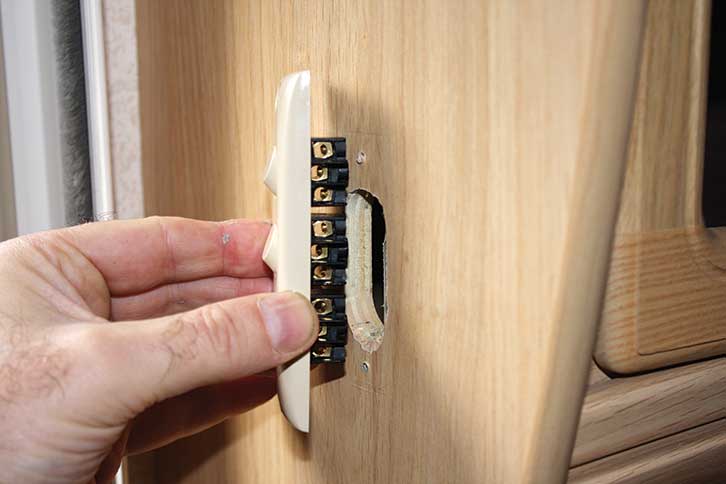
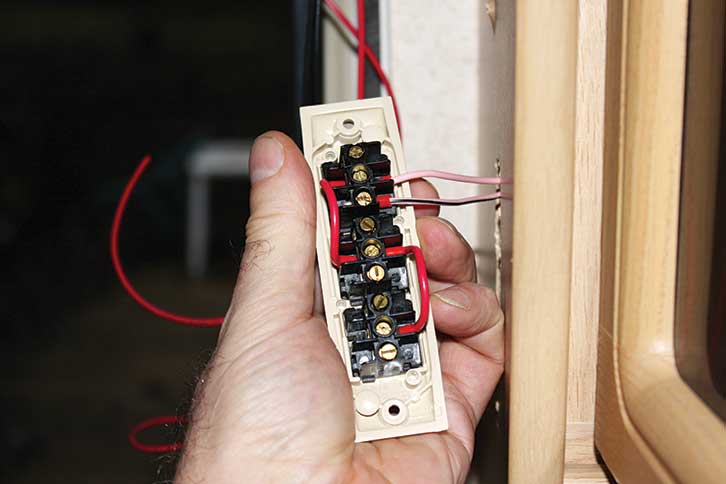
Working inside, the wall switch operating an internal light and the awning light was removed, and the cables disconnected (making a note of which wire was where for the internal light).
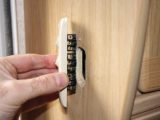
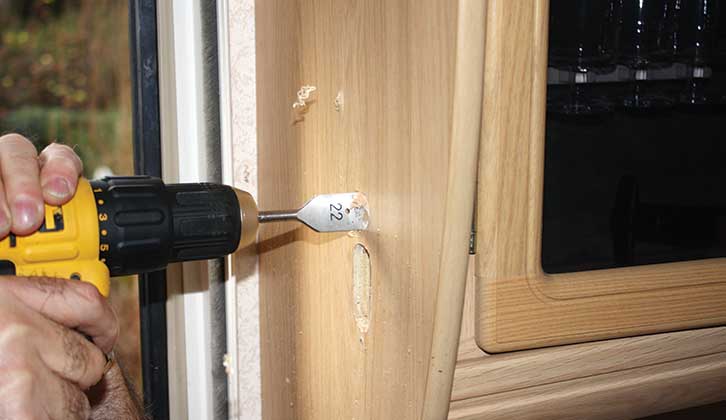
The cables ran in some trunking inside the dresser, which gave us easy access when the cover was removed. We’d bought a new triple light switch that matched the old one, but the original hole where the switch was mounted needed enlarging. Using a 22mm wood bit and a Stanley knife, the hole was opened out so that the new triple unit would fit.
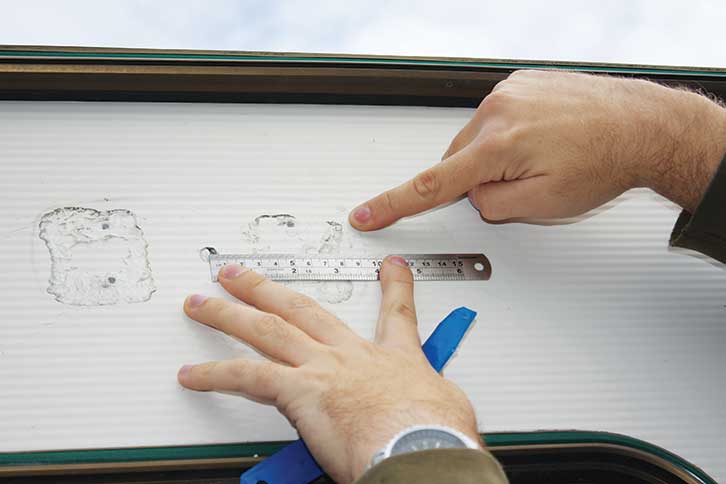
Measure before drilling
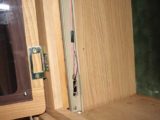
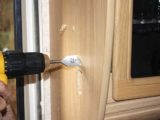
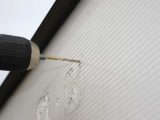
Carefully measuring where the new light unit would fit, an 8mm hole was drilled through the wall (after drilling a pilot hole) where the wires would need to pass through to the inside.
With that drilled, a section of self-adhesive trunking was fitted (we decided the trunking would look better if it covered the whole gap between the washroom wall and the dresser, rather than being cut off halfway along).
Then, working from the outside and using the 8mm hole, the same hole was drilled through the back of the trunking, and another hole was drilled in the dresser to where the original wires were.
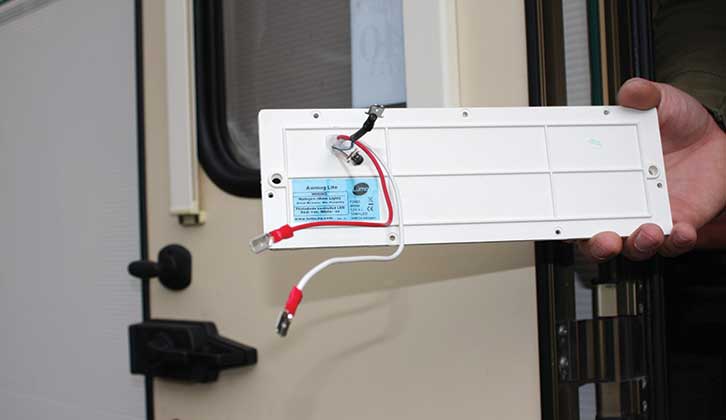
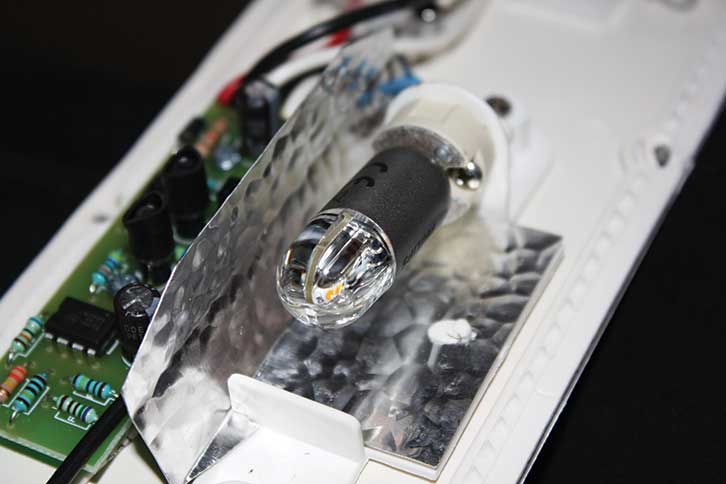
Before fitting the light unit, we also changed the original halogen bulb for another LED.
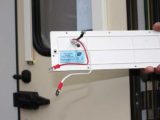
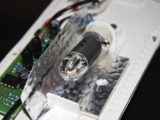
The new unit was supplied with self-tapping screws, which were used to attach it loosely to the wall, feeding the wires through the hole first. Crimped bullet connectors were attached to the ends of the wires feeding the photocell LEDs, and crimped spade connectors for the awning light.
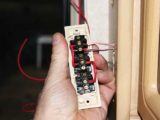
With the original power feed from the battery connected to the new switch unit, power to the other two switches was piggybacked from this (as the originals had been).
Then, two lengths of red cable (live) were run from the switches to the cables from the unit (with their respective crimped connectors).
Next, an earth cable was rerouted, which was connected using a terminal block to two lengths of earth cable (black). The loose ends were again connected to the ‘spare’ cables from the wires attached to the light unit.
Time to test the lights
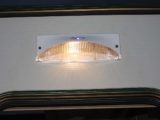
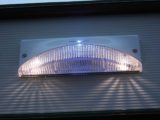
With the light switches in the ‘off’ position, the 12V battery was reconnected to test the light. It was much brighter than the old one and the photocell worked just as it should.
With the power safely disconnected again, the light was removed and sealant applied to the back of the unit, around the hole where the cables entered the ’van, and around all of the screws and screw holes.
The unit was then secured to the exterior wall. Internally, the cables were tidied inside the trunking, and finally, the switch unit was secured before reconnecting the 12V battery.
The result is a neat and practical upgrade from the original light, which also offers the added security of the photocell-activated LEDs.
How to fit an awning light – a step-by-step guide:


You may also like:
- We talk you through the steps of how to make an awning
Future Publishing Limited, the publisher of Practical Motorhome, provides the information in this article in good faith and makes no representation as to its completeness or accuracy. Individuals carrying out the instructions do so at their own risk and must exercise their independent judgement in determining the appropriateness of the advice to their circumstances. Individuals should take appropriate safety precautions and be aware of the risk of electrocution when dealing with electrical products. To the fullest extent permitted by law, neither Future nor its employees or agents shall have any liability in connection with the use of this information. Double check any warranty is not affected before proceeding.
If you’ve enjoyed reading this article, why not get the latest news, reviews and features delivered direct to your door or inbox every month. Take advantage of our brilliant Practical Motorhome magazine SUBSCRIBERS’ OFFER and SIGN UP TO OUR NEWSLETTER for regular weekly updates on all things motorhome related.