


Changing a wheel is something that all motorcaravanners will probably encounter at some point – while many motorhomes are equipped with cans of tyre sealant, these don’t always work and with a blowout, they are of little use.
In the event of a sudden tyre deflation, the key is to get the vehicle somewhere safe so you can work on it or call for help. If you have to drive on the tyre to get somewhere safe, you should do so at reduced speed. But do get somewhere safe – keeping you and your passengers safe is the number one priority.
Any tyre that has suffered a blowout or been driven on while flat must be replaced – even if it looks fine on the outside, the carcass will be damaged.
Whether you’ve just bought a new motorhome or have had one for years, it makes no difference: before you find yourself having to change a spare wheel, it pays to familiarise yourself with how to do it. So before your next trip, take a little time to locate your jack and toolkit, and find out where the spare wheel is stored (and check it’s inflated!).
If you don’t have a spare wheel, it’s highly recommended to fit one, if your payload allows it. If your motorhome doesn’t have a garage to store one and an underslung cradle isn’t fitted, then consider having one installed – you can get all manner of brackets to hold spare wheels on the outer panels of the ‘van, or underneath it.
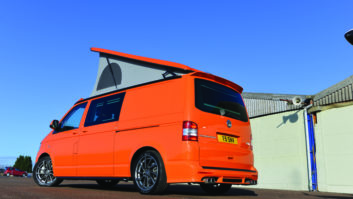
Here we’ve used a Renault Traffic campervan with an underslung spare wheel to show you the whole procedure, but the steps are very similar no matter what brand of vehicle you might have. Both Ford Transit Custom and Toyota Proace have the spare wheel located in a similar way, but the release screw is inside the vehicle (this is better, because it doesn’t corrode).
While the wheels on medium vans are not too bad, the wheels on large ones, such as Transits and Ducatos, are quite a bit heavier. Many conversions retain the original Fiat spare wheel mechanism, so be prepared for the weight of it – they’re not light.
Many Fiat vans have the spare wheel underslung on a wire ratchet system and, while it’s easy to raise and lower the wheel to the ground, the hard part is feeding the wire and support plate through the wheel. So if you can have assistance to do this, or something to prop the wheel on while you remove/attach the plate, it’s helpful.
For RVs with even larger wheels, it’s a case of calling out a breakdown firm – a truck – and coach-sized wheels are not a DIY prospect.
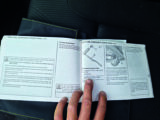
No matter what vehicle you have, step one is to read the owner’s manual for tips and to see the procedure.
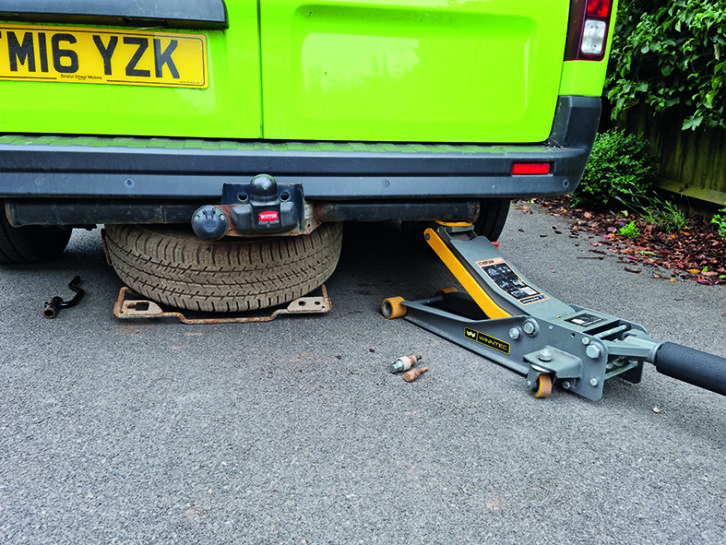
For all wheel changes, the vehicle needs to be lifted in the air – it’s crucial to always put the handbrake on, leave the vehicle in gear, and chock the wheel diagonally opposite the side you are lifting (I carry a lightweight chock for this reason).
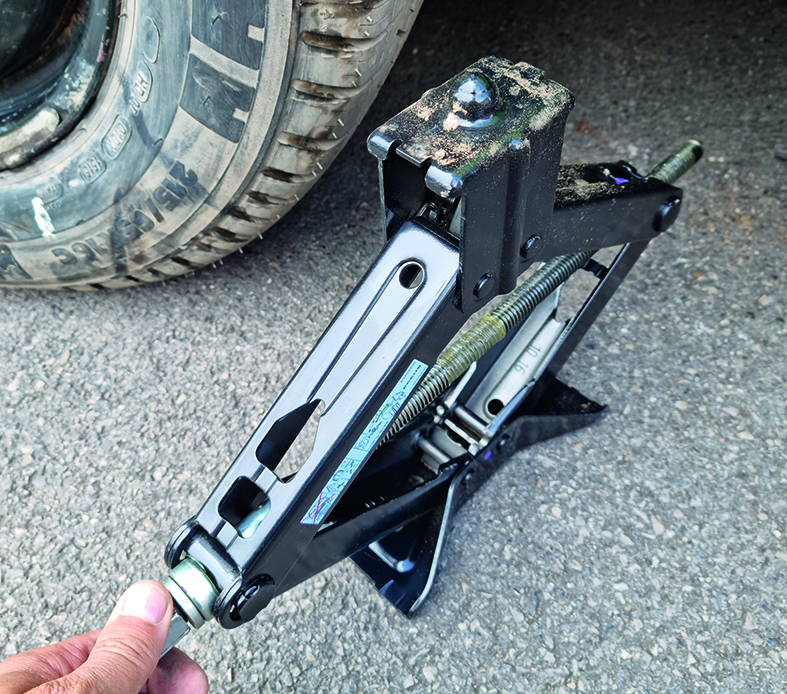
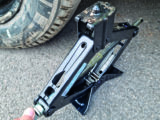
The supplied jack on most vehicles is pretty basic and must be on firm ground and level before you start lifting.
If it moves at all, lower the vehicle and reposition it. Whenever the vehicle is on the jack, do not get any of your limbs underneath – if it falls off the jack, you risk being crushed.
While the vehicle is resting on a jack, don’t step inside or outside, or move around inside – you don’t want to risk any movement unsettling it.
If you’re embarking on a long trip, it’s well worth upgrading the factory jack to a trolley jack – these are faster, easier to use and safer.
You can buy lightweight aluminium ones from Machine Mart, for example, that won’t eat into your payload too much – typically they weigh in at less than 20kg. While most motorhomes might be around the 3500kg mark, you’re not lifting the whole vehicle, and a 1.5-2t jack is fine for most ‘vans.
I have lifted a Ducato on a 1.25t aluminium jack without issue – you’re only lifting one corner, so the weight isn’t high. With any jack, though, check the maximum height it lifts to – measure the extended height of your factory jack to see the height you need, or measure down from the chassis and add about 150mm.
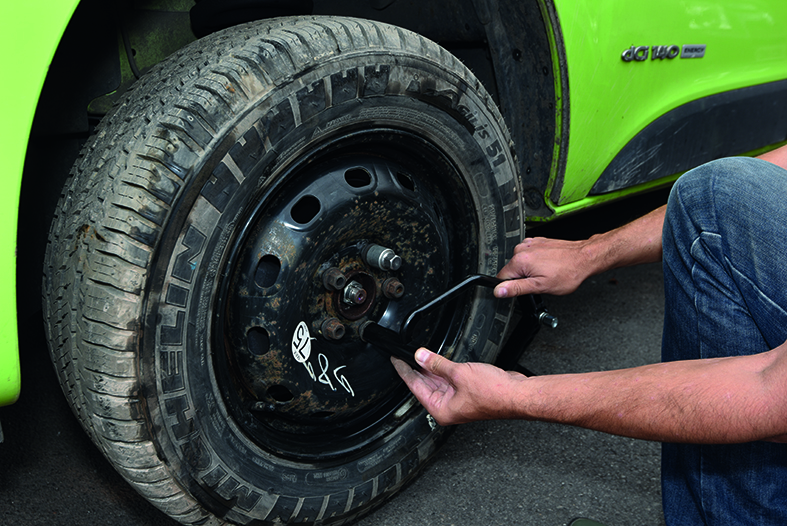
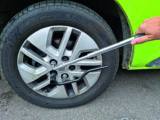
The other point is that the wheel nuts (or bolts) are tight. Some manufacturers supply quite a good wrench, but you can buy extending wrenches to make removing them easier. And remember: lefty loosey and righty tighty!
How to change a wheel

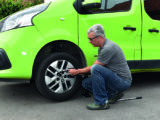
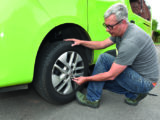
1.Find the owner’s manual – usually the base vehicle manual – and check the procedure for releasing the spare wheel and where the toolkit is.
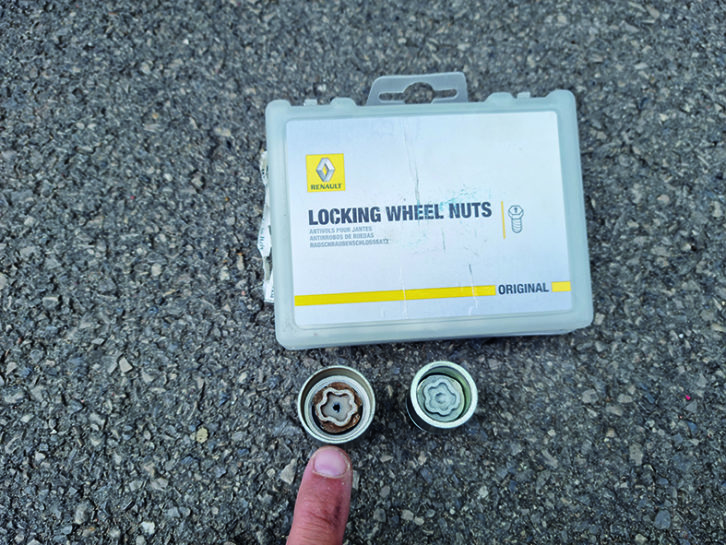
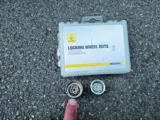
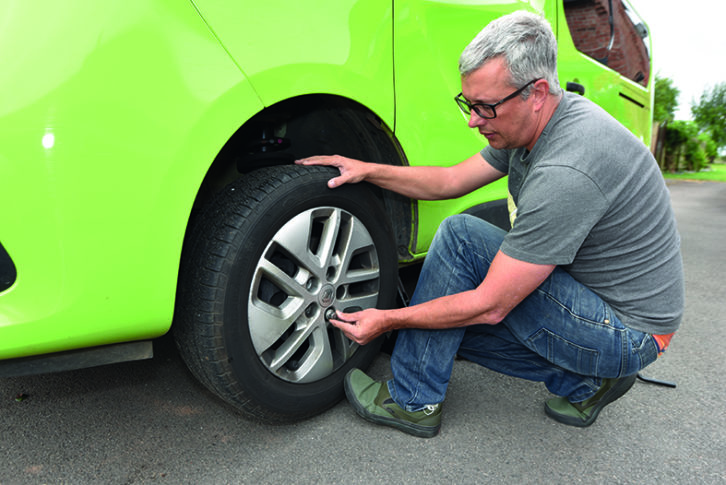
2.Next, find the locking wheel bolts (sometimes there are two, one for the spare and one for the road wheels) and check that they fit.
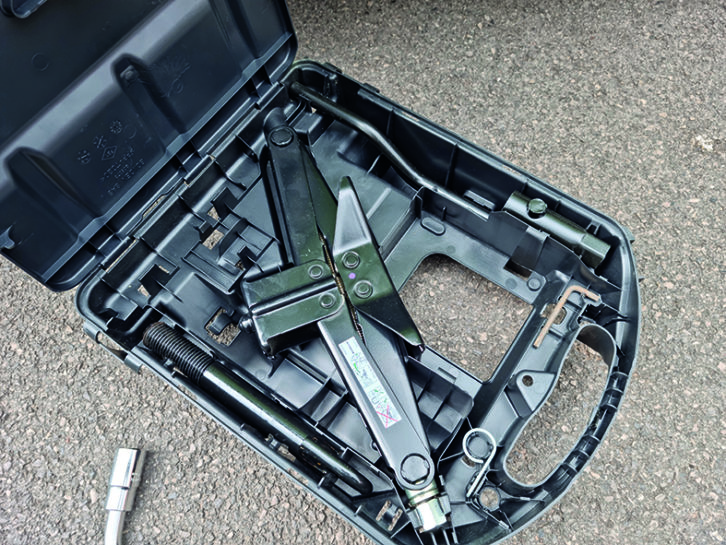
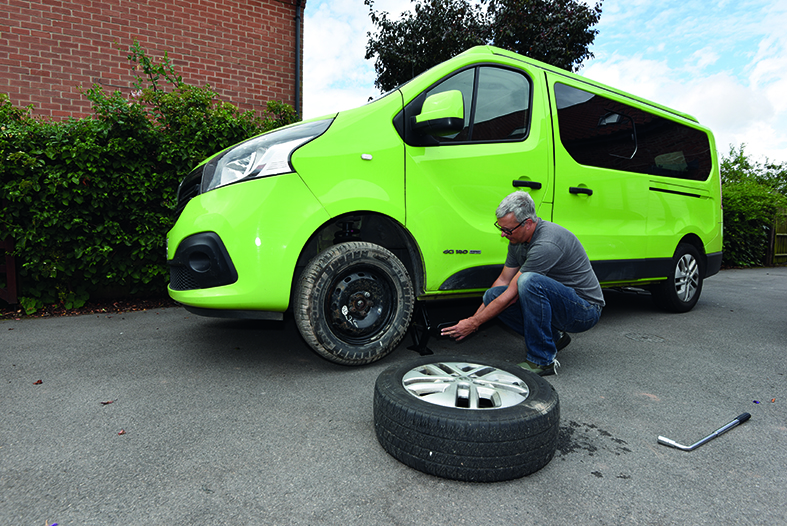
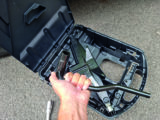
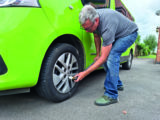
3.Now locate the toolkit (on Trafics and Ducatos, this is often to be found under a cab seat, while Transits usually store them in a hatch by the driver). Gloves are handy if you have them. If you’re working near traffic or it’s night-tine wear a hi-vis jacket.
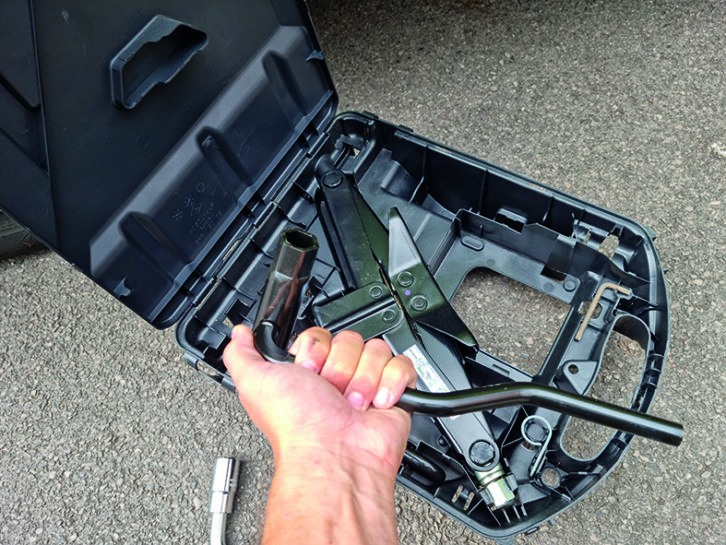
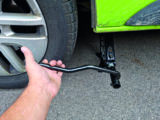
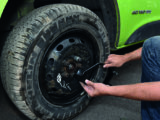
4.Find the wheel wrench in the toolset – this Renault one is pretty good, but an extendable wrench is well worth packing, to give extra leverage.

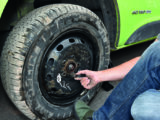
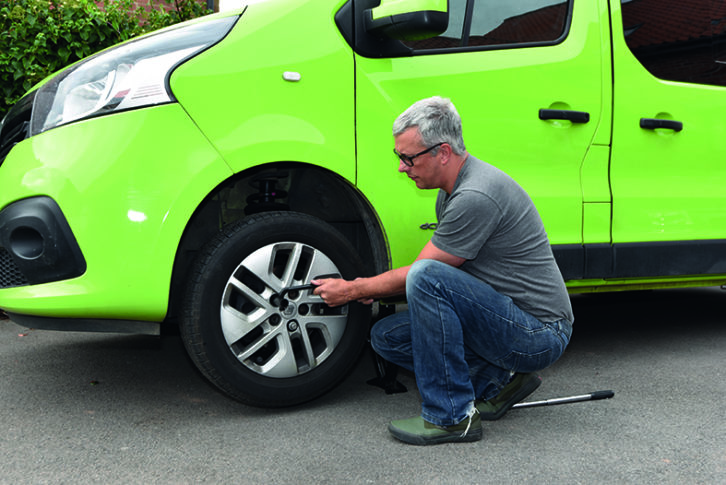
5.Loosen the wheel nuts on the wheel you are replacing – including the locking wheel nut; an extending wrench helps. Don’t remove any yet, but do make sure they are freed off.

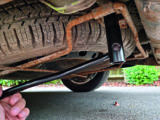
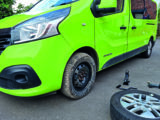
6.Find the spare wheel cradle. Some vehicles use a spare wheel locking nut to secure the spare wheel cradle in place, so have this to hand.

7.Loosen the bolts holding it in place (two in this case – one on many ‘vans).

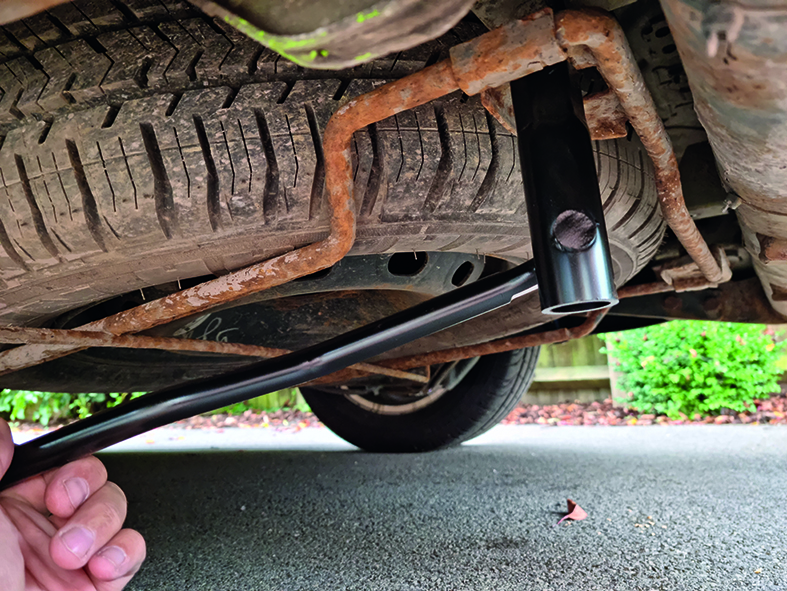
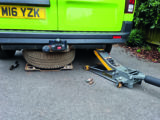
8.Keep going until one edge of it rests on the ground. On some models, such as Toyotas, you’ll need to unhook one edge of the wheel cradle to release it. Be warned, they’re heavy, so keep your hands out of the way.
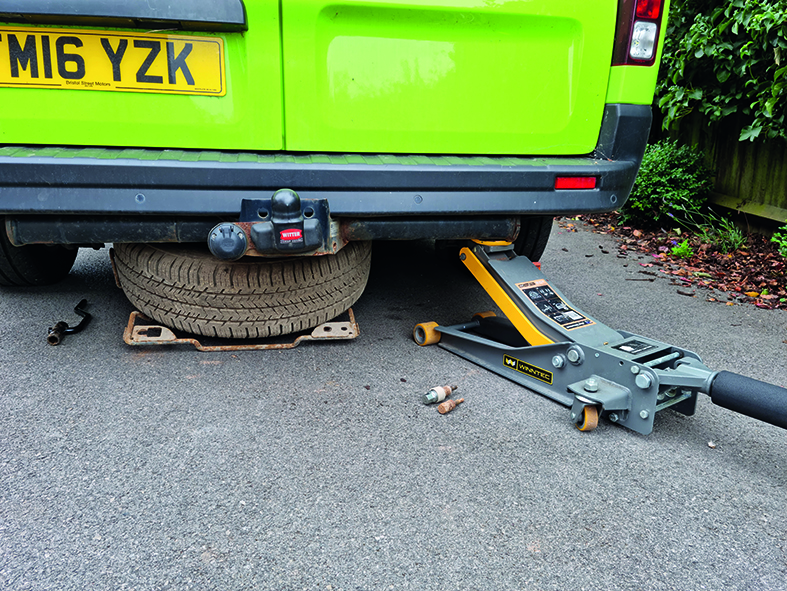
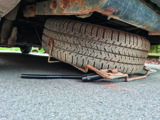
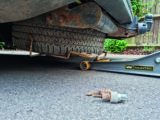
9.At this point, I was quite relieved to be carrying out this task at home: the towbar fouled on the cradle, so I could not slide out the spare wheel. A jack was needed to raise the towbar so the wheel could then be removed. So glad to be at home at the time!

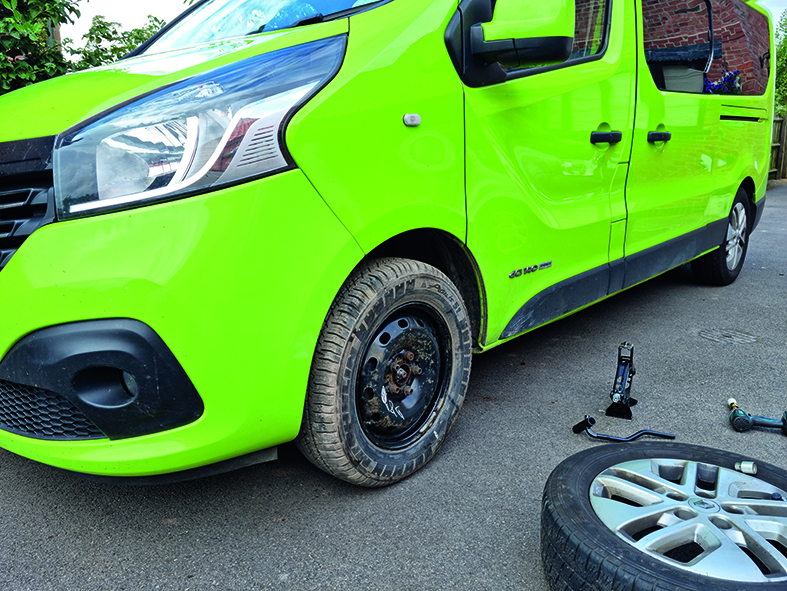
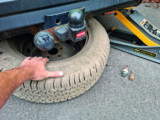
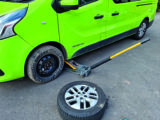
10.With the spare released from the vehicle, pull it free and move it to wherever you need it.
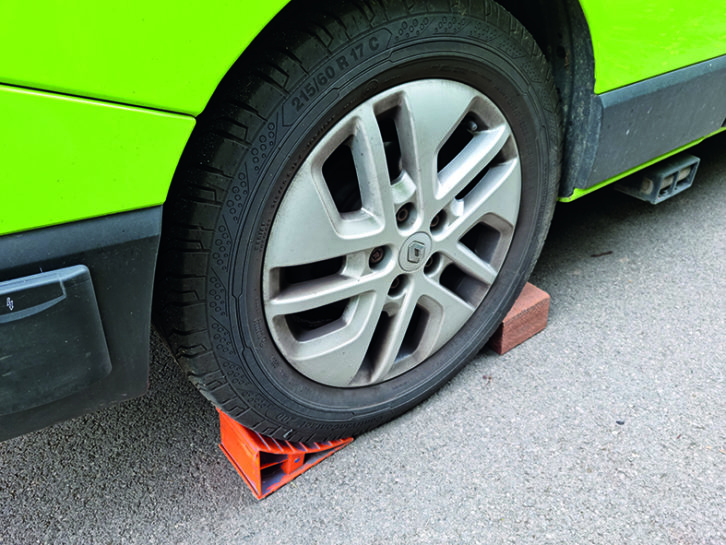
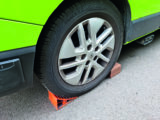
11.Chock the wheel diagonally opposite the wheel you’re lifting in the air.

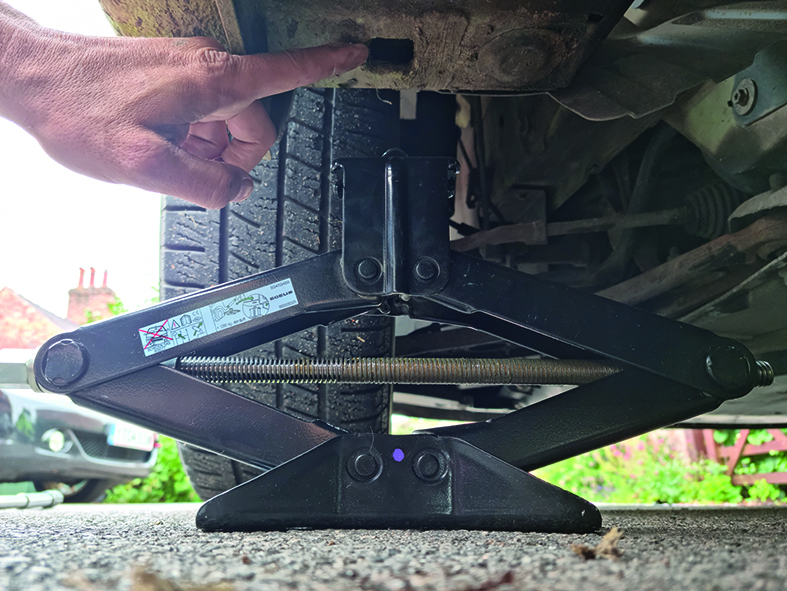
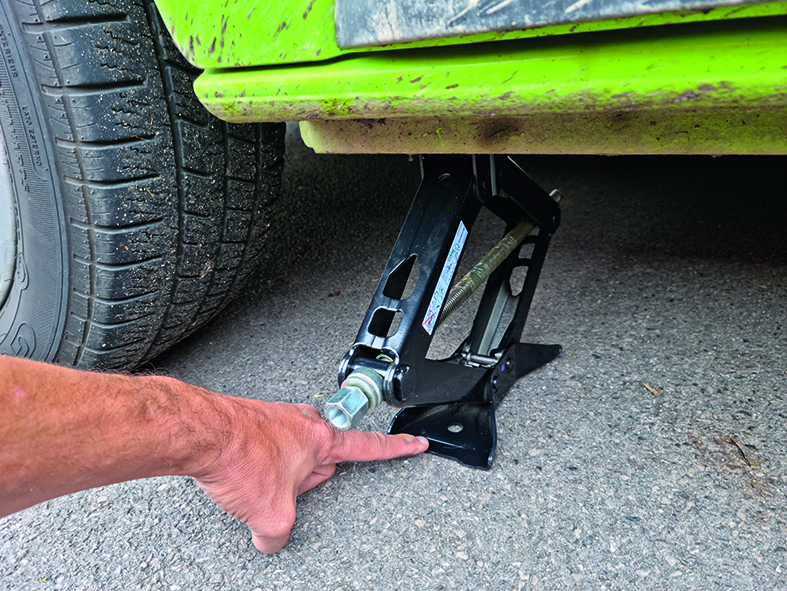
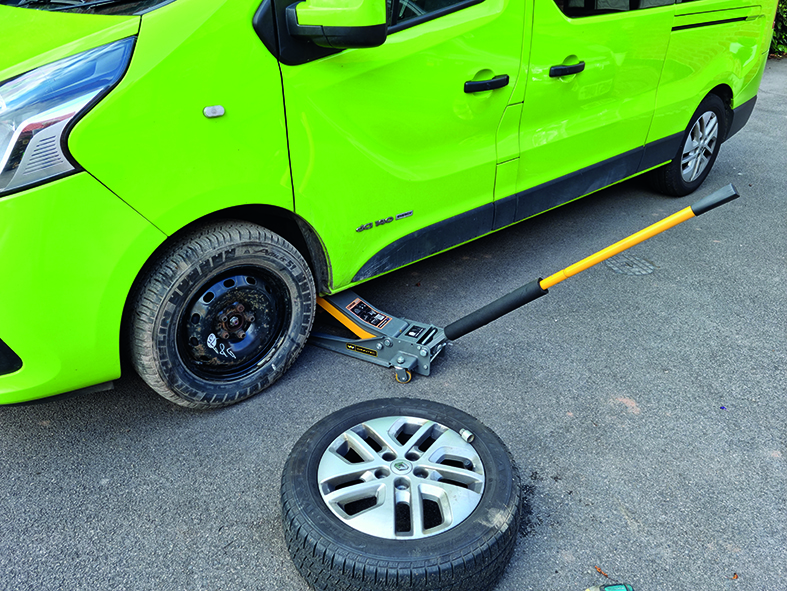
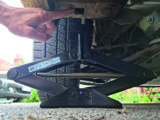
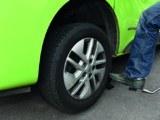
12.All vehicles will have some sort of marking, either slits, indentations or holes, to indicate where the jack should be placed – the dimple on the jack must fit this hole in the chassis.

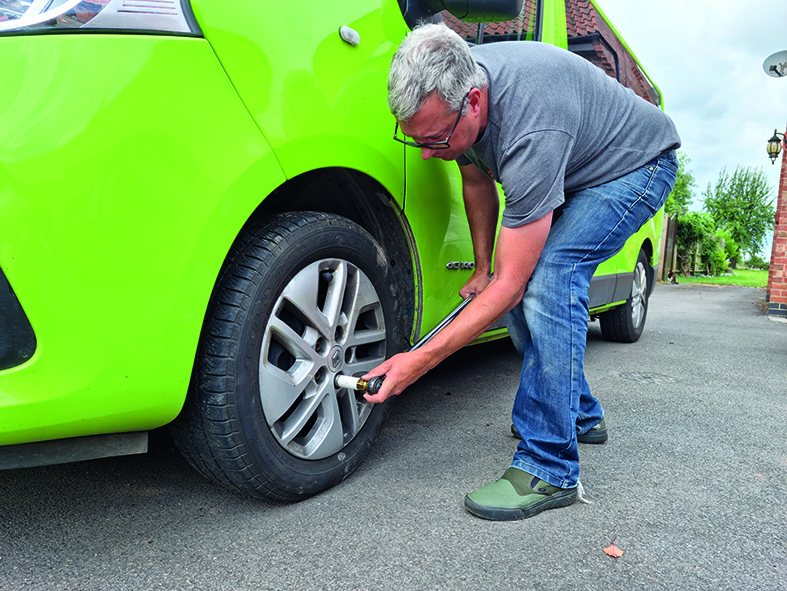
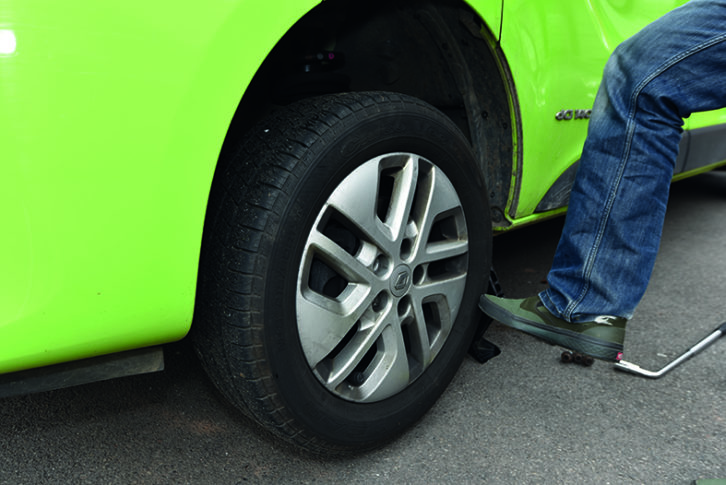
13.Wind the jack with your hand (or a wrench if it’s stiff) until it just starts to make contact with the jacking point. Check the jack is level and vertical.

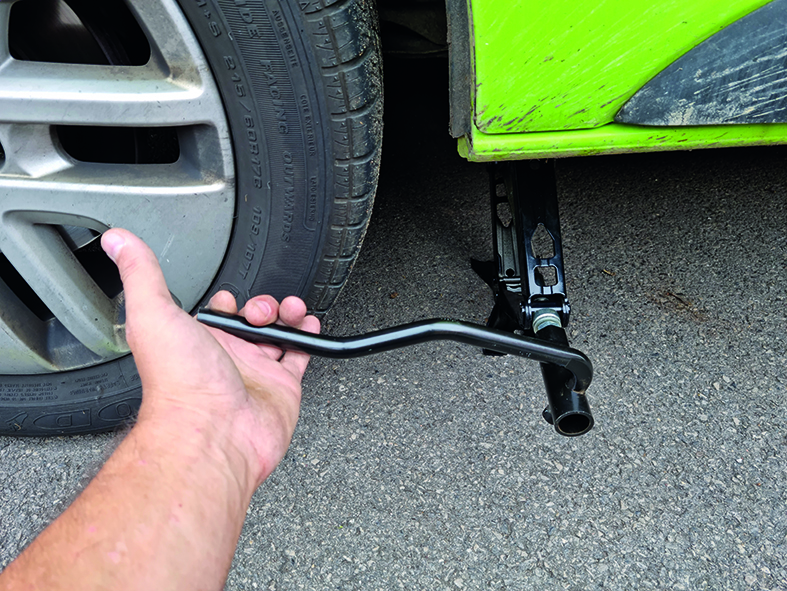
14.Wind the jack up with the supplied wheel nut wrench (or your extendible one) – make sure you complete this in a smooth fashion, so you don’t jerk or move the jack at all.
15.As soon as the wheel is clear of the ground, wind the jack up a little more and then stop – raising it too high will make the vehicle less steady and then it is going to be more difficult to lift the spare wheel into place.

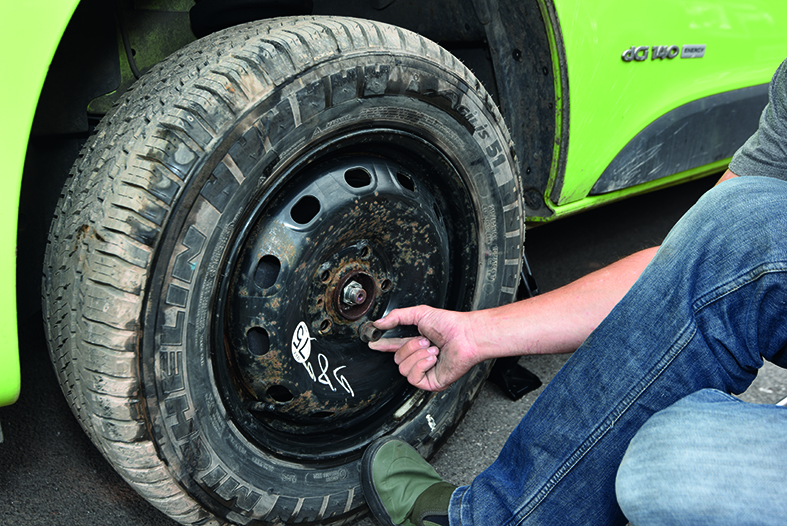
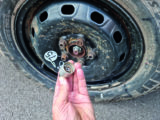
16.Remove all of the wheel bolts except the lowest one – store them out of the way and keep the threads clear of grit.
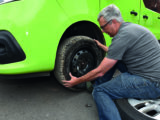
17.Keep your foot on the lower sidewall of the tyre and remove the final nut (or bolt). Remove the fixing, then remove the wheel if it comes loose.
18.Alloy wheels often stick in place (they galvanically corrode to the hub). If this is the case, kick the wheel on one side to free it. Do not try to pull it off with your hands, because this is dangerous – remember, no part of your body should ever be underneath a vehicle that is only on a jack.
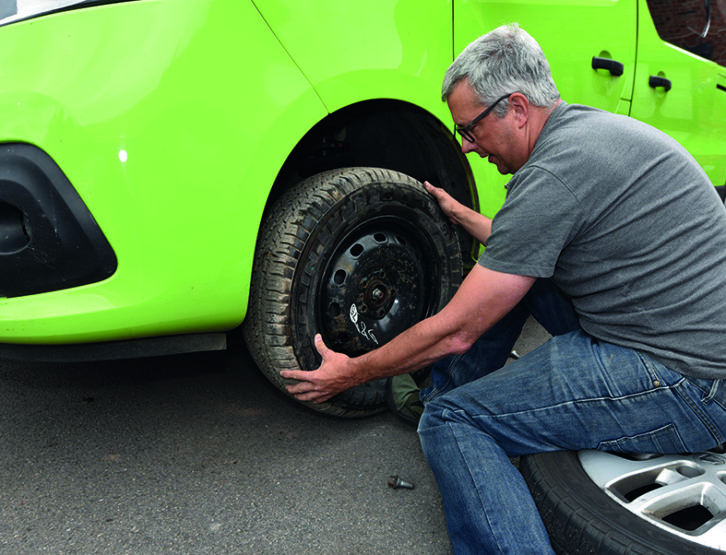
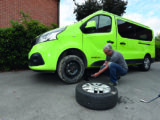
19.The removed wheel makes a handy seat while you fit the replacement. Grab one wheel bolt (or nut), lift the spare onto the hub and rotate it so that the bolt holes align.

20.Hold the wheel in position on the sidewall with your foot and attach the bottom fixing first. Tighten it up buy hand, then release your foot. Refit all of the remaining bolts, finger-tight.

21.Tighten them up with the wrench, starting at the bottom, then going to the opposite fixing until all are tight – do not go in a clockwise pattern; always do the opposite fixing so the wheel is clamped squarely on the hub.;

22.Lower the jack down until the tyre is back in contact with the ground, then continue unscrewing it until it becomes loose and can be pulled clear of the vehicle.

23.Now carry out a final tightening of the wheel fixings, using an ‘opposite to opposite pattern’. Ideally, you’d use a torque wrench here, but few people carry one, so as tight as possible will be good enough to get you to a garage.

24.Don’t try to refit the spare in the cradle; let the tyre centre do it. Pack all your kit away and head to the tyre centre so they can repair/reneew the tyre and torque up the bolts. Most spares have a reduced speed marked on them – don’t exceed it.

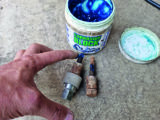
25.Don’t forget to remove the locking wheel bolts key (been there, done that!).

26.Before you refit the cradle bolts, it’s a good idea to grease them to prevent them seizing up in the future (never grease wheel fixings).

27.This is why it’s a really good idea to let the tyre centre refit the tyre in the cradle – it’s an extremely awkward lift on many vehicles. The jack helped to support the cradle while the bolts were being refitted.

28.Last but not least, if you’re planning to make a more extensive journey, you might want to invest in a trolley jack (the one pictured here is steel, although aluminium ones are best) and perhaps even an impact driver.
If you liked this… READ THESE:
Best kit to pack for a motorhome toolkit on tour
Fitting alloy wheels to your campervan
If you’ve enjoyed reading this article, why not get the latest news, reviews and features delivered direct to your door or inbox every month. Take advantage of our brilliant Practical Motorhome magazine SUBSCRIBERS’ OFFER and SIGN UP TO OUR NEWSLETTER for regular weekly updates on all things motorhome related
Future Publishing Limited, the publisher of practicalmotorhome.com, provides the information in this article in good faith and makes no representation as to its completeness or accuracy. Individuals carrying out the instructions do so at their own risk and must exercise their independent judgement in determining the appropriateness of the advice to their circumstances. Individuals should take appropriate safety precautions and be aware of the risk of electrocution when dealing with electrical products. To the fullest extent permitted by law, neither Future nor its employees or agents shall have any liability in connection with the use of this information. You should check that any van warranty will not be affected before proceeding with DIY projects.
Remember, lefty loosey and righty tighty!