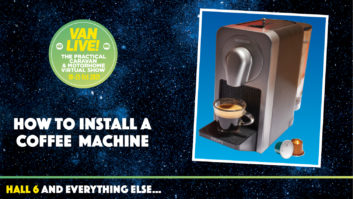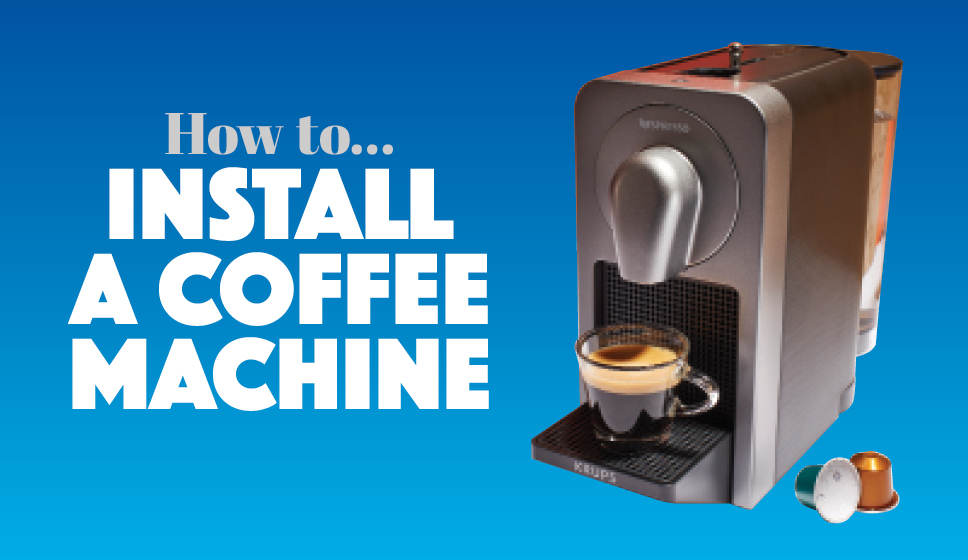


If you’re reading this holding a cup of instant coffee, this article probably isn’t for you. Skip the page. Save your time. But, if cafetières don’t really float your boat, and you know that there’s no ‘x’ in espresso, read on to find out how to install a coffee machine in your ‘van.
I’m an unashamed coffee snob, and a really good coffee is one of my motorhome essentials. There is no better way to start the day.
But just how do you get a decent coffee in your motorhome or camper, without having to resort to spending £8 at a hipster coffee store – and having to queue?
On an electric hook-up, it’s easy – plug in and use your domestic coffee machine. Either a pod machine or, if you have a larger motorhome, perhaps even a bean-to-cup machine. But what if you want to enjoy first-rate coffee when you’re not on hook-up? How is that possible?
This was precisely the dilemma I faced with my campervan. There were two problems: first, space is at a premium, ruling out bulky bean-to-cup coffee machines; and second, I did not want to use a generator. They’re bulky and even the quietest suitcase models still produce some noise.

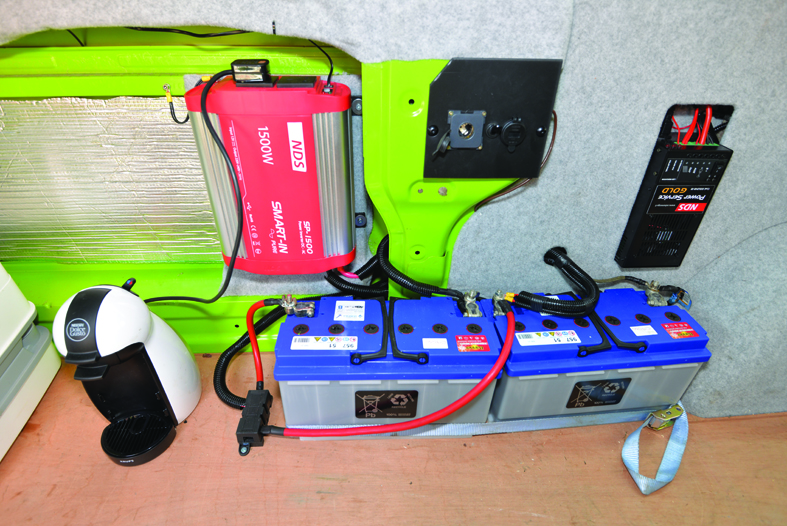
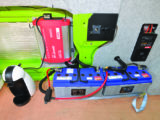
So the only other practical way to power a coffee machine was with an inverter – a device that converts 12V DC to 230V AC. The vehicle already had two 100Ah Banner leisure batteries fitted, so there was plenty of capacity to run an inverter for the brief amount of time a coffee machine requires.
Choosing a coffee machine
One of the drawbacks with instant and filter coffee is that the beans are pre-ground and inevitably taste musty.
You could grind the beans yourself, but this involves lugging around both the beans and some form of grinder. A better way to get the freshly ground taste is to use a pod machine. These use ground coffee that has been sealed to keep it fresh. Most pods can now be recycled, too.
Pod machines have another important feature, critical to good coffee – they pass the hot water through the coffee beans under pressure.It’s this combination of pressure, heat and time that lets the beans release their full flavour. These three elements – the holy trinity of great coffee – are all carefully controlled by a pod-style machine.
When all three elements are correctly balanced, the coffee should look like Guinness, with a dark brown body and a thick, foamy, beige head, formed by the released oils. This head is critical – it means the oils have been released from the coffee to provide the optimum taste. You get none of this with instant or filter coffee, hence the ‘flat beer’ look to it.
Pod coffee machines are pretty cheap these days, and for use in a motorhome, I’d pick a basic espresso maker without a built-in milk steamer; these can be a pain as they’re so hard to clean.
With this in mind, I ordered a pile of coffee pods and a trio of machines, to try them out – a Dolce Gusto and a Bosch Tassimo, at around £30 each, and a Nespresso Essenza, at £70.
First to fall was the Tassimo – while it can make a wide variety of drinks, including excellent hot chocolate, I didn’t find its coffee the best. Whether this was down to the coffee grind – I tested a wide selection – or the low 3.3 bar pump pressure isn’t clear, but I didn’t find a single coffee I liked.
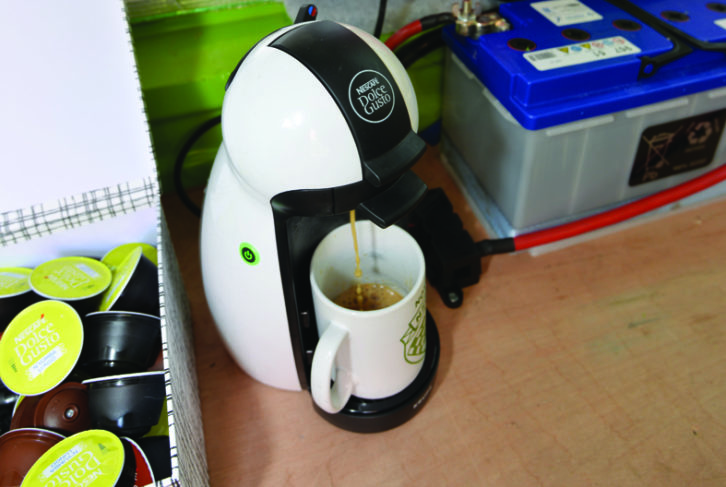
The Dolce Gusto uses a 15 bar pump and made much more appealing coffee, but it was quite bulky and had a water tank that was fiddly to fill.
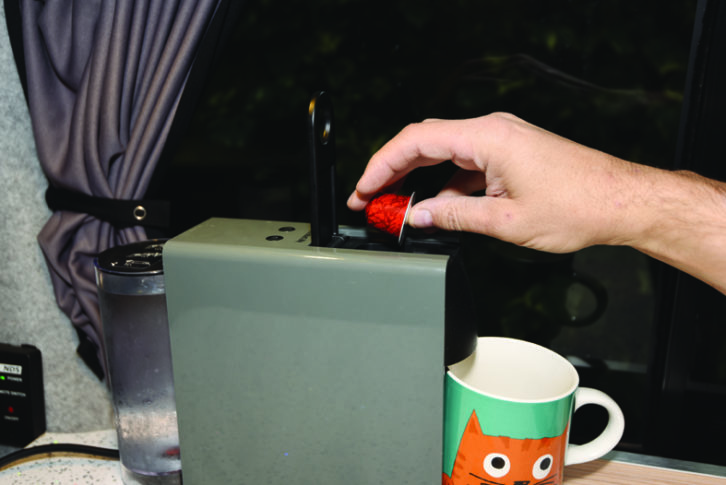
That left the Nespresso. This particular one was the smallest machine tested – a definite plus in a campervan, and its 19-bar pump and aluminium capsule pods produced coffee that was, to me, in a different league to that of the other machines.
Although you can buy compatible pods for this machine from supermarkets, I’d highly recommend using the Nespresso capsules – the coffee is good and they don’t get stuck in the machine. Nespresso does have a few shops around the country, but the best place to get them is online, at nespresso.com. They also supply recycling bags for used capsules, which can be left at your local Collect+ parcel drop-off point or collected by Nespresso for free. You get a recycling bag free with online orders (or by calling 0800 442 442).
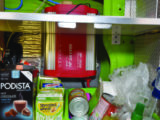
In addition, you can buy compatible Podista pods for chocolate drinks online, and these are not bad. I also found tea pods online, but they got a thumbs-down from tea-drinking friends, so perhaps it’s best to stick to a kettle!
Selecting the inverter
Having chosen the coffee machine, next came the tricky task of powering it. The Nespresso Essenza is 1310W, so the normal rule of thumb is to specify an inverter of double this capacity – something around 2600W (when any device is switched on, there’s a sharp spike of power that the inverter has to be able to cope with).
Inverters are usually quoted by their peak power – the level they sustain for a few seconds during switch-on – rather than the much more useful continuous rated power.
Once switched on, a 1500W continuous power inverter would be ideal – it’s best to pick one that is only as large as you need, because there are losses in converting from DC to AC and the larger the inverter power, the greater the losses.
In addition, 12V leisure battery power is finite. To run an inverter, you need to double up your battery bank as a first step (as mentioned earlier, I already had 200Ah, which was ample).

Anything that either heats, cools or has a motor in it will be a tricky load for an inverter. Coffee machines are even harder, because they have both a heating element and a pump, so they’re a real challenge for any inverter. Microwaves are the worst, however, with epic start-up currents and longer run times.
There are two main kinds of inverter: the cheaper modified sine wave inverter, and the more sophisticated pure sine wave inverter.
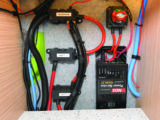
You’ll need a pure sine wave inverter for your coffee machine, and it needs to be a good-quality one that is correctly fused – these units take enormous current from your leisure batteries and have to be safe.
Be very wary of cheap inverters from online sources and only buy from a reputable motorhome dealer, specialist parts supplier or high street store. Many of the lower-priced imported inverters have never been CE tested and are fires just waiting to happen. The essential point here is that anything combining mains electricity and 12V in one box must be safe.
So I would stick to brands such as Dometic, Sterling, Victron and NDS. How do I know this? Well, at first I tried a cheaper option, a 2000W model, bought online for £120. The quality was poor – it rattled internally and didn’t fill me with confidence. It also failed to power the Nespresso machine and made it go haywire. Lesson learnt!
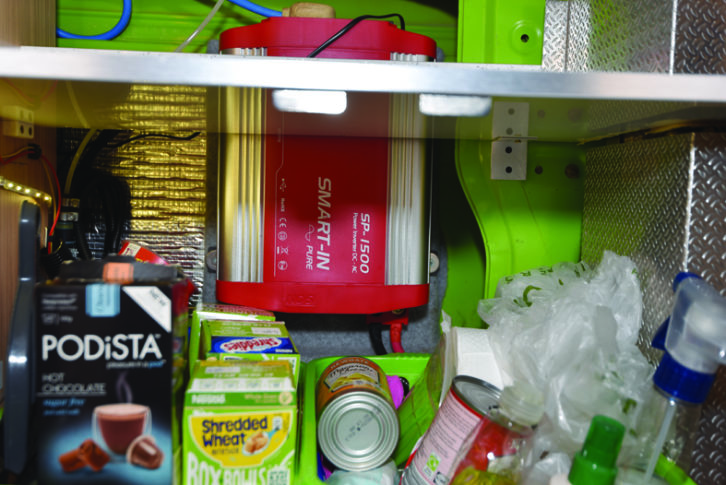
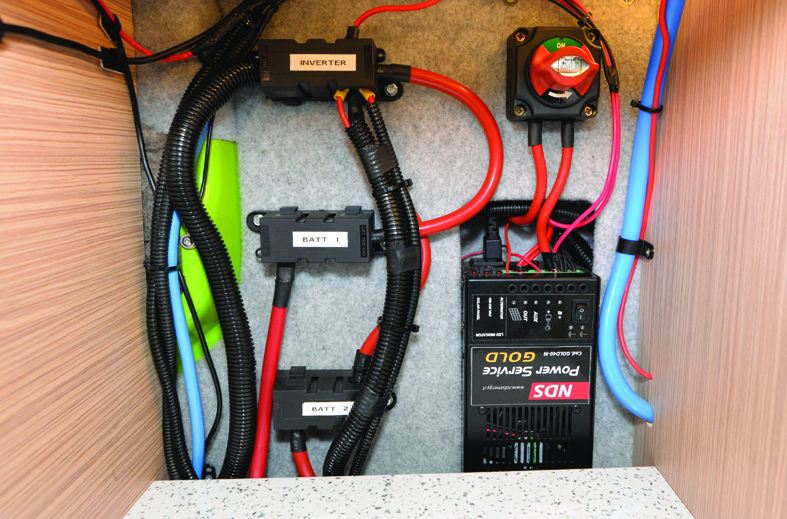
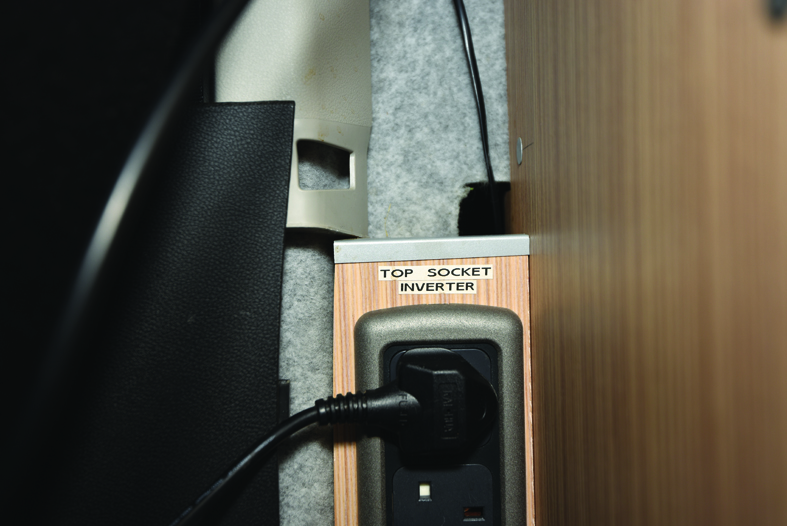
Taking advice from Andy Harris at RoadPro, I opted for an NDS 1500W Pure Sine Wave inverter. At £438, they’re not cheap, but this can also power any other 230V devices you might have. More importantly, it is E-marked and comes with a two-year warranty.
This model has two built-in 230V sockets and can support peak loads of up to 4000W for a few seconds when you switch it on (NDS quotes the continuous power ratings on the case).
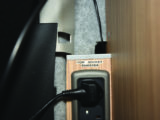
Andy also threw in a remote on/off switch, which means I don’t have to open the cupboard doors to activate the inverter, which is hidden away behind the kitchen cabinets.

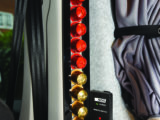
It’s essential that an inverter is fitted with a fuse on its main input cables – always use the supplied cables and keep the distance between battery and inverter as small as possible. For this 1500W model, NDS recommends a 200A fuse, so you can appreciate that the currents involved are pretty massive. Do not fit any inverter without a fuse – you can weld with this level of amperage.
Fitting the coffee machine
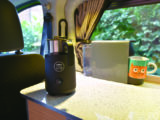
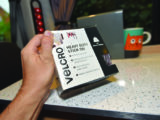
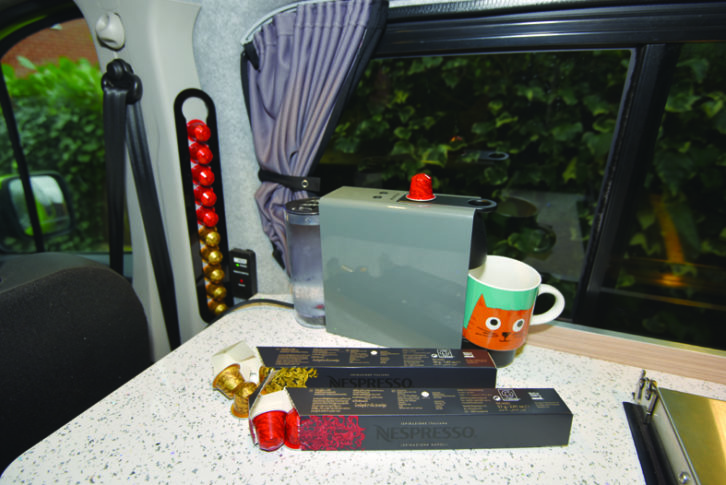
Having the coffee machine close to hand for a rapid morning brew is crucial to me, so I opted to mount it on the worktop, rather than in a cupboard. Initially, I was going to make up some form of bracket or shelf to support it, but then I discovered self-adhesive, heavy-duty Velcro!
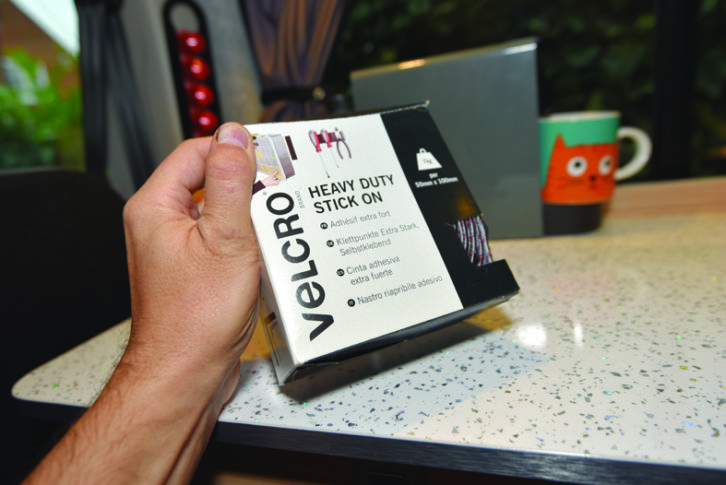
This industrial-strength product is 50mm wide and proved ideal – just make sure you position the self-adhesive part carefully, because it is very difficult to remove if misaligned.
You can remove the Velcro section, but it’s really not easy (each 100mm length holds with a force of 7kg). In my campervan, it has remained in place for well over a year now and not budged a bit. Do not use ordinary Velcro or a generic product – it will come off.
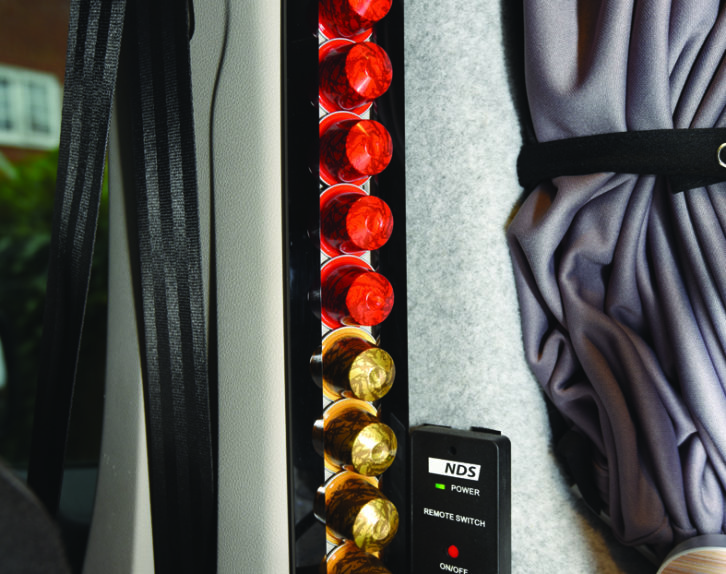
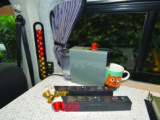
Various pod-holders can be ordered online and I found a useful self-adhesive strip that stuck on the B-pillar of my camper – this neat little holder is a great space-saver that cost around £10.
Using the Nespresso machine
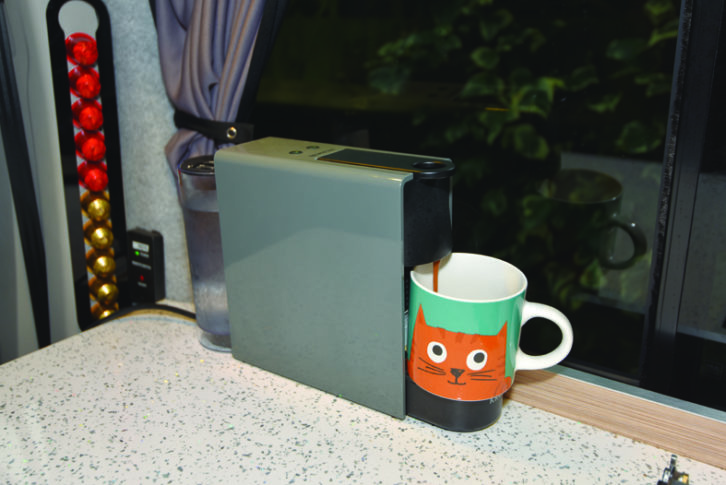
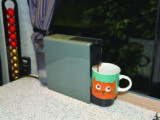
Even if you’re heating up a kettle of water on a gas hob, it takes a few minutes to boil. The real beauty with the Nespresso machine is speed. With the inverter switched on and the water container filled, the machine takes just 34 seconds to warm up and then another 20 seconds to full your cup. This particular one only makes espresso, but if you want a larger coffee, Nespresso also offers the Vertuo range.
Although coffee-making does take a lot of current from the ‘van’s leisure batteries, it’s only for a very short duration, so you can enjoy lots of drinks without worrying too much (12 consecutive drinks for friends is my record so far!). Remember to switch off the inverter when you’re done, though – even idling, they still draw a little current.
This speed of production, from cold water to steaming hot espresso, is the key benefit and, although the upfront costs of the inverter are high, not having the expense of service station coffee (never mind the lengthy queue) has saved me a fortune. The capsules typically cost between 35p and 42p each, which is about a tenth of the price of a motorway coffee.
When you’re on a campsite – with or without a hook-up – having the ability to make fresh coffee whenever you want, at the touch of a button, is just brilliant. On many early morning starts, going from bleary-eyed to hot coffee in a matter of seconds has definitely got me in the good books with my other half!
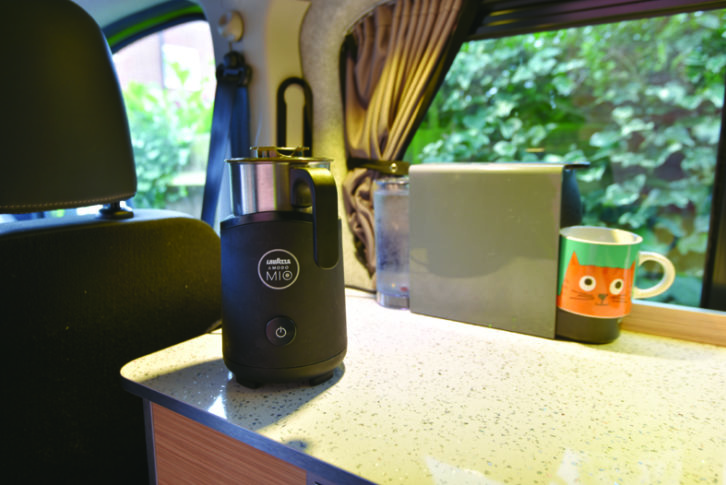
I prefer to drink my coffee black, but for those who like to add milk, I’ve also found a very easy-to-clean 230V milk warmer, which the inverter can run (not simultaneously – heat the milk first, then make the coffee).
Costing around £55 online, the 500W Lavazza A Modo Mio MilkUp produces either frothy or normal hot milk and takes just seconds to warm up – great if you like cappuccino.
The final point to note is about mugs. Don’t use metal camping mugs – they conduct heat far too fast and will allow your coffee to cool down much too quickly; stick to melamine or china.
If you liked this… READ THESE:
Top Sites – best motorhome and caravan parks in the UK 2021
Motorcaravanning for Beginners – everything you need to know
If you’ve enjoyed reading this article, why not get the latest news, reviews and features delivered direct to your door or inbox every month. Take advantage of our brilliant Practical Motorhome magazine SUBSCRIBERS’ OFFER and SIGN UP TO OUR NEWSLETTER for regular weekly updates on all things motorhome related.
Future Publishing Limited, the publisher of practicalmotorhome.com, provides the information in this article in good faith and makes no representation as to its completeness or accuracy. Individuals carrying out the instructions do so at their own risk and must exercise their independent judgement in determining the appropriateness of the advice to their circumstances. Individuals should take appropriate safety precautions and be aware of the risk of electrocution when dealing with electrical products. To the fullest extent permitted by law, neither Future nor its employees or agents shall have any liability in connection with the use of this information. You should check that any van warranty will not be affected before proceeding with DIY projects.
When you're on a campsite - with or without a hook-up - having the ability to make fresh coffee whenever you want, at the touch of a button, is just brilliant