


In the tenth part of our Getting Started series, Gentleman Jack attempts to repair our Project Peanuts’ faulty indicators.
In this installment, we take a closer look at the motorhome’s indicators that had taken on a mind of their own during owners Kate and Kyle’s journey home from their last tour. I didn’t so much disassemble the column indicator/lights/horn stalk switch as catch the bits when they fell into my lap….
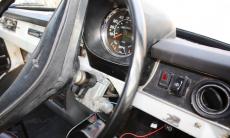
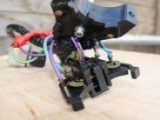
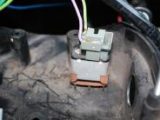
Wiring exposed
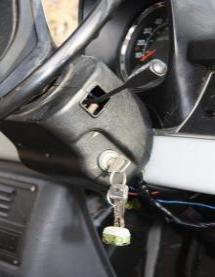
[tl:gallery index=1 size=230×138]This is where we finished up last time. Note how naked the steering column looks without the stalk swiotch assembly and its surrounding black plastic shroud.
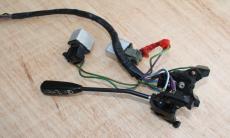
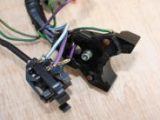
Switch assembly
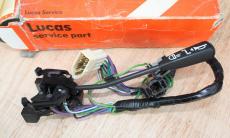
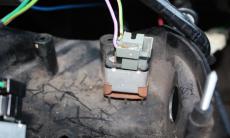
[tl:gallery index=2 size=230×138]The switch assembly was orginally pre-fitted with flasher units attached (see right). The switch mechanism is supposed to be one unit but unfortunately it isn’t anymore. And that was the problem: the switch control lever ‘makes’ and ‘breaks’ [tl:gallery index=3 size=230×138]contact by pivoting around an aluminium capstan insert, which is tensioned by a hairspring.
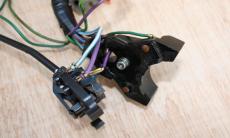
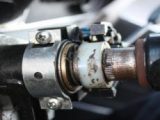
Cracked plastic
[tl:gallery index=4 size=230×138]A closer look reveals the problem to be two fractures through the main operating lever body around the socket for the pivot. I did try gluing it several times, but it wouldn’t take. The problem wasn’t so much the fracture as the missing chunks of plastic.
Sourcing a new part
Stupidly, I persevered for about 10 hours then gave up and did what I should have done from the beginning: look on the internet for a NOS (new old stock) unit. We sourced one from jrichardssurplus (http://myworld.ebay.co.uk/jrichardssurplus). The handy thing about Lucas [tl:gallery index=5 size=230×138]electrical components from this period is that they were used in many different vehicles, so obtaining spare parts is a relatively pain-free experience.
Positioning is vital
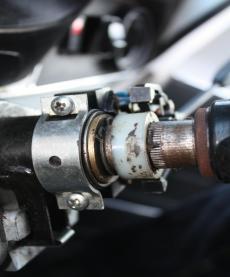
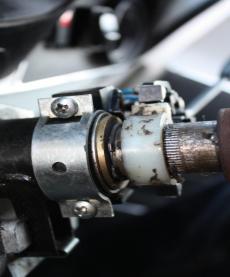
[tl:gallery index=6 size=230×277]In these before-and-after pictures you can see a close-up view of the steering column taken from the nearside. The indicator switch unit is held on by two bolts and an aluminium bracket. There are no keyways or locating lugs so ensuring it is in the correct position is a case of trial and error.
[tl:gallery index=7 size=230×277]Of paramount importance is its positioning in relation to the rasied piece (a peg cam) on the white nylon collar, as this operates the self-cancelling mode for the indicators.
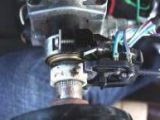
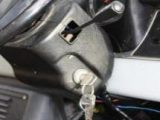
In a straight line
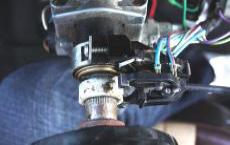
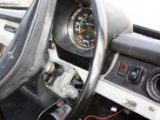
[tl:gallery index=8 size=230×145]This is the view looking down on the steering column from above. Before tightening the swtich clamp bolts, make sure that both the steering wheel and the road wheels are in the straight-ahead position. If they do not align then the tracking probably needs to be adjusted.
Put it back together
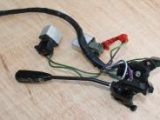
[tl:gallery index=9 size=230×138]Next, re-attach the flasher units on the bottom of the plastic shroud. And in vehicles like ours, that have had overdrive retro-fitted, make sure the activator swtich is re-connected.
And finally…
[tl:gallery index=10 size=215×277]Loosely attach the lower shroud to the column with the central fixing. Next, mate the upper and lower portions of the shroud. Finally, screw these together while checking for trapped (pinched) wires. And that’s the job done.
Project Peanuts: the story so far
Gentleman Jack set out to show you can live the dream for less than £2000 in our ‘Project Peanuts’ series. This 1977 Auto-Sleeper Leyland Sherpa cost just £825; Jack is managing it for single mum Kate and her son Kyle, who enjoy regular camping trips away in it. Each month, Jack carries out essential tasks, providing DIY advice and ownership tips.
Starter van to-do list
Shake down DONE
Urgent mechanical repairs DONE
Mechanical safety check, lubrication service DONE
Repair elevating roof DONE
Habitation safety check DONE
Service and refit gas and 12V equipment DONE
Fit new rear door cards DONE
Soft furnishings upgrade DONE
Power upgrade 230V and 12V DONE
Refinish cabinetwork
Bodywork make-over
Safety equipment upgrade
Time spent
Previously 45 hours
This month 10 hours
TOTAL SO FAR 55 hours
Money spent
Fixed costs:
Motorhome purchase £825
One year’s road fund licence (tax disc) £205
Insurance £176.24
MoT test £39.95
Repairs and upgrades:
2 x wiper blades £5.98
Top-up fluids £10.00
Workshop manual £5.96
Overdrive actuating solenoid assembly £81.50
Roof seals £19.97
Brass hinges and screws £6.25
New van battery £70.00
Brake adjustment £40.00
Gas and 12V ‘consumables’, including three-way manifold, new fuse box, etc £72.74
Wood, glue, screws and screw covers £15.00
Anti-freeze, new jubliee clips, second-hand 230V unit and fire blanket £40.97
Indicator/lights/horn stalk swtich assembly £33.999
TOTAL SO FAR £1648.55
Missed the earlier articles? Click on the links below to catch up:
- Part 1: buying a van – your options
- Part 2: more buying tips and insurance
- Part 3: safety check, towbar and rear step
- Part 4: essential roof repairs
- Part 5: making safe old DIY horrors
- Part 6: refitting the hob, fridge and some wiring
- Part 7: general improvements to the interior
- Part 8: making new door cards
- Part 9: ‘wiring’ for 230V and winter prep
Ask Jack …
If you have any queries relating to this series, feel fee to contact Gentleman Jack at [email protected].