
To make sure your motorhome is in tip-top shape for the touring season follow the checklist below:
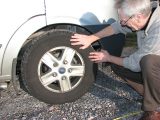
1. Tyres
First, make a visual inspection: check tread depth and remove trapped stones. Then check for signs of the rubber cracking between the treads: looking between otherwise substantial treads on an elderly tyre can reveal major cracks. Then, inspect the sidewalls, both on the inside and the outside of the wheel. Pay special attention to the sidewalls if the ’van has been laid up for a lenghty period: there may be bulges or even cracks at the point where the tyre rests on the ground. Watch out for flat spots, too. If all is well, then check and adjust the tyre pressures in accordance with the vehicle manufacturer’s handbook. Never run under-inflated tyres.
2. Vehicle servicing
When was the vehicle last serviced? The mileage may not be great but perishables need replacing on a time as well as distance basis. Perishables include lubricating oils, brake fluid, rubber hoses, rubber belts and filters (oil and fuel). When was the handbrake linkage last greased? If you have rear wheel drive, what about the propeller shaft grease nipples? Many owners trust major servicing jobs to others but it remains the responsibility of the driver to make sure that levels are correct. Check fluids carefully before you start the season, including the coolant level in the radiator. Top up with correctly mixed antifreeze/water to ensure continued protection against freezing. Don’t forget to make sure you have enough screen wash fluid, too.
3. Cambelt
With many vehicles, the relationship between the crankshaft and camshaft relies on a toothed rubber belt. If this fails when the engine is running, the result is frequently ‘terminal’ and a replacement engine is required – an expensive fix! Manufacturers provide mileage and age limits on cambelts and one should always replace all the components of this drivetrain within these limits. When a cambelt is changed, the belt tensioner must also be changed, as well as any other pulleys that the cambelt runs on, and sometimes the water pump as well. Running a new belt on a used set of pulleys can result in premature failure.
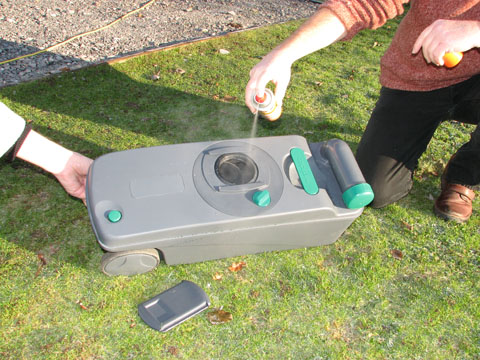
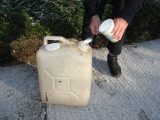
4. Water tanks
These should be left empty to protect against frost. Pre-mix the required quantity of tank cleaner with water in a can and fully dissolve it. Refill the fresh water tank, adding the solution. One suitable cleaner is Puriclean, which removes most things and is stated to be non-toxic and non-injurious to water-system components. Leave in the tank for at least one hour, then pump the contents through your various taps so that the solution is transferred to your grey-water tank using all available waterways. Leave overnight then drain. Refill the fresh tank and flush through the system. Drain again and re-fill for use.
5. Heating
Several heating systems are in general use, most gas-fired systems being made by Truma or Alde and diesel-fired units by Eberspächer and Webasto. More and more systems provide both hot water and space heating. All these systems need regular maintenance, although in most cases this just requires partial disassembly to enable thorough cleaning of airways (in) and exhaust-gas flue paths (out). Remove all fluff and follow the maintenance instructions in the owner’s handbook, prime the system and ensure that everything operates as it should.
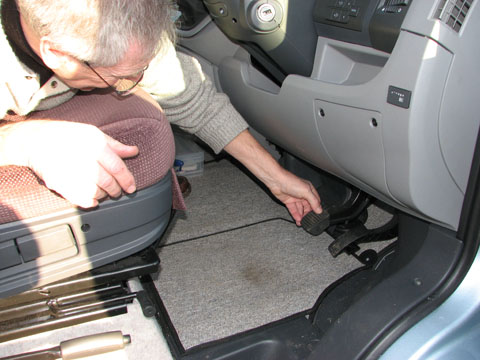
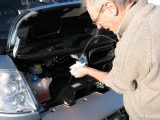
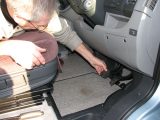
6. Cab
When were the cab mirrors and windscreen last thoroughly cleaned? Remove that layer of grime with a proprietary glass cleaner. Mirrors are frequently overlooked and the inside of the windscreen is just as important as the outside. You’ll be amazed just how much grime comes off the inside of the cab glazing. When you cannot see the glass from the inside, it’s clean! Pedal rubbers get worn without being noticed – check them and replace as necessary. Remove the cab carpets for cleaning. Vacuum out the cab and check for any signs of water ingress. Replace the heater pollen filter if you have one. Are the wiper blades okay?
7. Batteries
This covers both starter and leisure types. Most vehicles use low-maintenance batteries which have sealed cell tops. If your cell tops are removable, check there is around 4mm of fluid above the plates. If not, top up with de-ionised water. Clean all terminals and smear with Vaseline before re-assembly. If you don’t have a decent-sized solar panel, you’ll have likely connected your ’van to a hook-up at least once a fortnight during lay-up to keep the batteries charged, and you will have ensured that the charging system charges both batteries. If not, a ‘battery mate’ or a ‘battery master’ should be fitted to maintain the starter battery.
8. Cassette toilet
Thoroughly clean all inside surfaces of the loo with toilet-bowl cleaner. Lubricate the trap-opening mechanism with blade lubricant and ensure it operates freely. Inspect the main blade seal and replace if necessary. Purveyors of modern chemical toilets offer a range of ‘care’ components that actually work and keep your closet shining. If you have an electric flush, then check its functionality while at home. Have you got a SOG toilet-vent unit? Test it works and replace the carbon filter.
9. Spring clean and check your weight
Put all curtains through the wash and while the ’van is full of light, critically appraise all the clutter you carry. Do you need it all? When did you last put the fully loaded ’van on the weighbridge to ensure you remain legal? While the curtains are being washed it’s time to shampoo the carpet and clean the inside thoroughly. Silicone polish helps keep dust down but you will never fit adhesive towel holders afterwards! Replace the batteries in the smoke and *carbon monoxide sensors and check the inspection date on your fire extinguisher.
10. Cooker and fridge
Check that all the igniters work on the cooker, oven and grill. Service the gas fridge by cleaning the flue way and burner – most are accessible by removing the grilles on the side of the ’van, then undoing a small screw to release a metal shield. The owner’s handbook will include details relating to your individual fridge. Check all modes of fridge operation, and remember that it can take several hours to check that gas and hook-up systems make ice. The ‘mobile’ mode is checked by the warning light on the fridge display. If after a good run your fridge is not cold, then you need expert help, but first check the gas bottle is full?
And finally…
*WHY YOU MUST REPLACE THE CARBON MONOXIDE ALARM
Replace your Carbon Monoxide alarm regularly and get your appliances checked out annually. There’s no danger if your gas heater or gas water heater has been maintained properly, but if it is leaking it could release carbon monoxide into the room, an odourless gas. The carbon monoxide replaces oxygen in your blood and the first symptoms would be flu-like, with dizziness, nausea and trouble breathing. If you ever experience this, open the doors and windows and get everyone outside in the fresh air as fast as possible.
Unfortunately people have been known to die of carbon monoxide poisoning from leaky gas appliances – or even because they’ve brought barbecues or other heaters into their tents or ‘vans for warmth at the end of cooking.
Stay safe, and happy touring everyone!