


Regular servicing and timely repairs are the first step towards passing the MoT test. You can improve the chances of a first-time pass by also carrying out a DIY pre-MoT check, giving you time to fix problems before the test date. A month is ideal, because if the vehicle appears sound, you can put it in for the test early and receive up to a 13-month certificate if it passes.
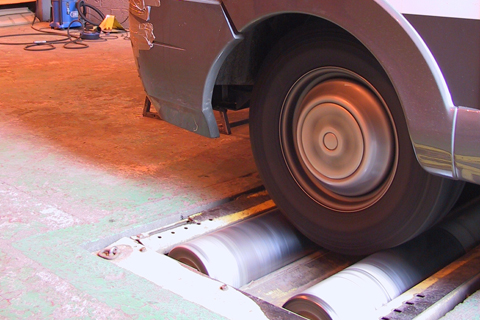
1. Road test
[tl:gallery index=1 size=215×129]
Most drivers monitor the vehicle as they drive, but if defects develop slowly we adjust without noticing them. Take a special test drive to search out hidden problems – for example:
-
Does the ’van lean more than usual on bends, suggesting worn suspension dampers? Listen for knocks on poor roads that might indicate worn suspension bushes. If the ’van veers left or right when you’re holding the steering lightly, it may mean a wheel alignment or tracking problem.
-
When there is no traffic around, brake gently, holding the steering lightly and note any pull to one side which points to brake imbalance or a defect in tracking or the suspension/damper. If the ’van pulls up squarely and feels safe and controllable, try braking harder (traffic permitting). If any wheels lock up or skid, have the brakes fixed.
2. Vehicle structure
Check for corrosion on the chassis and underbody, especially around the body, suspension and seatbelt mountings. Repair corrosion before it gets worse. Scrape rust away and tap the area with a hammer – a dull thud means a repair is needed. Fix structural side sills and any body corrosion that leaves sharp edges or loose panels.
3. External fittings
Registration plates need checking to ensure they are secure, not cracked, easy to read and not obscured by a tow bar or bike/luggage rack. Check that all doors open, close and latch securely.
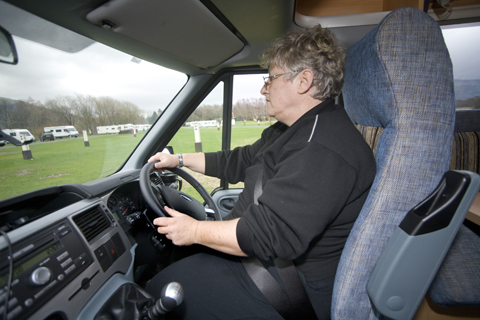
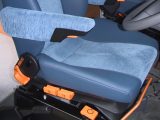
4. Inside the cab
[tl:gallery index=3 size=215×129]
Check that travelling seats are secure and the belts lock easily and spring open when you press the release button. Check belt webbing for damage. Pull the belt hard to ensure the inertia mechanism locks, then release the belt and check it fully retracts.
5. On-road visibility
Check the wiper blades are free of splits and rough edges and that the springs in the wiper arms hold the wipers firmly against the screen. Check the screen washer reservoir is topped up and that the nozzles are correctly aimed. If necessary, adjust the nozzle direction using a pin in the hole.
Windscreen defects can cause a ’van to fail the MoT if they are any larger than 10mm in the wiped area and within 145mm either side of the steering wheel centre. Outside this band in the wiped area, the limit is 40mm. Check the wiped area is not obscured by stickers.
Confirm all mirrors are secure and clear, and check the horn works.
6. Steering
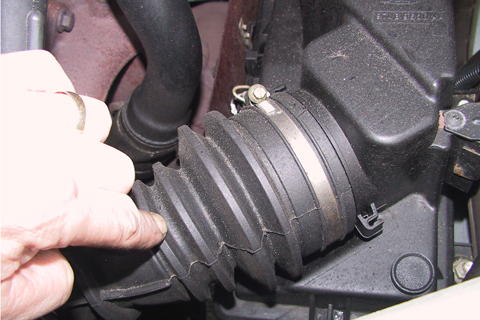
[tl:gallery index=4 size=215×129]
Push, pull and rock the steering wheel to test for bush and joint wear. Steering column and track rod end joints can be checked by watching or feeling each joint while a helper rocks the steering wheel slightly – but do avoid fingers being trapped by moving parts.
Check the power steering pipes, hoses and connections for leaks. Don’t worry about long-term dark stains, but wet oil needs attention.
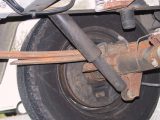
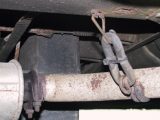
7. Suspension
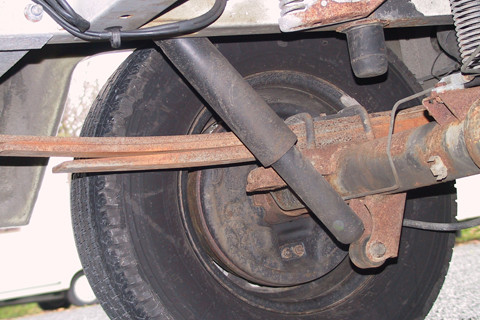
[tl:gallery index=5 size=215×142]
You tested the suspension on the test drive. Now use a pry bar on accessible bushes and joints to check for play between components. Check springs for corrosion and fractures. Check dampers for fluid leaks.
8. Brakes
You tested the brakes on the road test. Now inspect brake pipes for corrosion and security, and the hoses for cracking and abrasion. Check for leaks from pipes and connections, brake calipers and drums. Pull the handbrake on gently to check it holds the vehicle on a slope.
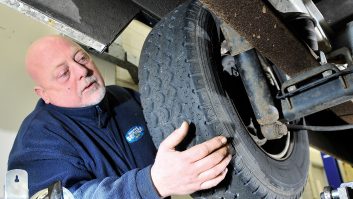
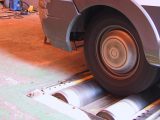
9. Wheels and tyres
Wheels and tyres are best checked off the vehicle, and that gives an opportunity to better inspect the brakes and suspension. Check the same size of tyre is fitted to each side of the axle and that rotational tyres are fitted in accordance with their arrow mark. Don’t split hairs on tread depth; consider 1.6mm all over as a minimum.
Check the tyre sidewalls for bulges, distortion, cuts and cracks, and wheel edges for kerb damage. When each wheel is refitted, but before lowering the jack, rock the wheel vertically and horizontally to feel looseness in suspension, steering and wheel bearings. Rotate the wheel and listen for rough bearings, or ticking CV joints in the axle shafts on full lock.
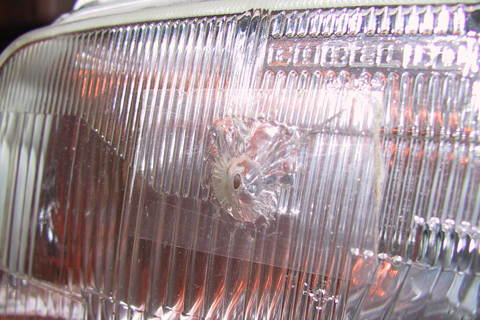
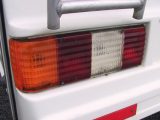
10. Road lights
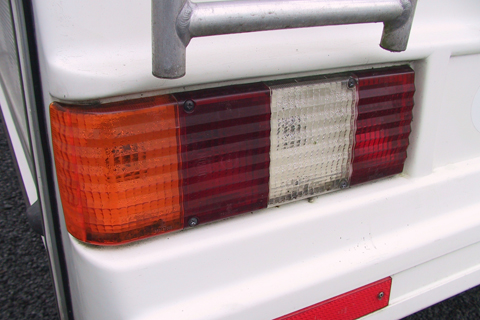
[tl:gallery index=2 size=215×129]
Check lamp units are secure and that lenses are undamaged. With the lights on, tap each lamp and notice whether the light dims or goes off, suggesting defective connectors or bulb holders.
Check the hazard lamps, indicators and brake lamps while the sidelights are on, and notice if one circuit affects another, such as tail lamps dimming when the brake pedal is pressed. That suggests there could be a corroded shared earth connection.
Headlamp alignment will be checked during the MoT test, though you’ll know from oncoming motorists and your own forward vision if they are significantly misaligned. [tl:gallery index=6 size=215×129]
Check the rear fog lamp with the headlamps on and note that the dashboard warning lamp illuminates. Rear number plate lights should come on with the sidelights.
11. Fuel
Remove the fuel tank cap to check its seal, and ensure it locks firmly to prevent spillage. Check fuel pipes are intact and firmly secured.
12. Exhaust and emissions
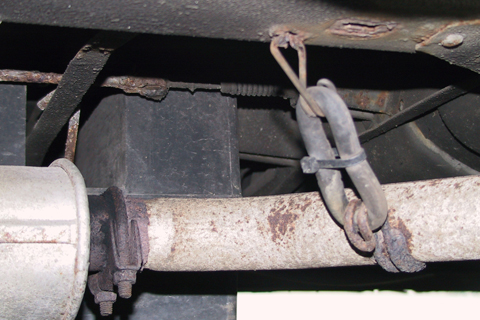
[tl:gallery index=7 size=215×129]
Is the exhaust system secure along its length and free of any holes? A noisy exhaust may have an internally corroded silencer. Exhaust defects and catalytic convertors that produce a tinny rattle can cause the vehicle to fail the emissions test.
The engine may go through full throttle accelerations for the emissions test, so it needs to be in good condition and up-to-date with cam belt replacement. The mechanic can refuse to test if he thinks the engine is not up to it.
You can do a basic smoke check with the engine hot. Rev the engine to around 2500rpm (or half throttle) for five seconds, noting any smoke from the exhaust. If there’s enough smoke to obscure other drivers’ vision, the vehicle will fail. The MoT tester will use a gas analyser.
13. The real test
[tl:gallery index=8 size=215×129]
The tester will carry out a more detailed test than this, but by making your DIY checks beforehand and fixing problems, there’s more of a chance of passing first time.
Safety tips
-
Before working underneath the vehicle, park it on level ground with the handbrake on and a gear engaged, and preferably with the wheels chocked. Keep the ignition keys in your pocket.
-
If the vehicle needs to be jacked up for access, support it on strong axle stands on firm ground. Take care not to dislodge the vehicle while working on it.
-
Wear eye protection when you are checking the underside and also the brake, fuel and hydraulic pipes.
Rotate the wheel and listen for rough bearings, or ticking CV joints in the axle shafts on full lock