
In the eighth part of our Getting Started series, Jack shows us how to make, trim and fit new door cards to the Sherpa – all for very little dosh
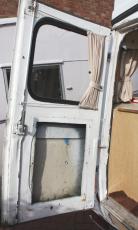
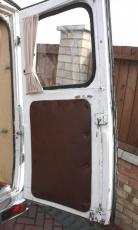
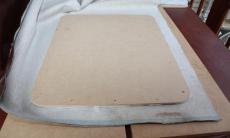
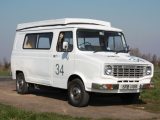
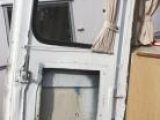
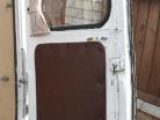
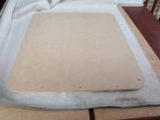
[tl:gallery index=1 size=138×230]As you can see from our ‘before’ and ‘after’ pictures (left and below), this month’s tips on how to make door cards deliver a big change to the ’van’s appearance for very little cost. As we said[tl:gallery index=2 size=138×230] last month, the Ambla upholstery vinyl was the result of a ‘skip-dive’, and everything else used was kicking around my workshop; but if you do
have to buy the wood, screws, caps, etc, you’d probably be looking at around £15 for the lot. There are no highlighted hot tips – all advice is smokin’ this time!
Preparation
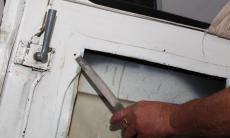
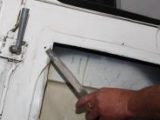
The first job was to straighten all the edges of the aperture. I used a panel-beater’s hammer to strike, and [tl:gallery index=3 size=230×138]a lump hammer to act as an anvil. Price: a couple of pounds for the two, bought secondhand at a steam rally. Finally I filed away the burrs from the old fixing holes, where the rear door cupboards had been ripped out by some earwig!
Cutting the board
You can use ply, hardboard or anything (within reason) to make the panels, though the trade frequently favours millboard. I used an offcut of 8mm MDF bought from a car boot sale for £1.50 – big enough to make four cards. I first worked out the size of panel required. Peanuts needed some larger than average to cover all the damage on the doors. Always measure twice and cut once.
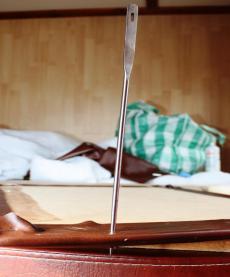
I have an orange-handled saw in the toolbox that’s good at cutting most woods and plastics. My blue-handled saw is a speed-saw and cuts in both[tl:gallery index=4 size=230×138] directions. I used a builder’s level as a straight-edge and an engineer’s square from my toolbox. I have carpenters’ squares in my workshop but find them ungainly. First-time carpenters often end up with a wonky rectangle. Frequently this is because the edge they are measuring from isn’t straight. My tip is to check that both diagonals measure the same.
For that professional look, radius the corners. Folk spend a fortune on jigs, compasses and the like, when all you need is a teacup to draw around. I only ever use three radii: eggcup, teacup, and saucer – bone china, of course!
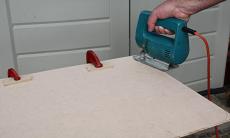
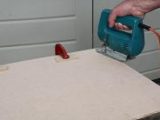
Clamp the panel to the work bench and use a scrap piece of timber under the jaws of the clamps to prevent unwanted dents in the panel. If using a jigsaw, always place the cable behind the saw so you don’t cut through it. Finish off with medium sandpaper.
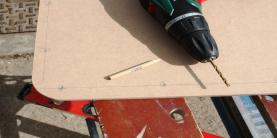
Drilling and fixings
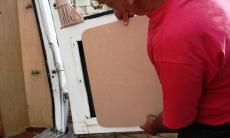
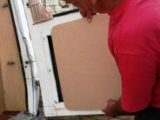
[tl:gallery index=5 size=230×138]Offer up the panel and note where the fixings should go. Normally I’d use plastic trim clips which can’t be seen, but in cases like this, where the door is damaged, it’s best to use self-tapping screws with plastic cups and caps to disguise the screw heads.
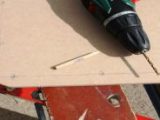
Mark with a cross the likely screw positions. Measure carefully so that they’re as evenly spaced as possible. Keep offering the panel up to the door to double check. When satisfied, identify those you want by [tl:gallery index=6 size=230×138]drawing a circle around their crosses. Finally, do a temporary fix with two screws and drill the remaining holes in the door. The holes in the board should be the same size as the screw; the ones in the door smaller to enable the screw thread to bite.
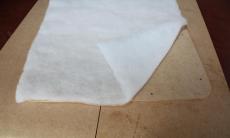
Padding and trimming
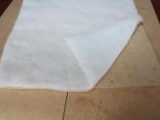
[tl:gallery index=7 size=230×138]I’ve used Dacron as padding, but you can use thin foam, table-protection material (see last month’s Workshop) or even bubble wrap. Be aware though, that the latter is not fire-retardant, whereas Dacron and foam should be.
First, lay the Dacron across the [tl:gallery index=8 size=230×138]panel and cut approximately to size. Spray the panel with carpet fitters’ quick-drying adhesive or use a hot-glue-gun and attach the Dacron. Next, turn the panel over and trim off excess. Lay the trim fabric face-down and place the panel (Dacron side down) on top. Trim off excess fabric leaving at least two inches spare all-round.
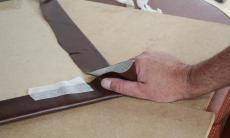
Fixing the fabric
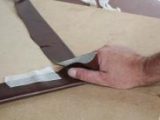
[tl:gallery index=9 size=230×138]Starting with the two long sides, use wide masking tape to temporarily attach the turnings to the back of the panel. Keep tightening the fabric. Finally, when you are happy with the look of the ‘face side’, glue the turnings to the board. Repeat for the two short sides.
At each corner there will be two ‘ears’ of material. Trim off the excess, leaving a thumb’s thickness upstanding. Now pleat the corner and fix it. This is why I like to use MDF, because I can employ a staple gun here (actually the correct name is a trigger tacker). Those using hardboard or millboard will have to use glue.
Attaching the panel
[tl:gallery index=10 size=230×277]The penultimate task was to locate those fixing holes again. I used a long, thin stiletto, which upholsterers call a regulator; but if you don’t have one, you can use a large sewing needle. Finally, attach the trimmed panel to the door, using screws, which you can then cover up using coloured cups with hinged caps.
Jack says …
“I prefer to work outside, under my car port. If working inside a workshop or motorhome, do ensure adequate ventilation when using spray adhesives and never smoke or have a naked flame – say to make a cup of tea, for example. Some adhesives are highly flammable, so for safety’s sake assume they all are.”
Project Peanuts: the story so far
Gentleman Jack set out to show that you can live the dream for less than £2000 in our ‘Project Peanuts’ series. This 1977 Auto-Sleeper Leyland Sherpa cost just £825; Jack is managing it for single mum Kate and her son Kyle, who enjoy trips away in it now that it has 12 months’ MoT. Each month, Jack carries out essential tasks, including lots of DIY and ownership tips.
Starter ‘van to-do list
Shake down DONE
Urgent mechanical repairs DONE
Mechanical safety check; lubrication service DONE
Repair elevating roof DONE
Habitation safety check DONE
Service and refit gas and 12V equipment DONE
Fit new rear door cards DONE
Soft furnishings upgrade DONE
Refinish cabinetwork
Bodywork make-over
Safey equipment upgrade
Power upgrade for 230V and 12V
Time spent
Previously 38 hours
This month 3 hours
TOTAL SO FAR 41 hours
Money spent
Fixed costs …
Motorcaravan purchase £825.00
One year’s road fund licence £205.00
Insurance £176.24
MoT test £39.95
Repairs and upgrades
2 x wiper blades £5.98
Top-up fluids £10.00
Workshop manual £5.96
Overdrive actuating solenoid assembly £81.50
Roof seals £19.97
Brass hinges and screws £6.25
New ‘van battery £70.00
Brake adjustment £40.00
Gas and 12V consumables, including three-way manifold and new fuse box £72.74
This month’s wood, glue, screws and screw covers £15.00
TOTAL SO FAR £1573.59
Missed the earlier articles? Click on the links below to catch up:
- Part 1: buying a van – your options
- Part 2: more buying tips and insurance
- Part 3: safety check, towbar and rear step
- Part 4: essential roof repairs
- Part 5: making safe old DIY horrors
- Part 6: refitting the hob, fridge and some wiring
- Part 7: general improvements to the interior
Ask Jack …
If you have any queries relating to this series, feel fee to contact Gentleman Jack at [email protected].