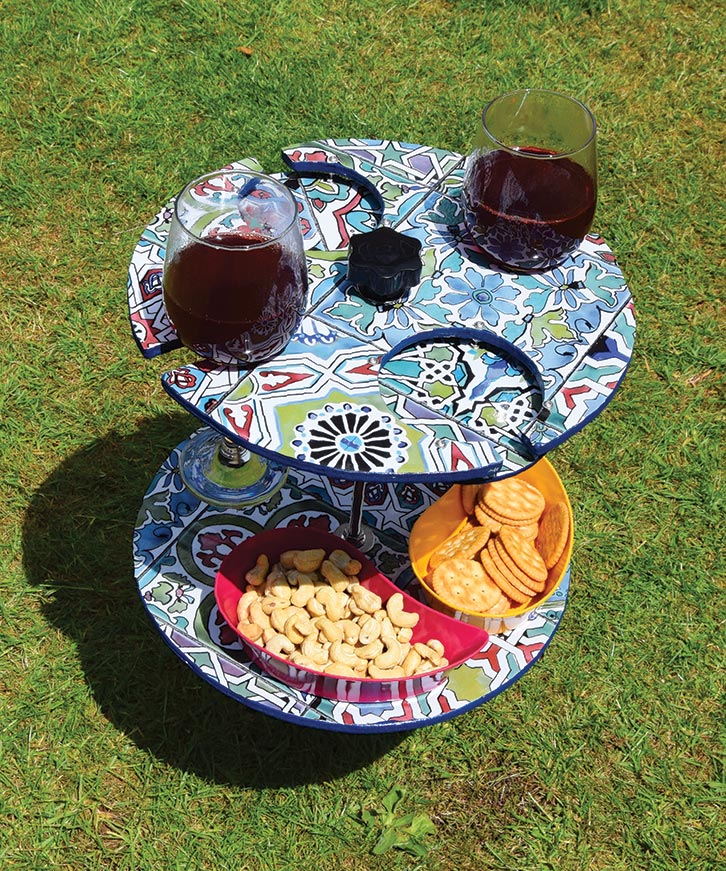


Have you ever found yourself relaxing at one of the UK’s best motorhome sites, looking out to sea as the sun sets and sampling a glass or two of a cheeky red, contemplating the meaning of life – only to find that putting down your glass proves a tad hazardous, because of the unevenness of the terrain?
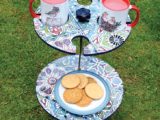
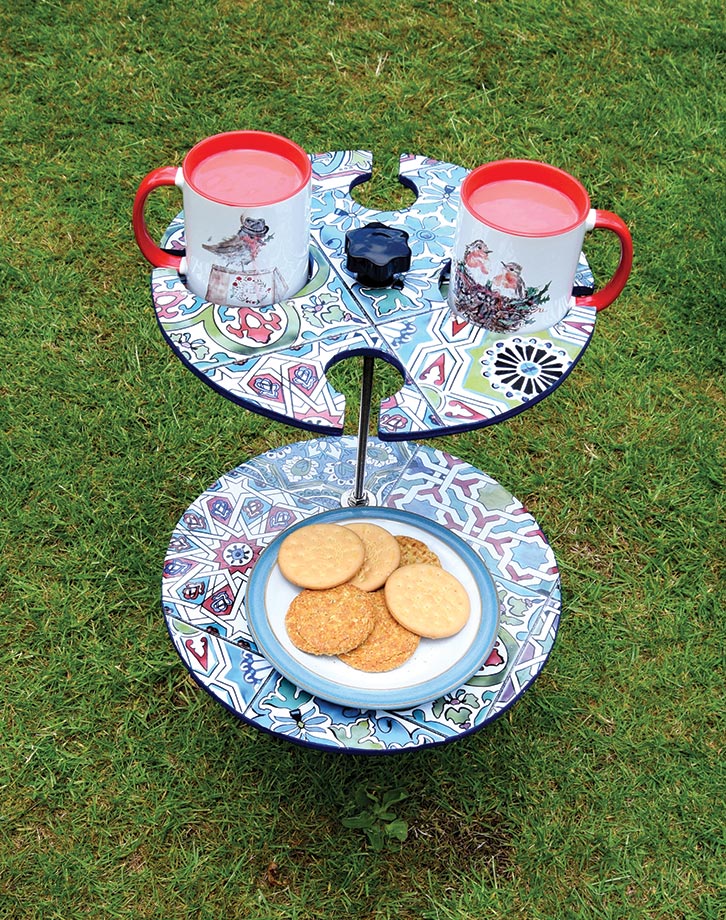
Now there’s a simple way to solve the problem of unstable tables! Follow the steps outlined in this article and you will have a safe repository for wine and beer glasses, and tea mugs, along with provision for holding a good variety of savoury nibbles, or a plateful of some of your favourite biscuits.
If you’re looking for a flask to hold your tea or coffee in as well, be sure to check out our guide to the best flasks for hot drinks.
Safe platforms
The design for this stand centres on a stainless-steel threaded rod, which supports two bespoke platforms, one above the other.
The top level of the stand is designed to accommodate your wine/beer/spirit glasses and the lower one, a plate or dishes for nibbles and biscuits.
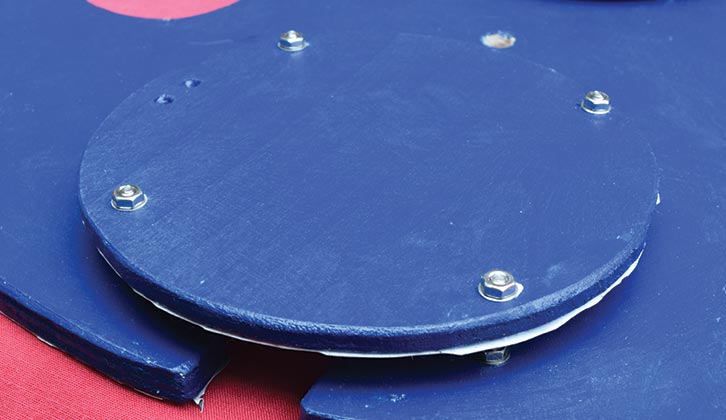
The central rod has a point at one end, which enables it to be pushed into the ground to a depth consistent with being stable. By default, unevenness of terrain, and inclines, will have no effect the stand’s deployment.
The whole structure is also easily dismantled in minutes and ideally suited for stowing in any nook or cranny for travel.
Anybody who has rudimentary woodworking skills should have no problem with the construction. The dimensions chosen are for my own mugs and glasses, so you will need to measure up your own glassware and crockery before you make your version of the drinks stand.
For a neat, durable finish, I painted the plywood elements in a cheery blue exterior gloss paint. But if you prefer, exterior varnish would be equally suitable. I covered the upper surfaces with sticky back plastic, which I think adds a pleasing finishing touch.
To make your own drinks stand, you will need:
Tool list
- Jigsaw with a fine-tooth blade
- 17mm spanner for M10 nuts
- 5.5mm spanner for M3 nuts
- Pair of compasses
- Drill set
- Drill brace (or electric)
- Sandpaper (medium grade for smoothing cut edges)
Parts list
- 1 x M10 stainless threaded rod 500mm long
- 3 x M10 stainless full nuts
- 4 x M10 stainless mudguard washers, 30mm diameter
- 8 x M3 x 25 stainless screws
- 24 x M3 stainless nuts
- 32 x M3 stainless washers
- 1 x M10 brass blind hole hand-grip nut
- 9mm plywood
- 6mm plywood
NOTE For this DIY project, I chose to use stainless-steel elements throughout, because the drinks stand will be outdoors, with a high probability of getting wet.
Zinc-plated mild steel can be substituted if you wish, which will halve the cost of the stand, although the risk of rusting does mean that it might not last as long.
I have a grindstone, so I was able to put a point on the central supporting rod. Without a stone, it would be fruitless to try to file the end on A2-grade stainless steel. However, in that case, it should be easy enough to push the blunt end of the rod into the ground.
A step by step guide to make your own drinks stand
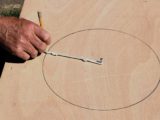
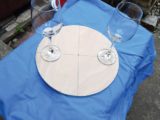
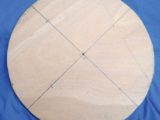
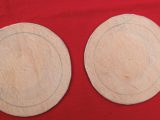
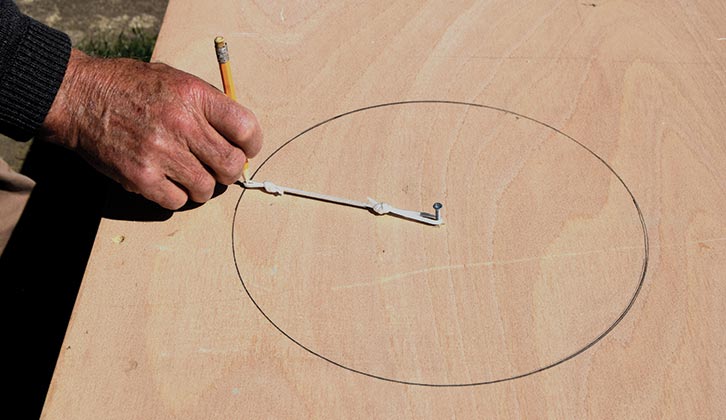
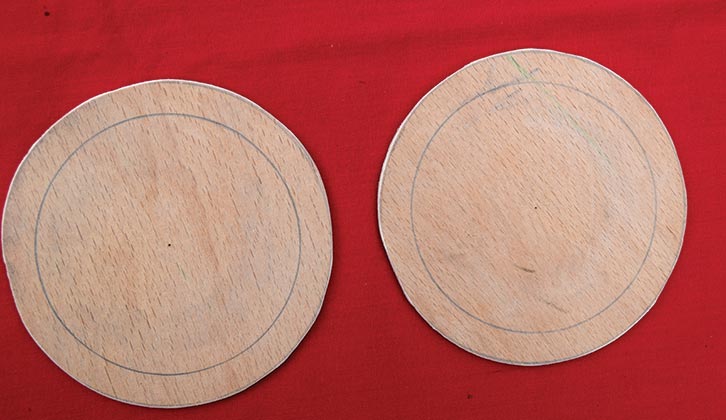
1. Use a pencil and a piece of string to draw two 15cm radius circles on 9mm plywood.
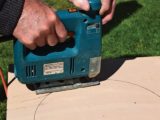
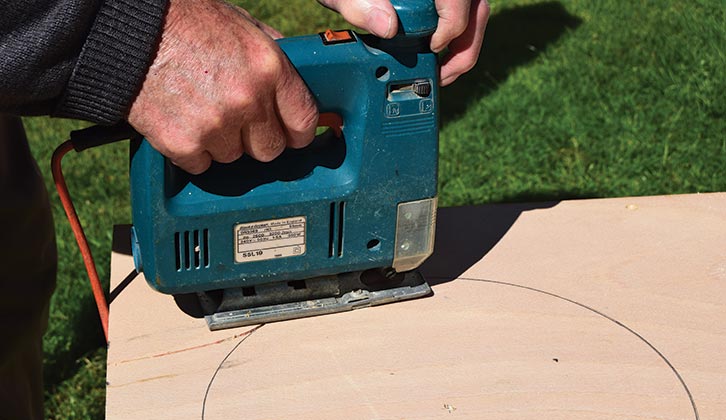
2. The next stage is to cut out the two 15cm radius discs, using a jigsaw.
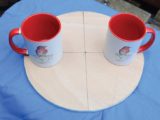
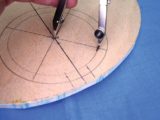
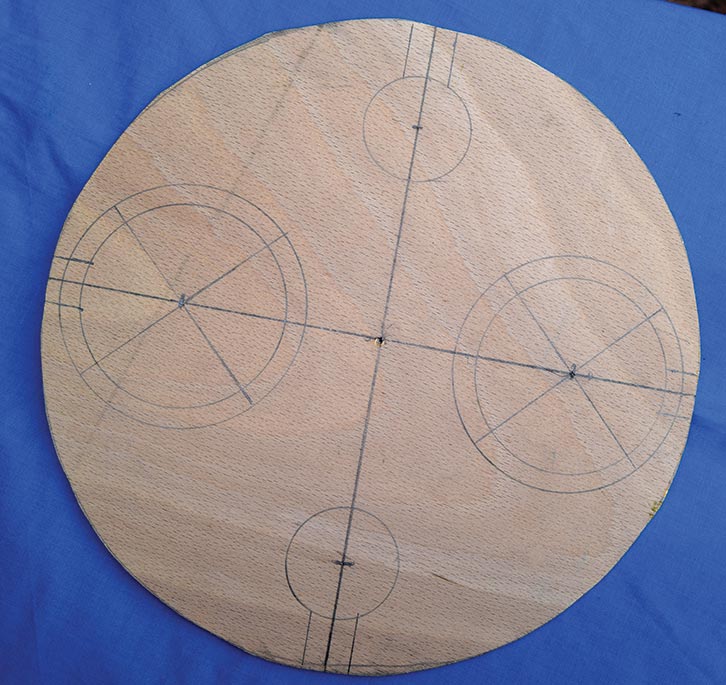
3. Next, offer up the tea mugs that are going to be used as templates and mark the centre.
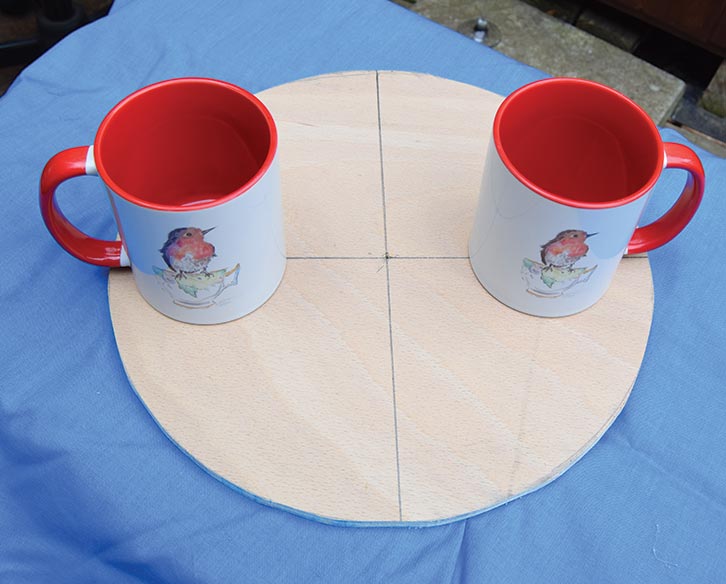
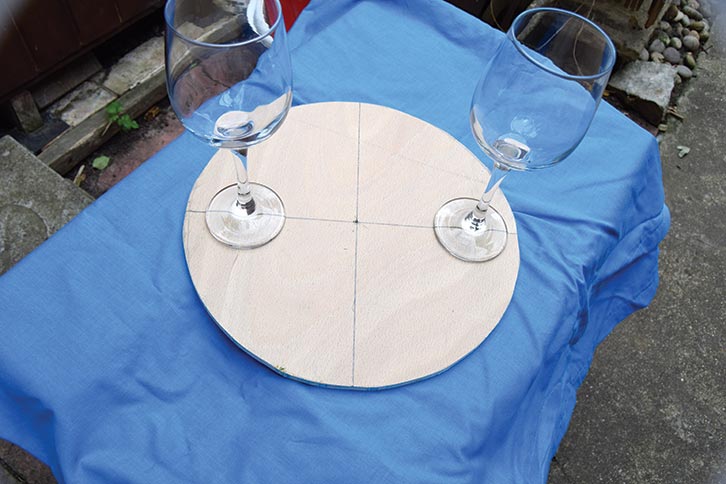
4. On the adjacent quadrant, offer up the glasses that are going to be used and mark the centres.
5. Clearly marked centres for both glasses and mugs.

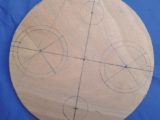
6. Now use a pair of compasses to mark up the cutting areas.
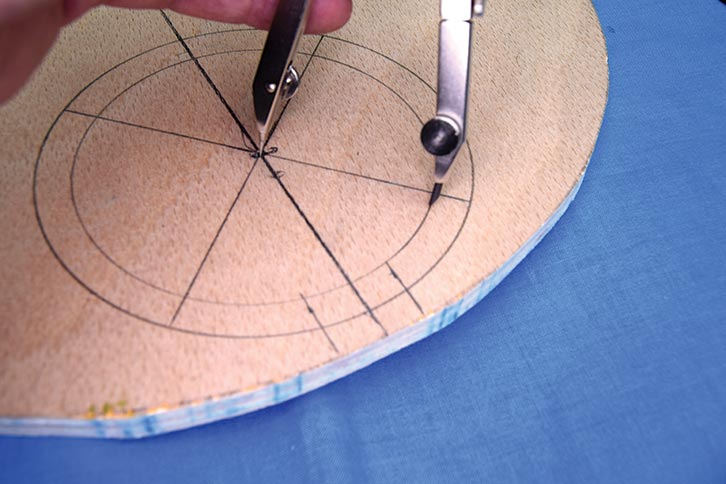
7. Cutting dimensions marked up for the upper plywood disc.
8. The upper tray after the apertures have been cut. Drill holes as shown.

9. Next, cut out two discs from the 6mm plywood and mark them as shown.
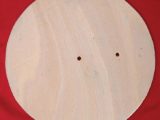
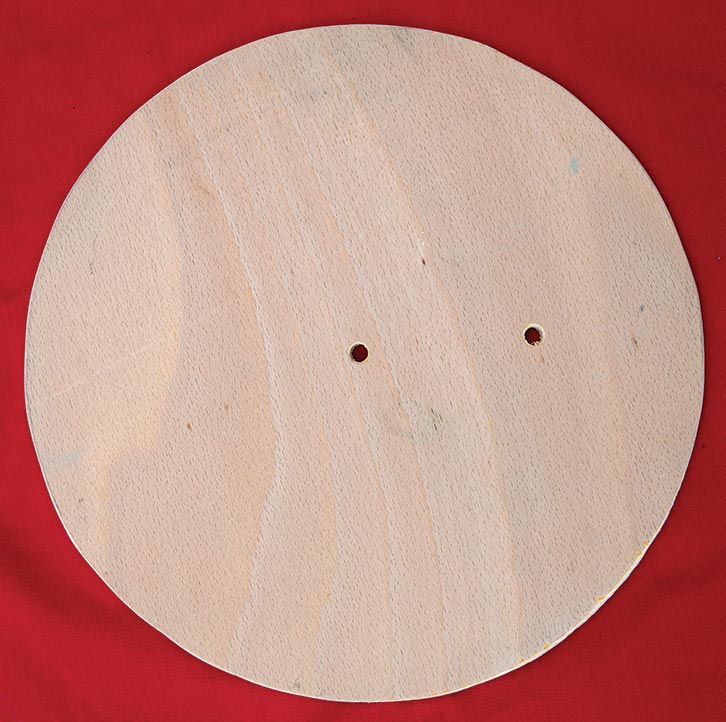
10. Drill two holes in the second 9mm plywood disc as shown here.
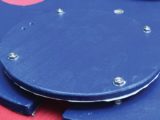
11. The 6mm plywood discs (now painted) mounted below the mug apertures using M3 screws.
12. For tea and biscuits mode, mount the lower tray through the second hole.
If you enjoyed this, why not read these:
- We talk you through the process of how to clean an Omnivent
- Wondering how to clean a motorhome? Our guide will help
- Take a look at our guide to care and repair of rubber seals too.
Future Publishing Limited, the publisher of Practical Motorhome, provides the information in this article in good faith and makes no representation as to its completeness or accuracy. Individuals carrying out the instructions do so at their own risk and must exercise their independent judgement in determining the appropriateness of the advice to their circumstances. Individuals should take appropriate safety precautions and be aware of the risk of electrocution when dealing with electrical products. To the fullest extent permitted by law, neither Future nor its employees or agents shall have any liability in connection with the use of this information. Double check any warranty is not affected before proceeding.
If you’ve enjoyed reading this article, why not get the latest news, reviews and features delivered direct to your door or inbox every month. Take advantage of our brilliant Practical Motorhome magazine SUBSCRIBERS’ OFFER and SIGN UP TO OUR NEWSLETTER for regular weekly updates on all things caravan related.