


In the sixth part of our Getting Started series, Jack repairs and refits both the hob and fridge, plus he gets to grips with the leisure wiring
Last month, we featured B-B’s (Bird Brain – a previous owner) attempts at fitting the fridge, hob and lighting. We removed the gas appliances, stripped out all the plumbing and wiring and then took stock.
New parts and tools
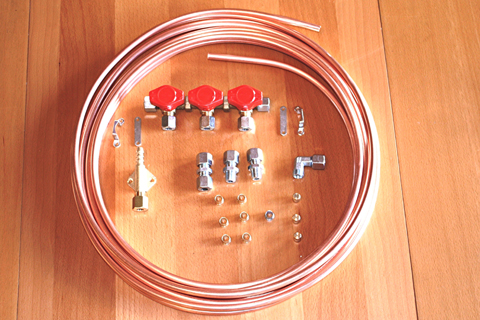
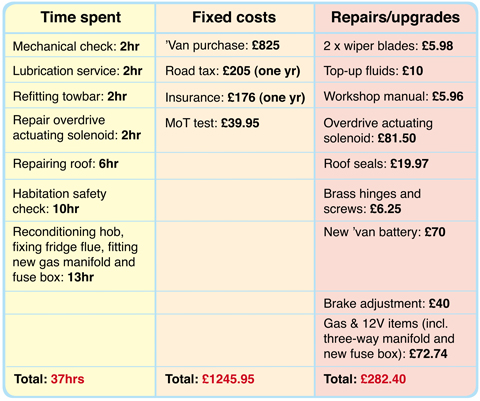
It was obvious that some[tl:gallery index=1 size=215×129] consumables were going to be required so these were ordered in advance. Pictured inside the copper piping (right) are various elbows, connectors, olives, a new hose barb and a three-way manifold. My workshop was already equipped with the specialist tools and equipment required. These are mini pipe benders, a mini pipe cutter, a leak test spray can and a roll of PTFE tape.
Metal works
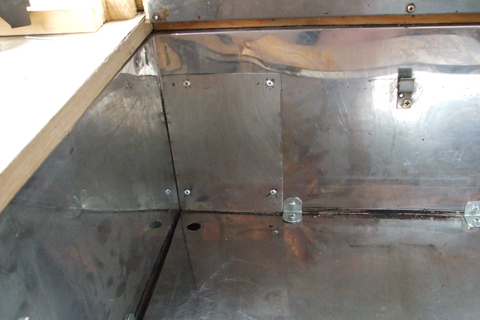
The first job was to patch[tl:gallery index=2 size=215×129] up the torn heat surround for the hob unit. After removing the hob unit we used a bit of scrap metal from the workshop to replace the damaged panel. We then drilled a hole in the left-hand corner to accept the grommet and supply pipe. The sides were joined to the base permanently with brackets. After the photograph was taken (right), a fillet of metal putty was run along the joints to stop crumbs being trapped.
Hob gets an MoT
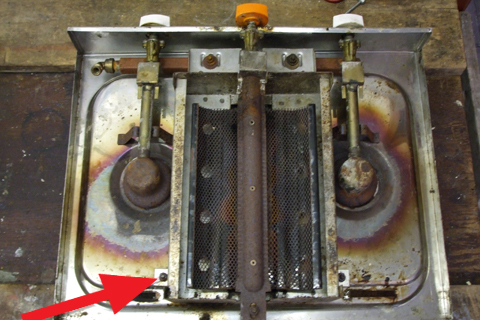
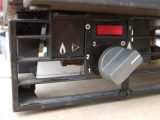
The hob unit (shown upside[tl:gallery index=3 size=215×129] down in the picture, right) was given a thorough clean and found to be in good working order with the exception of a loose bracket just visible at the end of the arrow.
The blind bolt had sheared, however, so it was drilled out and replaced with a through bolt and locknut. The hob unit was then bench tested and the flames were steady and blue. Refitting the unit was comparatively easy, despite the fact that we had to order a replacement connector from the internet because the old one was an odd size (the website www.bes.co.uk came to the rescue). It was a right-angle unequal elbow with a threaded ¼-inch female connector on one end and an 8mm compression joint on the other.
Fridge fixer-upper
The fridge was working (poorly),[tl:gallery index=4 size=215×129] but was insecure and didn’t always light. First, we repaired the obvious faults: a screw locating the burner safety shield was missing, so this was replaced.
Next, we tried to get to the bottom of the fridge’s ignition unit. Opening the flap with the flame symbol only afforded access to a mirror of the flame, so we had to remove the [tl:gallery index=5 size=215×129]front fascia grille to get access. The unreliable spark generation was eventually traced to a loose connection on the back of the illuminated red rocker switch.
After that, the fridge flue was checked (it was soot free – although ancient, I don’t think the fridge has been used very much) and then the usual servicing and safety checks were completed. [tl:gallery index=6 size=215×129]
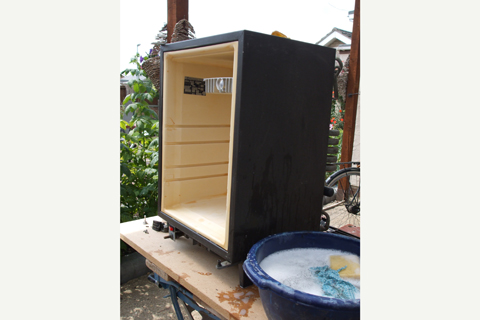
Finally, despite a good wash we couldn’t remove all of the staining to the interior of the cabinet, but at least they are ‘clean’ stains now and both Kate and Kyle are happy to put (wrapped) food and drink in it!
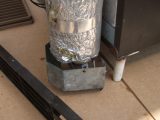
Fridge flue
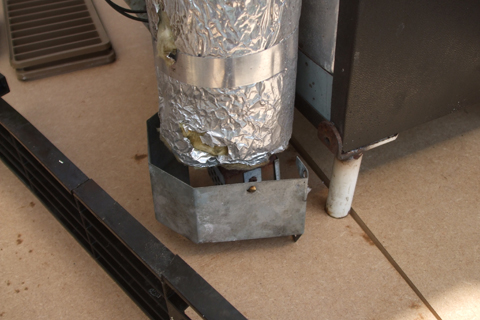
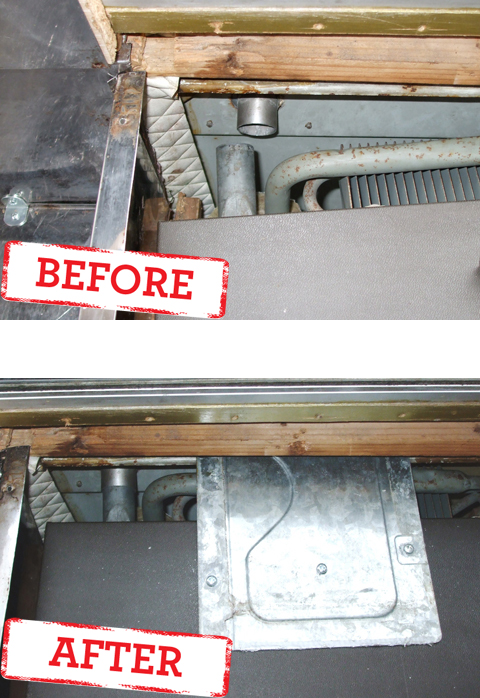
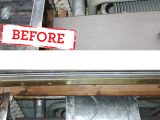
A major problem with the way the[tl:gallery index=7 size=215] fridge had been installed was the fact that the fridge was only held in place by brackets on its front legs. As a result it would rock during travel and detached itself from the flue vent. (Remember, it was plumbed in using flexible hose so it wasn’t even restrained by the pipework.)
The escape of flue gases into the interior is potentially very dangerous. My solution was to fabricate a top ‘cradle’ bracket out of a scrap tumble drier inspection cover. It was pop-riveted to the motorhome’s waist-high internal rib and screwed to the fridge cabinet using self tappers. It will be hidden from view by the worktop.
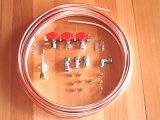
Gas manifold
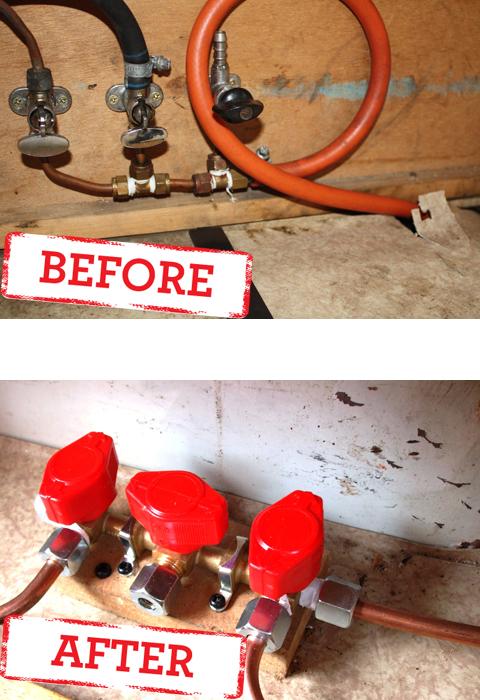
The old ‘arrangement’, apart from[tl:gallery index=8 size=215] being unsafe, was difficult to access quickly because it was beneath a seat squab. The new manifold was installed behind the central lower locker flap in the kitchen. The central outlet awaits the fitting of a blanking plug, sometimes referred to as a ‘stop end’. We chose a three-way one in case we can afford to upgrade to gas heating sometime in the future.
Hot tips: When forming an intricate pipe run make a mock-up using an old (opened up) plastic-covered wire coat hanger before you begin. The mock-up will tell you whether it will be possible to run the pipe run through all the bulkheads in one piece, or whether it will need to be installed in sections.
Assemble sections without any olives in, to double-check that it all fits as it should.
Finally, when cutting the pipe to length with a cutter, only ever increase the depth of the cut on the revolving blade wheel when you are rotating it around the pipe, never when the cutter is stationary – you’ll kink the pipe.
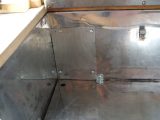
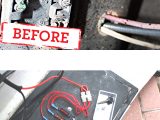
Leisure system fuse box
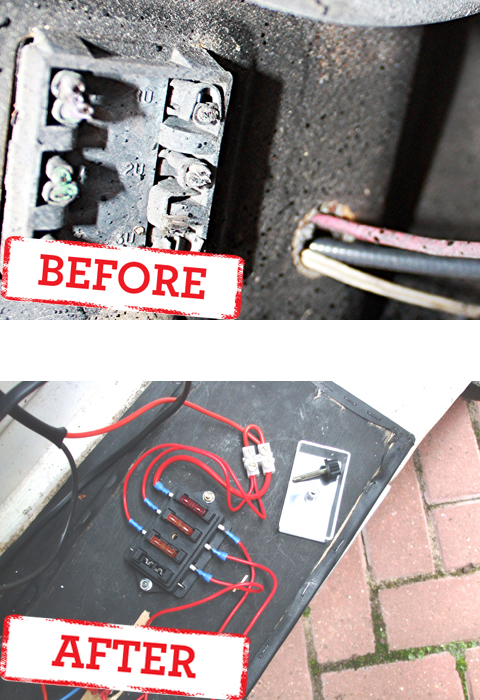
We’ve replaced the ’van’s old fuse[tl:gallery index=9 size=215]box (that was fitted under the bonnet) with a new blade-type fuse box which is located under the driver’s seat, where it is mounted on the reverse of the seat box trim. It can be accessed in a jiffy, but is out of sight and protected from the elements.
Each circuit – fridge ignition, lights and water pump – is individually switched and fused. All the habitation wiring is also now in proper 12V black and red cable which is of above-spec amperage. Quite an improvement on the old bell wire and bits of old mains cable from an expired vacuum cleaner (or whatever)!
Jack says…
“It may sound a bit ‘belt and braces’ but even if you have conducted a thorough leak test and/or flue gas analysis, always have any DIY gas installation or repair checked by an accredited and qualified person before use. For leak detection I now use a spray, but for decades I used soapy water, a small paint brush and a home-made manometer to check the system. It is my opinion that the dangers of using soapy water are vastly overstated. Washing-up liquid may have a little salt in it, but to claim (as many experts do) that the pipe will become seriously corroded if you use a solution of it to check the integrity of gas connections, seems a bit unlikely to me.”
Oops! that wasn’t supposed to happen!
Kate went away for the weekend in Peanuts when she and her friend encountered a spot of bovver… After coming to a halt the ignition light would come on when the key was turned but the starter wouldn’t operate.
A loose connection to the starter motor was found, fixed and they were on their way again lickety-split – apparently smiling so broadly at their technical expertise that it caused the sun to come out from behind the clouds.
To do list
• Shake down DONE
• Urgent mechanical repairs DONE
• Mechanical safety check, lubrication service DONE
• Habitation safety check DONE
• Repair elevating roof DONE
• Service & refit gas/12V equipment DONE
• Fit new rear door cards
• Refinish cabinetwork
• Soft furnishings upgrade
• Bodywork make-over
• Safety equipment upgrade
• Power upgrade 230V & 12V
Progress so far
[tl:gallery index=10 size=459]
Missed the earlier articles? Click on the links below to catch up:
- Part 1: buying a van – your options
- Part 2: more buying tips and insurance
- Part 3: safety check, towbar and rear step
- Part 4: essential roof repairs
- Part 5: making safe old DIY horrors