


An outside temperature sensor and a load monitor are well worth fitting. The latter is especially useful if you tour abroad, where electricity supply can vary a great deal.
Before starting either job, make sure the 230V mains and 12V battery are disconnected from the motorhome, and the Alde system is turned off.
Temperature sensor
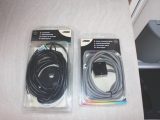
Tools required for the job are:
- Screwdriver
- P-clips
- Small screws and cable ties
First, find a suitable place to mount the sensor, ideally away from any heat source but close enough for the lead to plug into the Alde boiler unit.
Extension leads are available from Alde if the latter is difficult.
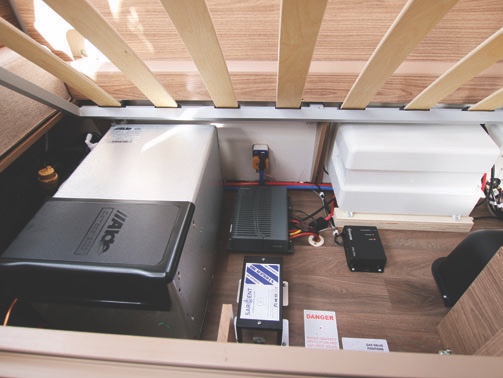
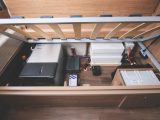
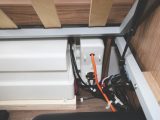
I mounted ours under the floor just inside the skirt, at the bottom of the sidewall, and under the front offside seat where the boiler is.
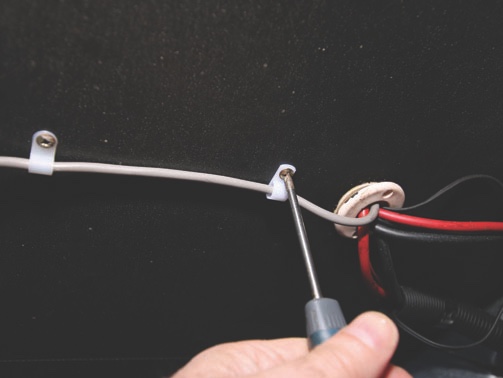
Next, secure the sensor to the floor using small screws. Feed the cable through the floor and into the ‘van. Then the lead is secured to the floor using a couple of P-clips.
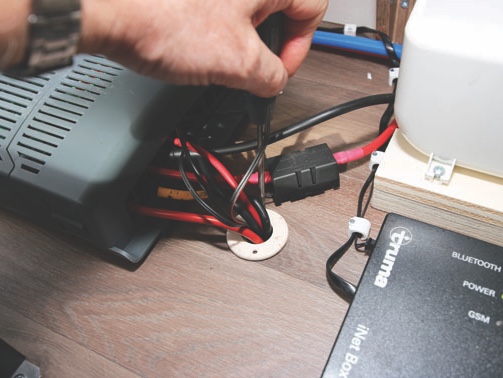
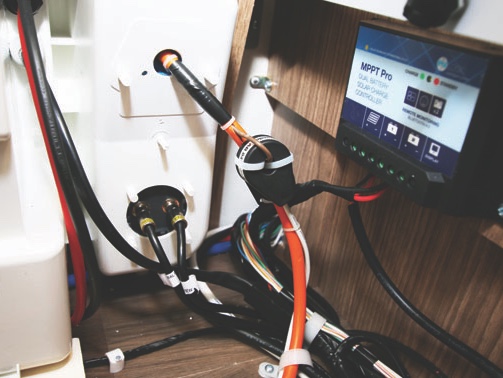
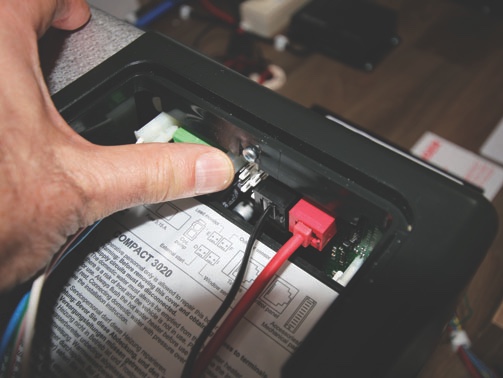
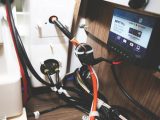
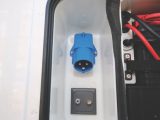
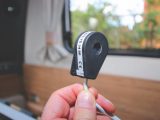
Working inside the ‘van, remove the black cover from the top of the boiler. This lifts from one end and unclips.
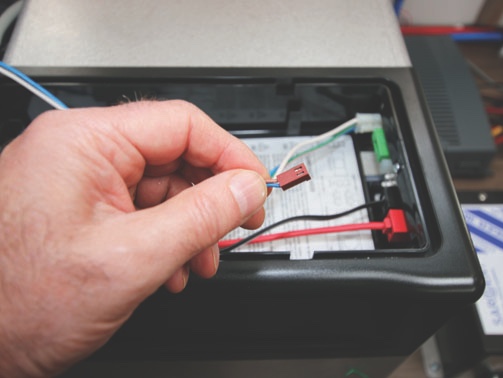
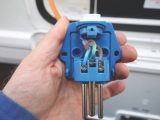
Inside you’ll see a printed plan of the plugs/sockets. As you look at them, the point required for the sensor is at the top right-hand corner.
Connect the brown plug on the cable from the sensor onto this connection, and secure the cable within the underseat area using cable ties. Then replace the cover on the boiler.
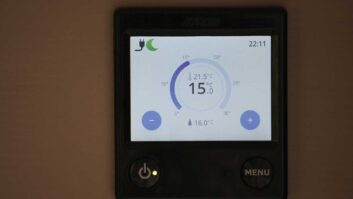
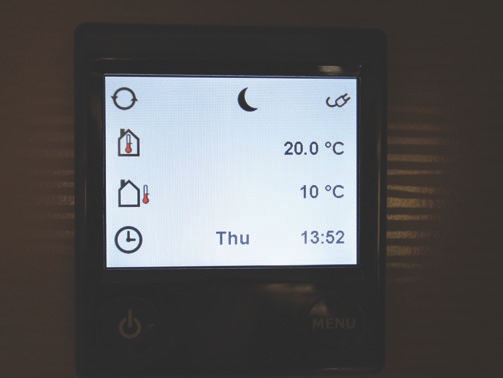
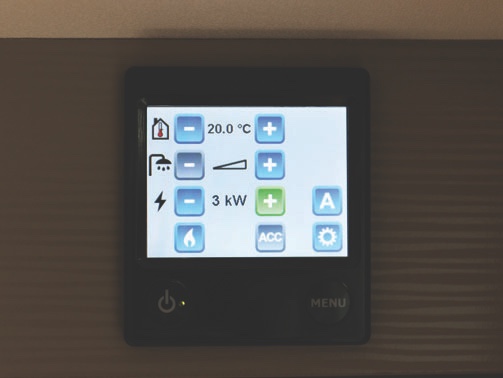
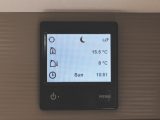
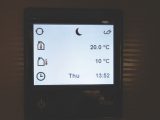
Reconnect the 12V battery and turn on the Alde heating system using the control panel. The outside temperature will be displayed below the internal temperature on the home screen.
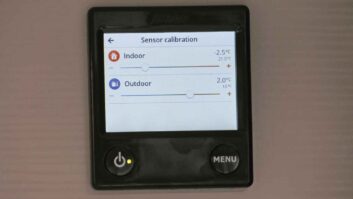
Should either figure be incorrect (checking against a thermometer known to be accurate), you can simply adjust the ‘offset’ through the Alde control panel.
Load monitor
To fit the load monitor, you’ll need the following tools:
- Screwdrivers
- Stanley knife
- Snips
- Cable ties
- Insulating tape
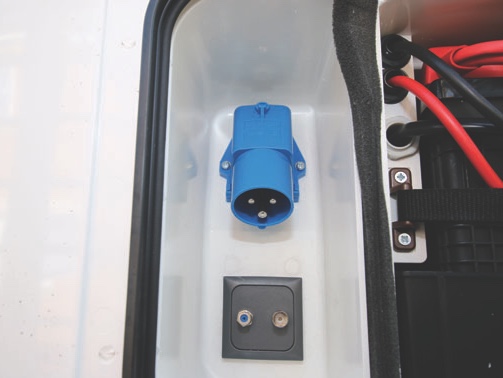
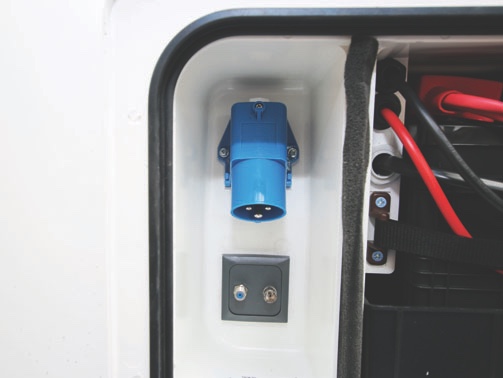
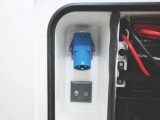
The first job is to dismantle the electric hook-up (EHU) inlet socket, but before starting, check you have easy access to the mains cable behind the socket inside the motorhome.
The load monitor needs to be as close to the inlet as possible.
Working outside, remove the screws holding the EHU socket, and pull the unit out from its housing. If you meet resistance, don’t just keep pulling: stop and check what’s holding it.
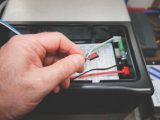
With that done, remove the cover on the socket, so you gain access to the terminal pins. Make a note of which wire goes where, then disconnect the wires. Feed the cable into the ‘van.
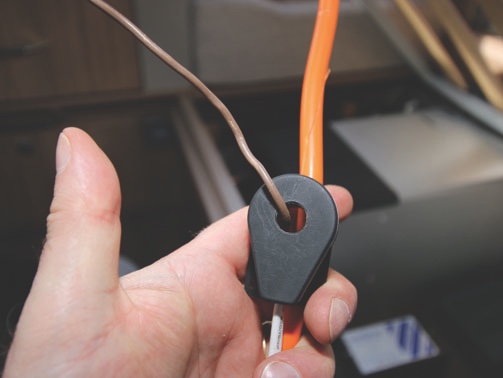
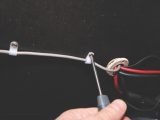
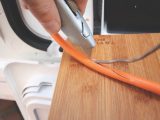
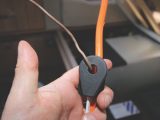
Carefully cut along the orange outer cable, where the brown wire needs to be separated from the main cable because it must pass through the centre of the load monitor. Make sure you don’t cut too deep and damage the brown sheathing.
Trim a couple of centimetres from the end of the orange cable, without damaging either the blue or the green/yellow inner wires.
This will ensure there’s enough of each wire exposed so they can be reconnected to the EHU inlet socket terminals, because in effect, the brown wire will have been shortened as it passes through the load monitor. Pass the brown wire through the hole in the centre of the load monitor, then use cable ties to secure the load monitor to the orange cable.
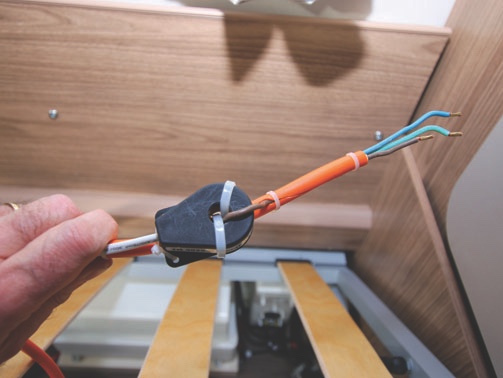
Feed the end of the brown wire back into the orange cable, and cable-tie each end of the cut in the orange cable. Wrap the area between the two cable ties with insulating tape. Pass the end of the cable through the hole and reassemble the EHU inlet socket.
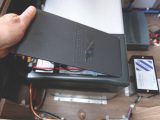
You could at this point connect the 230V mains supply and use a mains polarity tester to check connections in the EHU socket are correct. The lead from the load monitor now needs to be connected to the appropriate terminal in the Alde 3020 boiler. Remove the black cover from the top of the boiler, and you’ll see on the printed plan where the various plugs/sockets are located.
The one for the load monitor is at the top left, next to the outside temperature sensor. Slide the white plug on the end of the cable from the load monitor onto this connection.
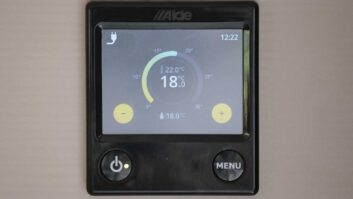
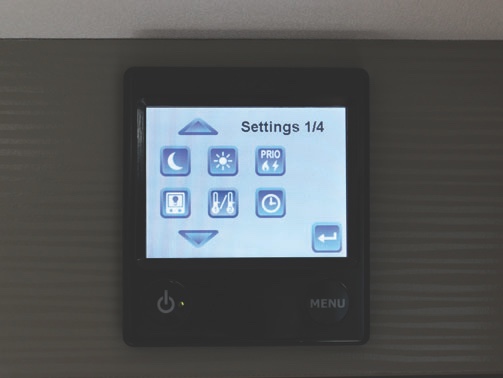
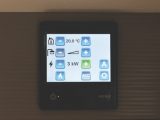
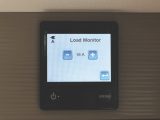
Use cable ties to secure the cable between the load monitor and the boiler, and replace the black cover. With the mains supply and battery reconnected, turn on the Alde system using the control panel. On page two of ‘settings’, you’ll see the top centre icon (Load Monitor) is greyed out.
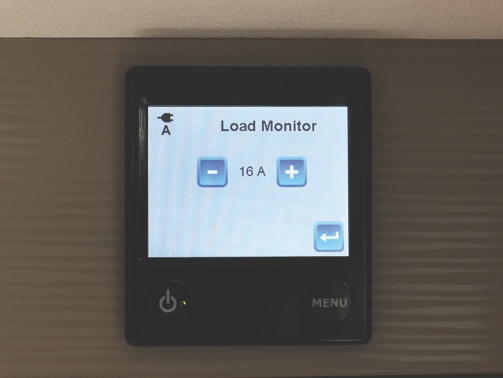
On page four, touch the ‘Installed Accessories’ icon. Now ‘check’ the Load Monitor box. Work back to page two and you’ll see the Load Monitor page and see that it is ‘off’. Touch the + icon and you can set the monitor to 5-17A.
Although 16A is usual for UK sites, check when you arrive and select the correct supply on the Alde control panel before turning on the heating, and avoid tripping the EHU bollard.
IMPORTANT!
Electricity is dangerous. Disconnect any mains supply and the 12V battery before you start. Seek the advice of a professional if in doubt*
*Future Publishing Ltd, the publisher of ‘Practical Motorhome’ provides the information in this article in good faith and makes no representation as to its completeness or accuracy. Individuals carrying out the instructions do so at their own risk and must exercise their independent judgement in determining the appropriateness of the advice to their circumstances. Individuals should take appropriate safety precautions and be aware of the risk of electrocution when dealing with electrical products. To the fullest extent permitted by law, neither Future nor its employees or agents shall have any liability in connection with the use of this information.
Find a suitable place to mount the sensor, ideally away from any heat source but close enough for the lead to plug into the Alde boiler unit