


Gentleman Jack shows us how to give every cabinet more ‘voter appeal’ – and all for just a few pounds from the kitty
Whatever you do, don’t paint cabinets in a motorhome with white household paint – they’ll look awful.
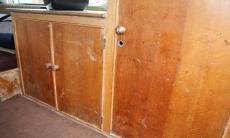
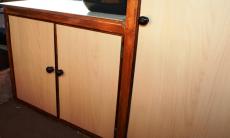
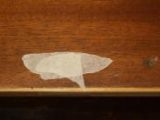
[tl:gallery index=1 size=230×138]First, the bad news: this had already happened to Peanuts, our get-you-motorcaravanning project camper. Good news: the last owner had stripped most of it off the woodwork before Kate, the current owner, bought it. More bad news: this revealed that the cupboard doors were badly scratched and gouged, making it too difficult and time-consuming to restore them to their original finish. So, we decided on a cheap, quick remedy – refinish the hardwood surrounds, but cover the ‘too-far-gone’ main door panels with beech-effect, self-adhesive vinyl.
I bought the vinyl on eBay from The Vinyl Warehouse (www.vinylwarehouse.co.uk, 07944 500 376). It cost £15.99 (+£4.99 P&P) for 15m – enough to refurbish all Peanuts’s cabinetwork and leave a good bit over in case of future accidents.
New readers should be aware that we have a pet name for a former owner, whose confidence at DIY tasks far outweighed his ability. We’ve called him/her/them ‘Bird Brain’, or ‘BB’ for short.
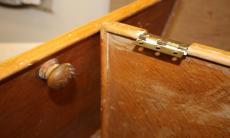
[tl:gallery index=2 size=230×138]The first job is to remove the doors and their hinges, knobs and catches. Note where they all belong so they go back correctly.
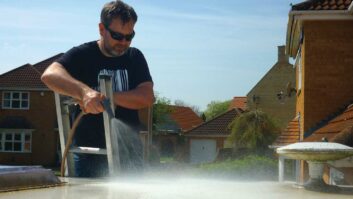
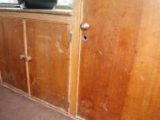
[tl:gallery index=3 size=230×138]BB left paint everywhere, so it had to be removed. Much harder was removing it from crevices and corners. Patience is the key.
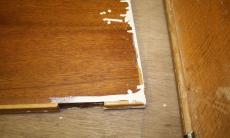
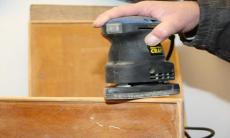
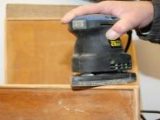
[tl:gallery index=4 size=230×138]Old varnish on the edging is sanded off with a small 230V sander. Use progressively finer paper for a smooth finish.
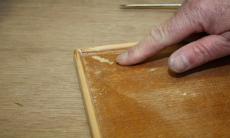
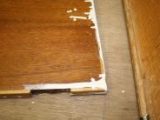
[tl:gallery index=5 size=230×138]Gouges like this need to be filled and sanded level.
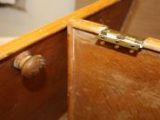
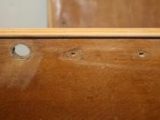
[tl:gallery index=6 size=230×138]The two smaller holes were for the original Auto-Sleepers handle; the big ‘un is BB’s. The original handles are long gone, so we only need one of the small holes per door for the more basic replacements we’ll fit.
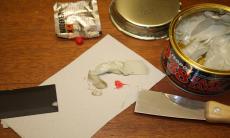
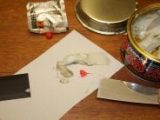
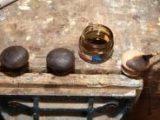
[tl:gallery index=7 size=230×138]The surplus smaller hole can be filled using wood filler or car body filler (pictured), which I favour. Top tip: to avoid waste, make up only small amounts, because it is only workable for 5-7 minutes.
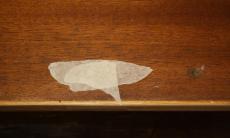
[tl:gallery index=8 size=230×138]Apply some masking tape on the reverse side of the small hole to be filled.
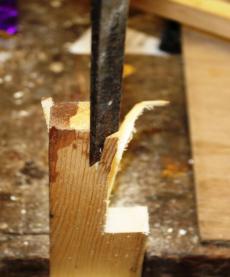
[tl:gallery index=9 size=230×277]To fill the large hole, we need to make a plug. Use softwood thicker than the hole. I cut some timber to roughly the right size, but left the thicker section for the vice to grip.
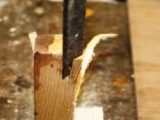
[tl:gallery index=10 size=230×277]Use a chisel to round off the corners – already it’s becoming more circular.
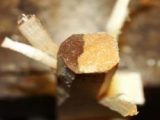
[tl:gallery index=11 size=230×277]Smooth off all flats, and add a slight taper using sandpaper or a rasp (as shown). Keep offering the plug to the hole to ensure a snug fit.
[tl:gallery index=12 size=230×277]Finally, cut it to length so that it’s slightly proud on both sides. Apply PVA wood glue and tap into place. Sand flush when dry.
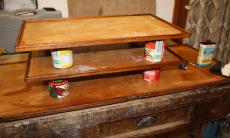
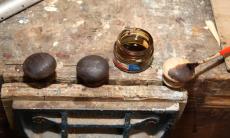
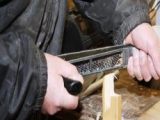
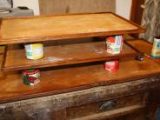
[tl:gallery index=13 size=230×138]Next, apply wood stain to the hardwood edges. Wear throw-away vinyl gloves to protect your hands and use a small brush in awkward areas. Allow to dry, then finish with varnish. The knobs (inset) responded well to the treatment. Top tip: if you [tl:gallery index=14 size=230×138]haven’t got a lot of room, use tins to create a tiered workstation. It allows access to the edges and lets air circulate for drying.
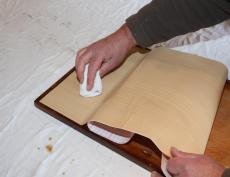
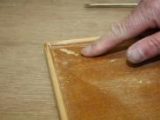
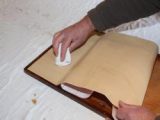
[tl:gallery index=15 size=230×177]Add the vinyl trim. If your’e sure the door is perfectly square and regular (not all of ours were), mark the trimming lines on the fabric’s reverse with a soft, blunt pencil (a point may tear the fabric). Use sharp scissors and smoothly cut to size. Remove the backing gradually and apply. Note: if you want to be cautious about getting it right, it’s much better to add 10-15mm to the length and width required, then apply the oversized fabric and trim off any excess using a sharp blade.
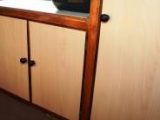
[tl:gallery index=16 size=230×138]The result is fresh facings for Peanuts’ cabinets, and all for a few quid and around 12 hours work.
Project Peanuts: the story so far
Gentleman Jack set out to show that you can live the dream for less than £2000 in our ‘Project Peanuts’ series. This 1977 Auto-Sleeper Leyland Sherpa cost just £825. Jack is managing it for single mum Kate and her son Kyle, who enjoy regular camping trips away in it. Each month, Jack carries out essential tasks, packed with DIY and ownership tips.
Starter-van to-do list
Shake down DONE
Urgent mechanical repairs DONE
Mechanical safety check, lubrication service DONE
Repair elevating roof DONE
Habitation safety check DONE
Service and refit gas and 12V equipment DONE
Fit new rear door cards DONE
Refinish cabinetwork DONE
Soft furnishings upgrade DONE
230V/12V power upgrade DONE
Roof-trim and floor repair
Bodywork makeover
Time spent
Previously 55 hours
This month 12 hours
TOTAL SO FAR 67 hours
Money spent
Fixed costs:
Motorhome purchase £825.00
One year’s road fund licence (tax disc) £205.00
Insurance £176.24
MoT Test £39.95
Repairs and uprgrades:
2 x wiper blades £5.98
Top-up fluids £10.00
Workshop manual £5.96
Overdrive actuating solenoid assembly £81.50
Roof seals £19.97
Hinges and screws £6.25
New ‘van battery £70.00
Brake adjustment £40.00
Gas and 12V consumables, including three-way manifold, new fuse box, etc £72.74
Wood, glue, screws and screw covers £15.00
Anti-freeze, new jubilee clips, second-hand 230V unit and fire blanket £40.97
Indicator/lights/horn stalk switch assembly £33.99
Beech-effect vinyl £20.98
TOTAL SO FAR £1669.53
Missed the earlier articles? Click on the links below to catch up:
- Part 1: buying a van – your options
- Part 2: more buying tips and insurance
- Part 3: safety check, towbar and rear step
- Part 4: essential roof repairs
- Part 5: making safe old DIY horrors
- Part 6: refitting the hob, fridge and some wiring
- Part 7: general improvements to the interior
- Part 8: making new door cards
- Part 9: ‘wiring’ for 230V and winter prep
- Part 10: repairing faulty indicators
Ask Jack …
If you have any queries relating to this series, feel fee to contact Gentleman Jack at [email protected].